McAfee MIS09EMB3RAA User Guide - Page 35
View scan results
 |
UPC - 731944575278
View all McAfee MIS09EMB3RAA manuals
Add to My Manuals
Save this manual to your list of manuals |
Page 35 highlights
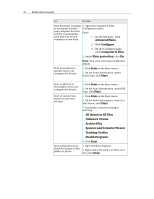
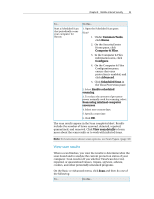
Chapter 8 McAfee Internet Security 33 To... Do this... Start a Scheduled Scan that periodically scans your computer for threats 1. Open the Scheduled Scan pane. How? 1. Under Common Tasks, click Home. 2. On the SecurityCenter Home pane, click Computer & Files. 3. In the Computer & Files information area, click Configure. 4. On the Computer & Files Configuration pane, ensure that virus protection is enabled, and click Advanced. 5. Click Scheduled Scan in the Virus Protection pane. 2. Select Enable scheduled scanning. 3. To reduce the amount of processor power normally used for scanning, select Scan using minimal computer resources. 4. Select one or more days. 5. Specify a start time. 6. Click OK. The scan results appear in the Scan completed alert. Results include the number of items scanned, detected, repaired, quarantined, and removed. Click View scan details to learn more about the scan results or to work with infected items. Note: To learn more about scan options, see Scan Types. (page 38) View scan results When a scan finishes, you view the results to determine what the scan found and to analyze the current protection status of your computer. Scan results tell you whether VirusScan detected, repaired, or quarantined viruses, trojans, spyware, adware, cookies, and other potentially unwanted programs. On the Basic or Advanced menu, click Scan and then do one of the following: To... Do this...
-
 1
1 -
2
-
3
-
4
-
5
-
6
-
7
-
8
-
9
-
10
-
11
-
12
-
13
-
14
-
15
-
16
-
17
-
18
-
19
-
20
-
21
-
22
-
23
-
24
-
25
-
26
-
27
-
28
-
29
-
 30
30 -
 31
31 -
 32
32 -
 33
33 -
 34
34 -
 35
35 -
 36
36 -
 37
37 -
 38
38 -
 39
39 -
 40
40 -
41
-
42
-
43
-
44
-
45
-
46
-
47
-
48
-
49
-
50
-
51
-
52
-
53
-
54
-
55
-
56
-
57
-
58
-
59
-
60
-
61
-
62
-
63
-
64
-
65
-
66
-
67
-
68
-
69
-
70
-
71
-
72
-
73
-
74
-
75
-
76
-
77
-
78
-
79
-
80
-
81
-
82
-
83
-
84
-
85
-
86
-
87
-
88
-
89
-
90
-
91
-
92
-
93
-
94
-
95
-
96
-
97
-
98
-
99
-
100
-
101
-
102
-
103
-
104
-
105
-
106
-
107
-
108
-
109
-
110
-
111
-
112
-
113
-
114
-
115
-
116
-
117
-
118
-
119
-
120
-
121
-
122
-
123
-
124
-
125
-
126
-
127
-
128
-
129
-
130
-
131
-
132
-
133
-
134
-
135
-
136
-
137
-
138
-
139
-
140
-
141
-
142
-
143
-
144
-
145
-
146
-
147
-
148
-
149
-
150
-
151
-
152
-
153
-
154
-
155
-
156
-
157
-
158
-
159
-
160
-
161
-
162
-
163
-
164
-
165
-
166
-
167
-
168
-
169
-
170
-
171
-
172
-
173
-
174
-
175
-
176
-
177
-
178
-
179
-
180
-
181
-
182
-
183
-
184
-
185
-
186
-
187
-
188
-
189
-
190
-
191
-
192
-
193
-
194
-
195
-
196
-
197
-
198
-
199
-
200
-
201
-
202
-
203
-
204
-
205
-
206
-
207
-
208
-
209
-
210
-
211
-
212
-
213
-
214
-
215
-
216
-
217
-
218
-
219
-
220
-
221
-
222
-
223
-
224
-
225
-
226
-
227
-
228
-
229
-
230
-
231
-
232
-
233
-
234
-
235
-
236
-
237
-
238
-
239
-
240
-
241
-
242
-
243
-
244
-
245
-
246
-
247
-
248
-
249
-
250
-
251
-
252
-
253
-
254
-
255
-
256
-
257
-
258
-
259
-
260
-
261
-
262
-
263
-
264
-
265
-
266
-
267
-
268
-
269
-
270
-
271
-
272
-
273
-
274
 |
 |