Samsung T27B750ND User Manual Ver.1.0 (English) - Page 22
English - 22, Wireless Network
 |
View all Samsung T27B750ND manuals
Add to My Manuals
Save this manual to your list of manuals |
Page 22 highlights
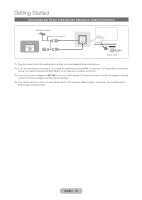
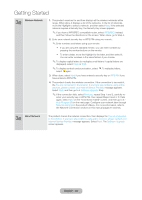
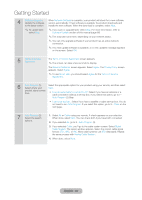
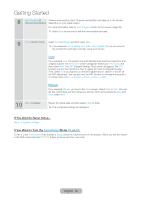
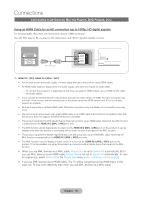
Getting Started 3 Wireless Network a 1. The product searches for and then displays all the wireless networks within range. When done, it displays a list of the networks. In the list of networks, move the Highlight to select a network, and then select Next. If the selected network requires a Security Key, the Security Key screen appears. ✎✎If you have a WPS(PBC) compatible router, select WPS(PBC) instead, and then follow the directions on the screen. When done, go to Step 4. 2. Enter your network security key or WPS PIN using your remote. ✎✎Enter numbers and letters using your remote. •• If you are using the standard remote, you can enter numbers by pressing the number buttons on the remote. •• To enter a letter, move the Highlight to the letter, and then select it. You can enter numbers in the same fashion if you choose. ✎✎To display capital letters (or redisplay small letters if capital letters are displayed), select Caps or Shift. ✎✎To display symbols and punctuation, select . To redisplay letters, select again. 3. When done, select Next if you have entered a security key or WPS PIN if you have entered a WPS PIN. 4. The product checks the wireless connection. If the connection is successful, the You are connected to the Internet. If you have any problems using online services, please contact your Internet Service Provider. message appears. Select Next, and then go to 4 Software Upgrade Step. ✎✎If the connection fails, select Previous, repeat Step 1 and 2, carefully re- enter your security key or WPS PIN, then repeat Steps 3 and 4. If it fails again, select Next on the "Connection Failed" screen, and then go to 6 Auto Program (1) on the next page. Configure your network later through Network Settings in the product's Menu. For more information, refer to the Network Connection sections in this manual (pages 61 and 62). 3 Wired Network b The product checks the network connection, then displays the You are connected to the Internet. If you have any problems using online services, please contact your Internet Service Provider. message appears. Select Next. The Software Upgrade screen appears. English - 22
-
 1
1 -
2
-
3
-
4
-
5
-
6
-
7
-
8
-
9
-
10
-
11
-
12
-
13
-
14
-
15
-
16
-
 17
17 -
 18
18 -
 19
19 -
 20
20 -
 21
21 -
 22
22 -
 23
23 -
 24
24 -
 25
25 -
 26
26 -
 27
27 -
28
-
29
-
30
-
31
-
32
-
33
-
34
-
35
-
36
-
37
-
38
-
39
-
40
-
41
-
42
-
43
-
44
-
45
-
46
-
47
-
48
-
49
-
50
-
51
-
52
-
53
-
54
-
55
-
56
-
57
-
58
-
59
-
60
-
61
-
62
-
63
-
64
-
65
-
66
-
67
-
68
-
69
-
70
-
71
-
72
-
73
-
74
-
75
-
76
-
77
-
78
-
79
-
80
-
81
-
82
-
83
-
84
-
85
-
86
-
87
-
88
-
89
-
90
-
91
-
92
-
93
-
94
-
95
-
96
-
97
-
98
-
99
-
100
-
101
-
102
-
103
-
104
-
105
-
106
-
107
-
108
-
109
-
110
-
111
-
112
-
113
-
114
-
115
-
116
-
117
-
118
-
119
-
120
-
121
-
122
-
123
-
124
-
125
-
126
-
127
-
128
-
129
-
130
-
131
-
132
-
133
-
134
-
135
-
136
-
137
-
138
-
139
-
140
-
141
-
142
-
143
-
144
-
145
-
146
-
147
-
148
-
149
-
150
-
151
-
152
-
153
-
154
-
155
-
156
 |
 |
