Samsung T27B750ND User Manual Ver.1.0 (English) - Page 92
Creating an Account, Smart Hub, Login, Create Account, Samsung Account, Password, Confirm password
 |
View all Samsung T27B750ND manuals
Add to My Manuals
Save this manual to your list of manuals |
Page 92 highlights
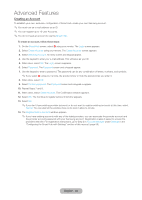
Advanced Features Creating an Account To establish your own, exclusive, configuration of Smart Hub, create your own Samsung account. ✎✎You must use an e-mail address as an ID. ✎✎You can register up to 10 User Accounts. ✎✎You do not need an account to use the Smart Hub. To create an account, follow these steps: 1. On the Smart Hub screen, select a using your remote. The Login screen appears. 2. Select Create Account using your remote. The Create Account screen appears. 3. Select Samsung Account. An entry screen and keypad appear. 4. Use the keypad to enter your e-mail address. This will serve as your ID. 5. When done, select OK. The Login screen reappears. 6. Select Password. The Password screen and a keypad appear. 7. Use the keypad to enter a password. The password can be any combination of letters, numbers, and symbols. ✎✎If you select a using your remote, the product show or hide the password as you enter it. 8. When done, select OK. 9. Select Confirm password. The Password screen and a keypad re-appear. 10. Repeat Steps 7 and 8. 11. When done, select Create Account. The Confirmation window appears. 12. Select OK. The Continue to register service ID window appears. 13. Select OK. ✎✎If you don't have existing provider accounts or do not want to register existing accounts at this time, select Cancel. You can also let the window close on its own in about a minute. 14. The Register Service Account window appears. ✎✎If you have existing accounts with any of the listed providers, you can associate the provider account and the provider account password with your Samsung account. Registration makes it easier to access the providers web site. For registration instructions, go to Step 2 in Account Manager under Settings in the "Configuring the Smart Hub with Settings" section of this manual. (page 96) English - 92
-
 1
1 -
2
-
3
-
4
-
5
-
6
-
7
-
8
-
9
-
10
-
11
-
12
-
13
-
14
-
15
-
16
-
17
-
18
-
19
-
20
-
21
-
22
-
23
-
24
-
25
-
26
-
27
-
28
-
29
-
30
-
31
-
32
-
33
-
34
-
35
-
36
-
37
-
38
-
39
-
40
-
41
-
42
-
43
-
44
-
45
-
46
-
47
-
48
-
49
-
50
-
51
-
52
-
53
-
54
-
55
-
56
-
57
-
58
-
59
-
60
-
61
-
62
-
63
-
64
-
65
-
66
-
67
-
68
-
69
-
70
-
71
-
72
-
73
-
74
-
75
-
76
-
77
-
78
-
79
-
80
-
81
-
82
-
83
-
84
-
85
-
86
-
 87
87 -
 88
88 -
 89
89 -
 90
90 -
 91
91 -
 92
92 -
 93
93 -
 94
94 -
 95
95 -
 96
96 -
 97
97 -
98
-
99
-
100
-
101
-
102
-
103
-
104
-
105
-
106
-
107
-
108
-
109
-
110
-
111
-
112
-
113
-
114
-
115
-
116
-
117
-
118
-
119
-
120
-
121
-
122
-
123
-
124
-
125
-
126
-
127
-
128
-
129
-
130
-
131
-
132
-
133
-
134
-
135
-
136
-
137
-
138
-
139
-
140
-
141
-
142
-
143
-
144
-
145
-
146
-
147
-
148
-
149
-
150
-
151
-
152
-
153
-
154
-
155
-
156
 |
 |
