Samsung T27B750ND User Manual Ver.1.0 (English) - Page 36
Calibrating the Screen Display, Auto Adjustment, PC Screen Adjustment
 |
View all Samsung T27B750ND manuals
Add to My Manuals
Save this manual to your list of manuals |
Page 36 highlights
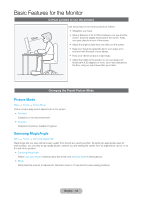
Basic Features for the Monitor Calibrating the Screen Display Auto Adjustment Menu → Picture → Auto Adjustment Automatically adjusts the picture's frequency, position, and fine tune settings in the PC mode. ✎✎Available only when you connect your PC to the product with a D-Sub cable. PC Screen Adjustment Menu → Picture → Screen Adjustment → PC Screen Adjustment ✎✎Available in PC mode only. •• Coarse / Fine: Removes or reduces picture noise. If the noise is not removed by Fine-tuning alone, use the Coarse function to adjust the frequency as best as possible (Coarse) and Fine-tune again. After the noise has been reduced, re-adjust the picture so that it is aligned with the center of screen. •• Position: Adjust the PC's screen position using your remote if it is not centered or does not fit the product screen. •• Image Reset: Resets the image to the default settings. Using Your Product as a Computer (PC) Display Entering the Video Settings (Based on Windows 7) For your product to work properly as a computer display, you must enter the correct video settings. ✎✎Depending on your version of Windows and your video card, the procedure on your PC will probably differ slightly from the procedure presented here. ✎✎However, the same basic information will apply in most cases. (If not, contact your computer manufacturer or Samsung Dealer.) 1. Click "Control Panel" on the Windows start menu. 2. Click "Appearance and Themes" in the "Control Panel" window. A display dialog box appears. 3. Click "Display". Another display dialog box appears. 4. Click the "Settings" tab on the display dialog box. -- On the Settings tab, set the correct resolution (screen size). The optimal resolution for this product is 1920 x 1080. -- If a vertical-frequency option exists on your display settings dialog box, select "60" or "60 Hz". Otherwise, just click "OK" and exit the dialog box. English - 36
-
 1
1 -
2
-
3
-
4
-
5
-
6
-
7
-
8
-
9
-
10
-
11
-
12
-
13
-
14
-
15
-
16
-
17
-
18
-
19
-
20
-
21
-
22
-
23
-
24
-
25
-
26
-
27
-
28
-
29
-
30
-
 31
31 -
 32
32 -
 33
33 -
 34
34 -
 35
35 -
 36
36 -
 37
37 -
 38
38 -
 39
39 -
 40
40 -
 41
41 -
42
-
43
-
44
-
45
-
46
-
47
-
48
-
49
-
50
-
51
-
52
-
53
-
54
-
55
-
56
-
57
-
58
-
59
-
60
-
61
-
62
-
63
-
64
-
65
-
66
-
67
-
68
-
69
-
70
-
71
-
72
-
73
-
74
-
75
-
76
-
77
-
78
-
79
-
80
-
81
-
82
-
83
-
84
-
85
-
86
-
87
-
88
-
89
-
90
-
91
-
92
-
93
-
94
-
95
-
96
-
97
-
98
-
99
-
100
-
101
-
102
-
103
-
104
-
105
-
106
-
107
-
108
-
109
-
110
-
111
-
112
-
113
-
114
-
115
-
116
-
117
-
118
-
119
-
120
-
121
-
122
-
123
-
124
-
125
-
126
-
127
-
128
-
129
-
130
-
131
-
132
-
133
-
134
-
135
-
136
-
137
-
138
-
139
-
140
-
141
-
142
-
143
-
144
-
145
-
146
-
147
-
148
-
149
-
150
-
151
-
152
-
153
-
154
-
155
-
156
 |
 |
