Yamaha AW4416 Reference Guide - Page 117
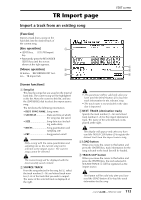
Additional functions in the CD, Import Importing CD-DA data into a, track
 |
View all Yamaha AW4416 manuals
Add to My Manuals
Save this manual to your list of manuals |
Page 117 highlights
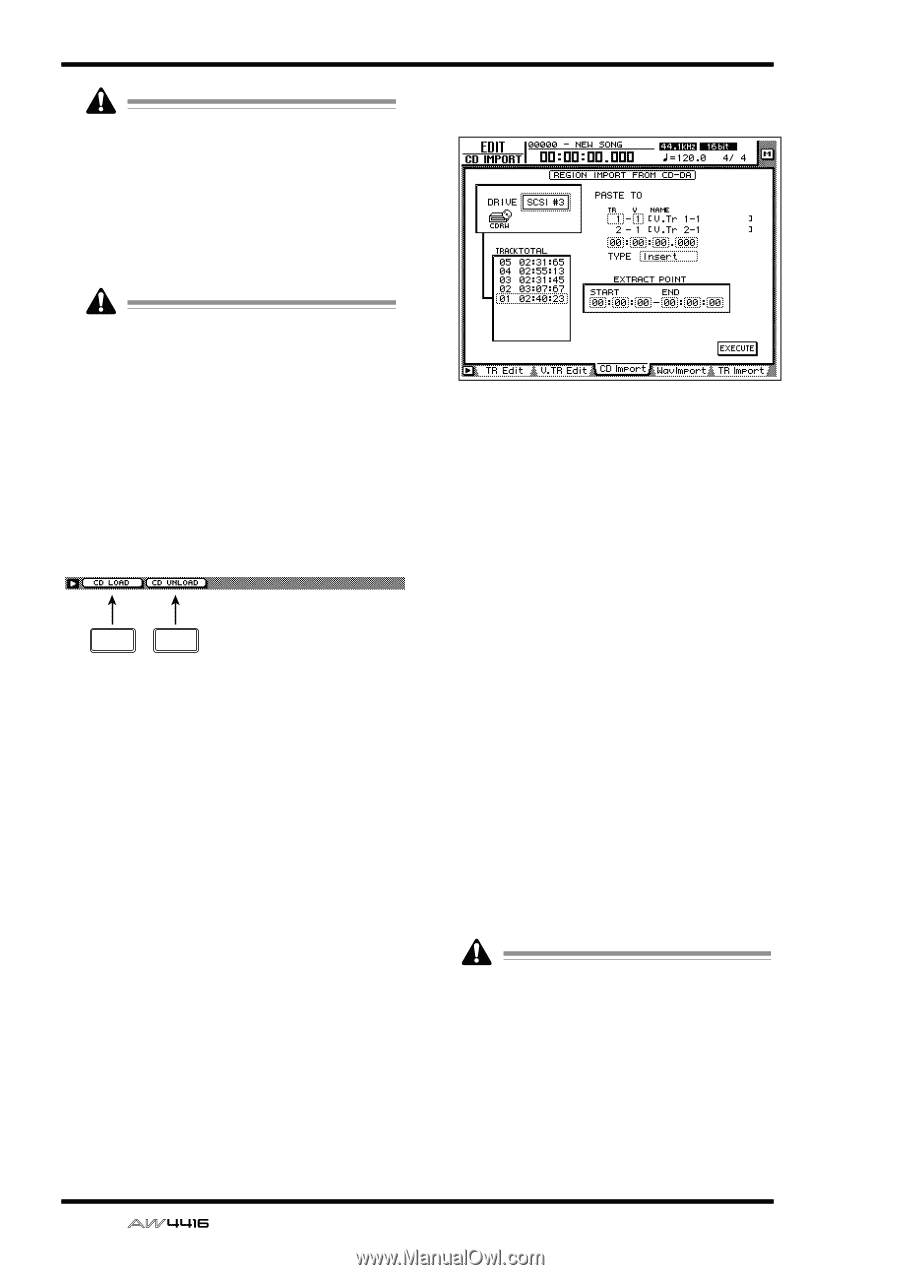
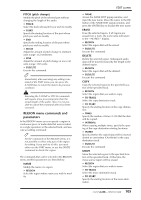
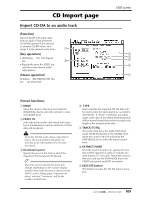
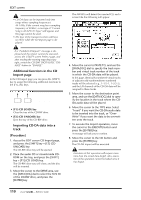
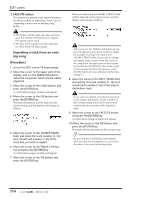
EDIT screen • CD-DA data can be imported only into songs whose sampling frequency is 44.1 kHz. If the current song has a sampling frequency of 48 kHz, a message of "Current Song is 48 (kHz) Fs Type" will appear, and this page cannot be used. • The keys of the transport section will have no effect while the CD Import page is displayed. If a "Prohibit CD Import!" message is displayed and the import cannot be executed, access the UTILITY screen Prefer.2 page, and after reading the warning regarding copyright, switch the CD/DAT DIGITAL REC "DISABLE" button to "ENABLE." s Additional functions in the CD Import page In the CD Import page you can press the [SHIFT] key to assign the following additional functions to the [F1]-[F2] keys. F1 F2 • [F1] (CD LOAD) key Close the tray of the CD-RW drive. • [F2] (CD UNLOAD) key Eject the tray of the CD-RW drive. q Importing CD-DA data into a track [Procedure] 1. Access the EDIT screen CD Import page, and press the [SHIFT] key + [F2] (CD UNLOAD) key. The CD-RW drive tray will be ejected. 2. Place the audio CD or mixed-mode CDROM on the tray, and press the [SHIFT] key + [F1] (CD LOAD) key. The CD-RW drive tray will close, and the disc will be inserted. 3. Move the cursor to the DRIVE area, use the [DATA/JOG] dial to select the SCSI ID of the CD-RW drive, and press the [ENTER] key. The AW4416 will detect the inserted CD, and a screen like the following will appear. 4. Move the cursor to PASTE TO, and use the [DATA/JOG] dial to specify the track number and virtual track number of the track in which the CD-DA data will be placed. In this page, identically-numbered virtual tracks of adjacent odd-numbered/even-numbered tracks will be selected (e.g., 1-1/2-1, 1-2/2-2), and the L/R channels of the CD-DA data will be assigned to these tracks. 5. Move the cursor to the destination point area, and use the [DATA/JOG] dial to specify the location in the track where the CDDA audio data will be placed. 6. Move the cursor to the TYPE area. Select "Insert" if you want the CD-DA audio data to be inserted into the track, or "OverWrite" if you want the data to be overwritten onto the track. 7. To execute the Import operation, move the cursor to the EXECUTE button and press the [ENTER] key. A message will ask you to confirm. 8. Move the cursor to the OK button and press the [ENTER] key. The CD-DA import will be executed. Execution of this operation will require more time than the actual data length. Also, execution of the operation cannot be halted once it has begun. 110 - Reference Guide
-
 1
1 -
2
-
3
-
4
-
5
-
6
-
7
-
8
-
9
-
10
-
11
-
12
-
13
-
14
-
15
-
16
-
17
-
18
-
19
-
20
-
21
-
22
-
23
-
24
-
25
-
26
-
27
-
28
-
29
-
30
-
31
-
32
-
33
-
34
-
35
-
36
-
37
-
38
-
39
-
40
-
41
-
42
-
43
-
44
-
45
-
46
-
47
-
48
-
49
-
50
-
51
-
52
-
53
-
54
-
55
-
56
-
57
-
58
-
59
-
60
-
61
-
62
-
63
-
64
-
65
-
66
-
67
-
68
-
69
-
70
-
71
-
72
-
73
-
74
-
75
-
76
-
77
-
78
-
79
-
80
-
81
-
82
-
83
-
84
-
85
-
86
-
87
-
88
-
89
-
90
-
91
-
92
-
93
-
94
-
95
-
96
-
97
-
98
-
99
-
100
-
101
-
102
-
103
-
104
-
105
-
106
-
107
-
108
-
109
-
110
-
111
-
 112
112 -
 113
113 -
 114
114 -
 115
115 -
 116
116 -
 117
117 -
 118
118 -
 119
119 -
 120
120 -
 121
121 -
 122
122 -
123
-
124
-
125
-
126
-
127
-
128
-
129
-
130
-
131
-
132
-
133
-
134
-
135
-
136
-
137
-
138
-
139
-
140
-
141
-
142
-
143
-
144
-
145
-
146
-
147
-
148
-
149
-
150
-
151
-
152
-
153
-
154
-
155
-
156
-
157
-
158
-
159
-
160
-
161
-
162
-
163
-
164
-
165
-
166
-
167
-
168
-
169
-
170
-
171
-
172
-
173
-
174
-
175
-
176
-
177
-
178
-
179
-
180
-
181
-
182
-
183
-
184
-
185
-
186
-
187
-
188
-
189
-
190
-
191
 |
 |