Yamaha AW4416 Reference Guide - Page 25
Patch Lib
 |
View all Yamaha AW4416 manuals
Add to My Manuals
Save this manual to your list of manuals |
Page 25 highlights
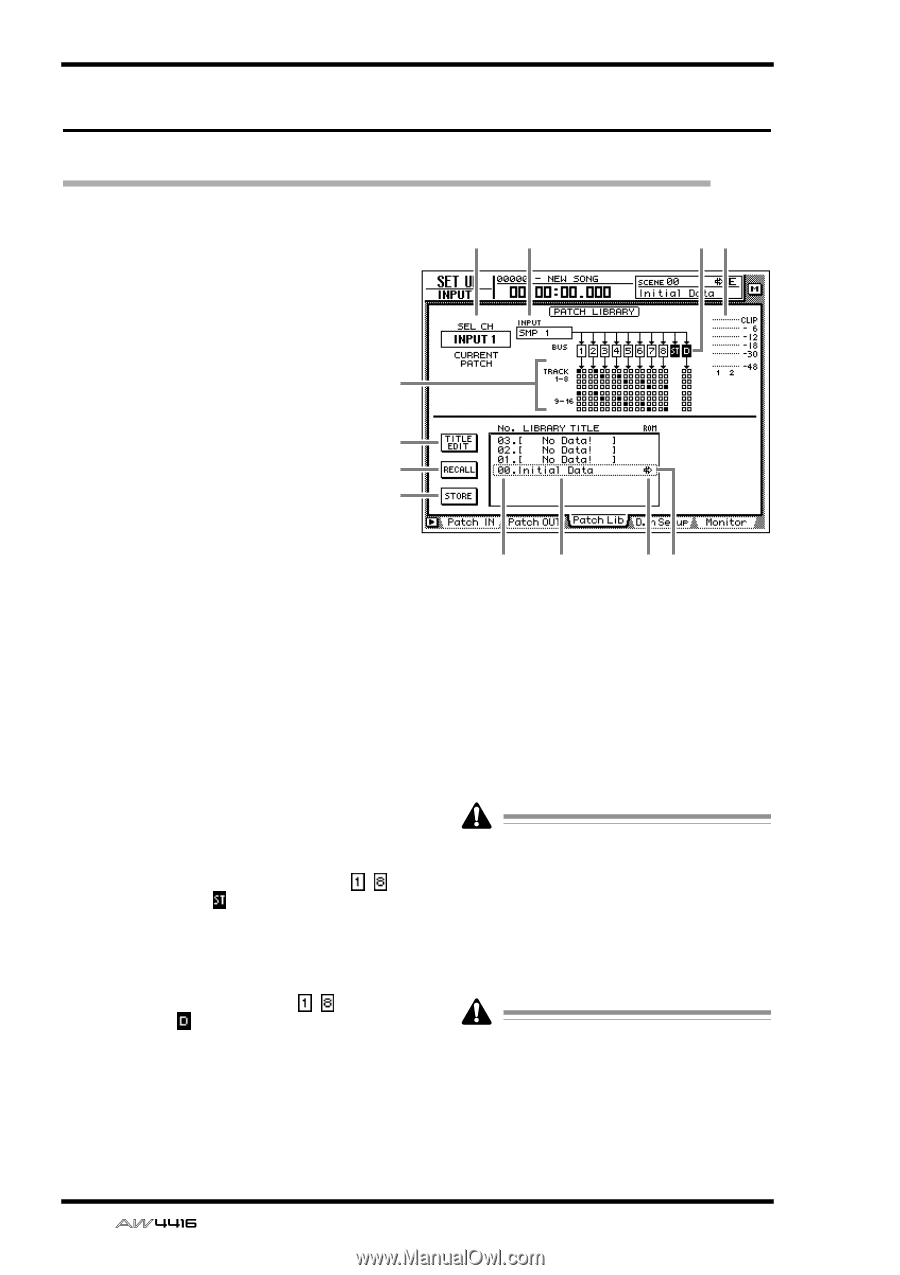
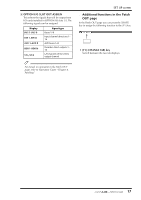
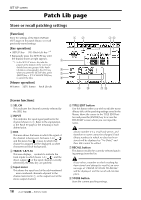
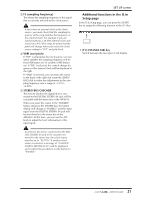
SET UP screen Patch Lib page Store or recall patching settings [Function] Store the settings of the Patch IN/Patch OUT pages in the patch library, or recall previously-stored settings. [Key operation] • [SETUP] key ¡ [F3] (Patch Lib) key (*1) • Repeatedly press the [SETUP] key until the display shown at right appears. 4 *1. In the SET UP screen, the tabs dis- played at the bottom of the screen are divided into two groups. If the Patch Lib tab is not assigned to the [F3] key 6 when you press the [SETUP] key, press 7 [SHIFT] key + [F1] (CHANGE TAB) key to switch the tabs. 8 [Mouse operation] M button ¡ SETU button ¡ Patch Lib tab 12 9J 35 KL [Screen functions] A SEL CH This indicates the channel currently selected by the [SEL] key. B INPUT This indicates the input signal patched to the channel shown in 1. Refer to the explanation of the Patch IN page for the meaning of each abbreviation. C BUS This area shows the buses to which the signal of the channel is being sent. For buses 1-8 ( - ) and the stereo bus ( ), buses to which that channel is assigned will be displayed as white characters on black background. D TRACK 1-8/9-16 This area displays s symbols to indicate the track inputs to which buses 1-8 ( - ) and the direct output ( ) of the input channel currently selected by the [SEL] key are patched. E Input meter This shows the input level of the odd-numbered ¡ even-numbered channels adjacent to the channel selected in 1, or the output level of the stereo output channel. F TITLE EDIT button Use this button when you wish to edit the name (library title) of the patching settings saved in the library. Move the cursor to the TITLE EDIT button and press the [ENTER] key to access the TITLE EDIT screen where you can input the name. Library number 0 is a recall-only preset, and therefore its name cannot be changed. Patch library numbers in which no data has been stored will be displayed as "No Data!," and their title cannot be edited. G RECALL button This button recalls the currently selected patching settings from the list. If you select a number in which nothing has been stored and attempt to recall it, an error message of "ERROR NO DATA TO RECALL" will be displayed, and the recall will not take place. H STORE button Store the current patching settings. 18 - Reference Guide
-
 1
1 -
2
-
3
-
4
-
5
-
6
-
7
-
8
-
9
-
10
-
11
-
12
-
13
-
14
-
15
-
16
-
17
-
18
-
19
-
 20
20 -
 21
21 -
 22
22 -
 23
23 -
 24
24 -
 25
25 -
 26
26 -
 27
27 -
 28
28 -
 29
29 -
 30
30 -
31
-
32
-
33
-
34
-
35
-
36
-
37
-
38
-
39
-
40
-
41
-
42
-
43
-
44
-
45
-
46
-
47
-
48
-
49
-
50
-
51
-
52
-
53
-
54
-
55
-
56
-
57
-
58
-
59
-
60
-
61
-
62
-
63
-
64
-
65
-
66
-
67
-
68
-
69
-
70
-
71
-
72
-
73
-
74
-
75
-
76
-
77
-
78
-
79
-
80
-
81
-
82
-
83
-
84
-
85
-
86
-
87
-
88
-
89
-
90
-
91
-
92
-
93
-
94
-
95
-
96
-
97
-
98
-
99
-
100
-
101
-
102
-
103
-
104
-
105
-
106
-
107
-
108
-
109
-
110
-
111
-
112
-
113
-
114
-
115
-
116
-
117
-
118
-
119
-
120
-
121
-
122
-
123
-
124
-
125
-
126
-
127
-
128
-
129
-
130
-
131
-
132
-
133
-
134
-
135
-
136
-
137
-
138
-
139
-
140
-
141
-
142
-
143
-
144
-
145
-
146
-
147
-
148
-
149
-
150
-
151
-
152
-
153
-
154
-
155
-
156
-
157
-
158
-
159
-
160
-
161
-
162
-
163
-
164
-
165
-
166
-
167
-
168
-
169
-
170
-
171
-
172
-
173
-
174
-
175
-
176
-
177
-
178
-
179
-
180
-
181
-
182
-
183
-
184
-
185
-
186
-
187
-
188
-
189
-
190
-
191
 |
 |