Yamaha AW4416 Reference Guide - Page 53
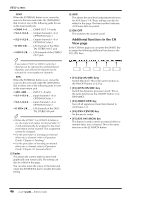
Additional functions in the CH, View F1] EQ ON/OFF keys, F3] ROUT OFF key, F4] PAN CENTER key
 |
View all Yamaha AW4416 manuals
Add to My Manuals
Save this manual to your list of manuals |
Page 53 highlights
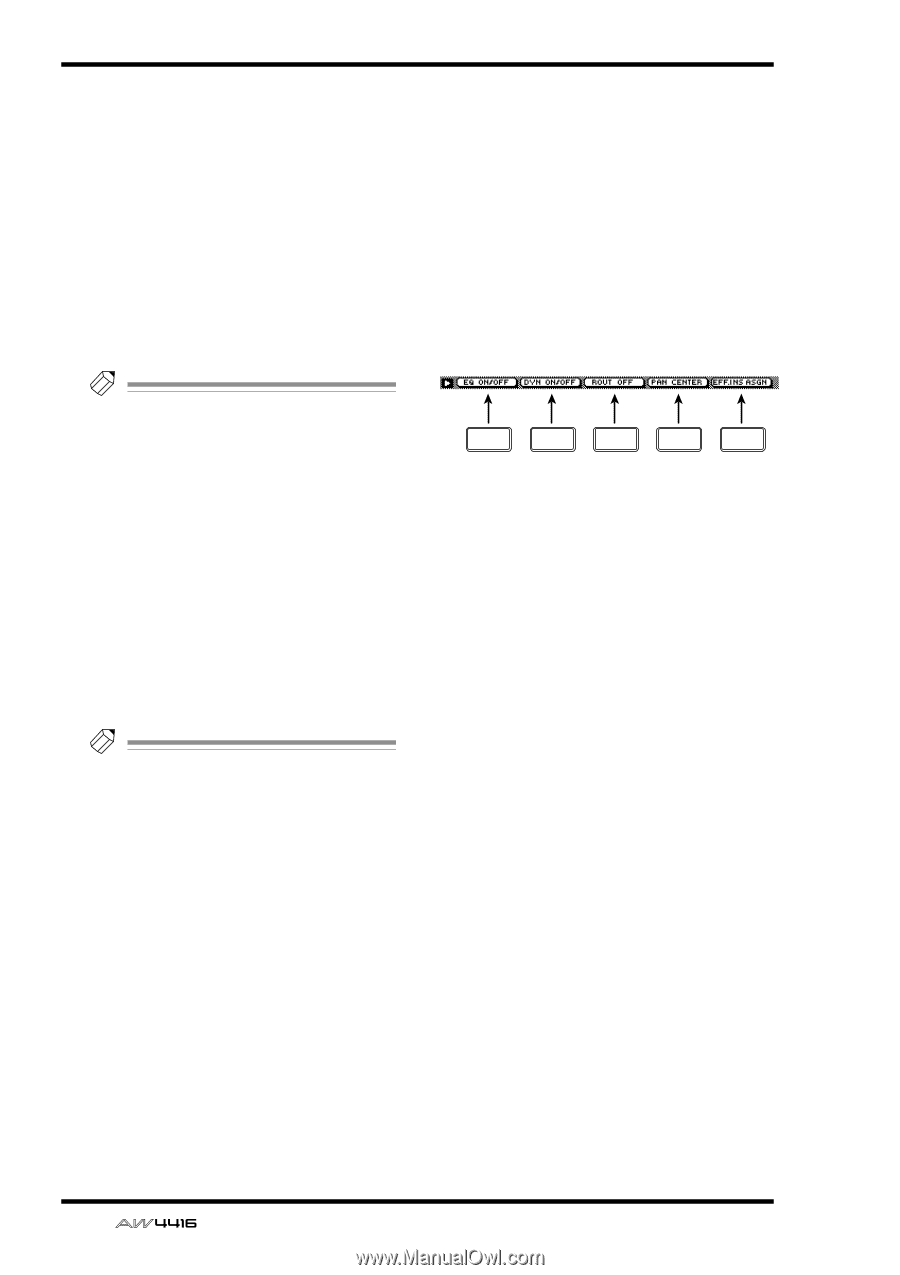
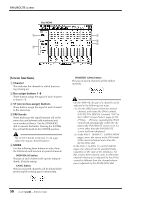
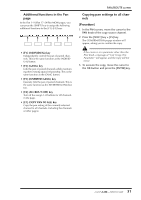
VIEW screen q SEND When the EXTERNAL button is on, move the cursor to this area and rotate the [DATA/JOG] dial to select one of the following jacks for use as the insert send jack. • OMNI 1-4 ..........OMNI OUT 1-4 jacks • SL1-1-SL1-8........Output channels 1-8 of OPTION I/O slot 1 • SL2-1-SL2-8........Output channels 1-8 of OPTION I/O slot 2 • D STO L/R ..........L/R channels of the DIGITAL STEREO OUT jack • STOUT L/R .........L/R channels of the STEREO OUT jack Tip! If you select D STO or STOUT, only the L channel can be selected for odd-numbered channels, and only the R channel can be selected for even-numbered channels. q RTN. When the EXTERNAL button is on, move the cursor to this area and rotate the [DATA/JOG] dial to select one of the following jacks for use as the insert return jack. • AD1-AD8 ...........INPUT 1-8 jacks • SL1-1-SL1-8........Input channels 1-8 of OPTION I/O slot 1 • SL2-1-SL2-8........Input channels 1-8 of OPTION I/O slot 2 • D STIN L/R .........L/R channels of the DIGITAL STEREO IN jack Tip! • When the INT.EFF 1 or INT.EFF 2 button is on, the input and output of internal effect 1/ 2 will automatically be assigned to the insert send/return of that channel. This assignment cannot be changed. • For the procedure of inserting an external effect into a channel, refer to Operation Guide "Chapter 8. Patching." • For the procedure of inserting an internal effect into a channel, refer to Operation Guide "Chapter 10. Internal effects." M Fader This shows the current fader location both graphically and numerically. The setting can also be edited in this page. You can also move the cursor to the fader and rotate the [DATA/JOG] dial to modify the fader setting. N AUX This shows the send level and pre/post selection for AUX buses 1-8. These settings can also be edited in this page. The heart symbol indicates AUX buses that are paired. O ON/OFF This switches the channel on/off. s Additional functions in the CH View page In the CH View page you can press the [SHIFT] key to assign the following additional functions to the [F1]-[F5] keys. F1 F2 F3 F4 F5 • [F1] (EQ ON/OFF) keys Switch EQ on/off. This is the same function as the ON/OFF button of 3 EQ. • [F2] (DYN ON/OFF) key Switch the dynamics processor on/off. This is the same function as the ON/OFF button of 4 DYNAMICS. • [F3] (ROUT OFF) key Turn off all signals sent from that channel to AUX buses 1-8. • [F4] (PAN CENTER) key Set the pan to center. • [F5] (EFF. INS ASGN) key This button is used to insert an external effect or internal effect into a channel. This is the same function as the L ASSIGN button. 46 - Reference Guide
-
 1
1 -
2
-
3
-
4
-
5
-
6
-
7
-
8
-
9
-
10
-
11
-
12
-
13
-
14
-
15
-
16
-
17
-
18
-
19
-
20
-
21
-
22
-
23
-
24
-
25
-
26
-
27
-
28
-
29
-
30
-
31
-
32
-
33
-
34
-
35
-
36
-
37
-
38
-
39
-
40
-
41
-
42
-
43
-
44
-
45
-
46
-
47
-
 48
48 -
 49
49 -
 50
50 -
 51
51 -
 52
52 -
 53
53 -
 54
54 -
 55
55 -
 56
56 -
 57
57 -
 58
58 -
59
-
60
-
61
-
62
-
63
-
64
-
65
-
66
-
67
-
68
-
69
-
70
-
71
-
72
-
73
-
74
-
75
-
76
-
77
-
78
-
79
-
80
-
81
-
82
-
83
-
84
-
85
-
86
-
87
-
88
-
89
-
90
-
91
-
92
-
93
-
94
-
95
-
96
-
97
-
98
-
99
-
100
-
101
-
102
-
103
-
104
-
105
-
106
-
107
-
108
-
109
-
110
-
111
-
112
-
113
-
114
-
115
-
116
-
117
-
118
-
119
-
120
-
121
-
122
-
123
-
124
-
125
-
126
-
127
-
128
-
129
-
130
-
131
-
132
-
133
-
134
-
135
-
136
-
137
-
138
-
139
-
140
-
141
-
142
-
143
-
144
-
145
-
146
-
147
-
148
-
149
-
150
-
151
-
152
-
153
-
154
-
155
-
156
-
157
-
158
-
159
-
160
-
161
-
162
-
163
-
164
-
165
-
166
-
167
-
168
-
169
-
170
-
171
-
172
-
173
-
174
-
175
-
176
-
177
-
178
-
179
-
180
-
181
-
182
-
183
-
184
-
185
-
186
-
187
-
188
-
189
-
190
-
191
 |
 |