Yamaha AW4416 Reference Guide - Page 92
Additional functions in the Wav, Import Assigning a WAV, le to a sam, pling pad
 |
View all Yamaha AW4416 manuals
Add to My Manuals
Save this manual to your list of manuals |
Page 92 highlights
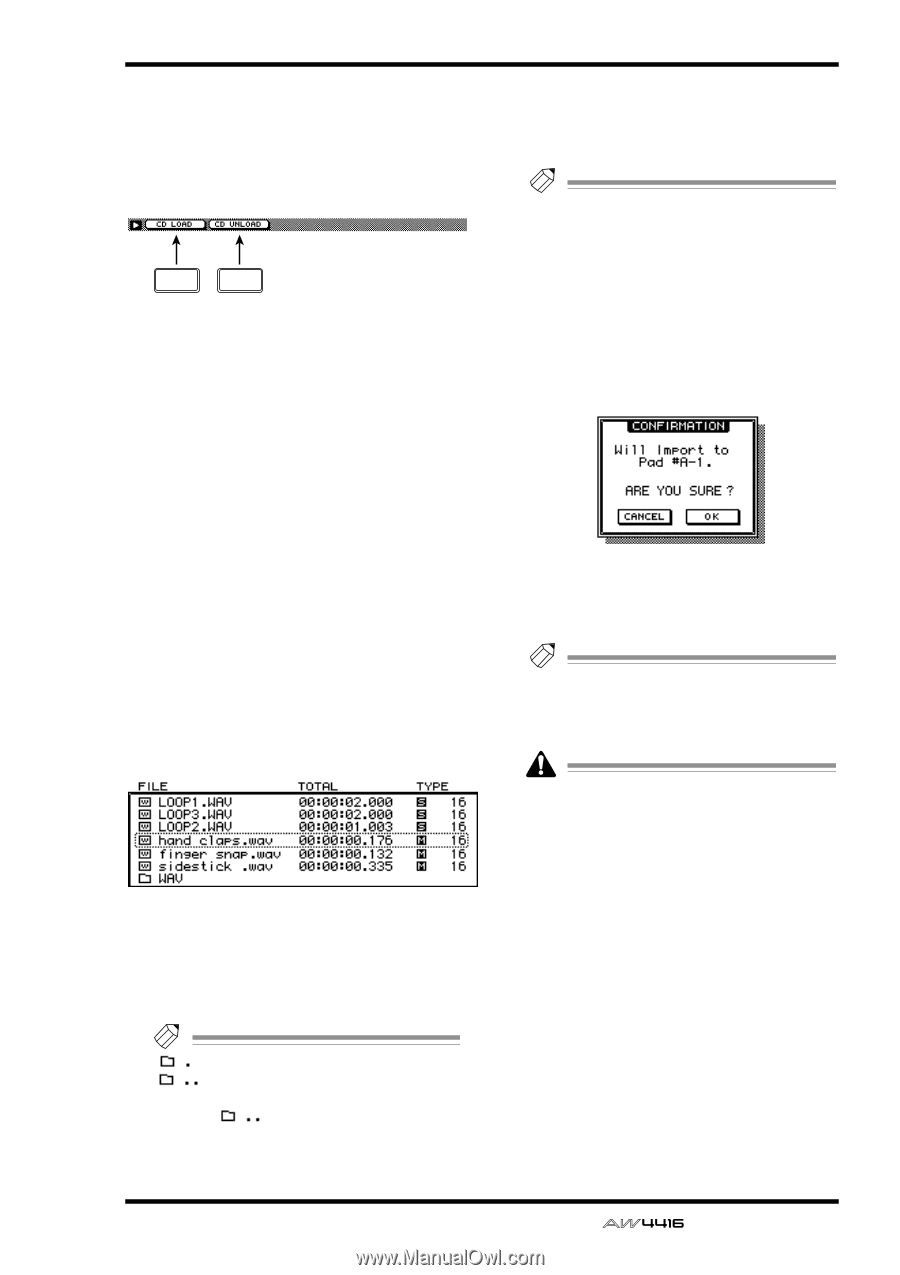
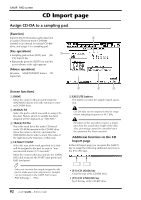
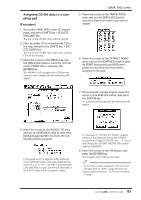
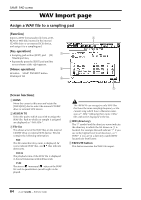
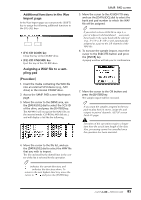
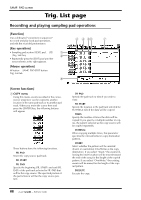
s Additional functions in the Wav Import page In the Wav Import page you can press the [SHIFT] key to assign the following additional functions to the [F1]-[F2] keys. F1 F2 • [F1] (CD LOAD) key Close the tray of the CD-RW drive. • [F2] (CD UNLOAD) key Eject the tray of the CD-RW drive. q Assigning a WAV file to a sampling pad [Procedure] 1. Insert the media containing the WAV file into an external SCSI device (e.g., MO drive) or the internal CD-RW drive. 2. Access the SAMP. PAD screen WavImport page. 3. Move the cursor to the DRIVE area, use the [DATA/JOG] dial to select the SCSI ID of the drive, and press the [ENTER] key. The AW4416 will recognize the WAV files on the inserted media (CD-ROM, MO disk etc.), and will display a list like the following. SAMP. PAD screen 5. Move the cursor to the ASSIGN TO area, and use the [DATA/JOG] dial to select the bank and pad number to which the WAV file will be assigned. Tip! If you select a stereo WAV file in step 4, a pair of adjacent odd-numbered ¡ even-numbered pads in the same bank will be selected (e.g., A-1/A-2, B-1/B-2) and automatically assigned as a pair to the L/R channels of the WAV file. 6. To execute the sample import, move the cursor to the EXECUTE button and press the [ENTER] key. A popup window will ask you for confirmation. 7. Move the cursor to the OK button and press the [ENTER] key. The sample import will be executed. Tip! If you want the samples assigned to the two pads to play back in stereo, assign the pad outputs to paired channels. (SETUP screen Patch IN page) Execution of this operation requires a longer time than the actual time length of the data. Also, processing cannot be cancelled once the operation has been executed. 4. Move the cursor to the file list, and use the [DATA/JOG] dial to select the WAV file that you wish to import. The file enclosed by the dotted lines in the center of the list is selected for the operation. Tip! indicates the current directory, and indicates the directory above. To return to the next highest directory, move the cursor to and press the [ENTER] key. 85 - Reference Guide
-
 1
1 -
2
-
3
-
4
-
5
-
6
-
7
-
8
-
9
-
10
-
11
-
12
-
13
-
14
-
15
-
16
-
17
-
18
-
19
-
20
-
21
-
22
-
23
-
24
-
25
-
26
-
27
-
28
-
29
-
30
-
31
-
32
-
33
-
34
-
35
-
36
-
37
-
38
-
39
-
40
-
41
-
42
-
43
-
44
-
45
-
46
-
47
-
48
-
49
-
50
-
51
-
52
-
53
-
54
-
55
-
56
-
57
-
58
-
59
-
60
-
61
-
62
-
63
-
64
-
65
-
66
-
67
-
68
-
69
-
70
-
71
-
72
-
73
-
74
-
75
-
76
-
77
-
78
-
79
-
80
-
81
-
82
-
83
-
84
-
85
-
86
-
 87
87 -
 88
88 -
 89
89 -
 90
90 -
 91
91 -
 92
92 -
 93
93 -
 94
94 -
 95
95 -
 96
96 -
 97
97 -
98
-
99
-
100
-
101
-
102
-
103
-
104
-
105
-
106
-
107
-
108
-
109
-
110
-
111
-
112
-
113
-
114
-
115
-
116
-
117
-
118
-
119
-
120
-
121
-
122
-
123
-
124
-
125
-
126
-
127
-
128
-
129
-
130
-
131
-
132
-
133
-
134
-
135
-
136
-
137
-
138
-
139
-
140
-
141
-
142
-
143
-
144
-
145
-
146
-
147
-
148
-
149
-
150
-
151
-
152
-
153
-
154
-
155
-
156
-
157
-
158
-
159
-
160
-
161
-
162
-
163
-
164
-
165
-
166
-
167
-
168
-
169
-
170
-
171
-
172
-
173
-
174
-
175
-
176
-
177
-
178
-
179
-
180
-
181
-
182
-
183
-
184
-
185
-
186
-
187
-
188
-
189
-
190
-
191
 |
 |