Dell Latitude CPi User Guide - Page 105
Installing the Power Management Utility, Installing the PC Card Utility
 |
View all Dell Latitude CPi manuals
Add to My Manuals
Save this manual to your list of manuals |
Page 105 highlights
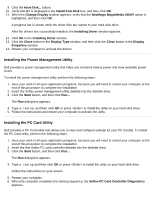
9. Click the Have Disk... button. 10. Verify that A:\ is displayed in the Install from Disk box, and then click OK. 11. When the Change Display window appears, verify that the NeoMagic MagicMedia 256AV option is highlighted, and then click OK. A progress bar is shown while the driver files are copied to your hard-disk drive. After the drivers are successfully installed, the Installing Driver window appears. 12. Click OK in the Installing Driver window. 13. Click the Close button in the Display Type window, and then click the Close button in the Display Properties window. 14. Restart your computer to activate the drivers. Installing the Power Management Utility Dell provides a power management utility that helps you conserve battery power and view available power levels. To install the power management utility, perform the following steps: 1. Save your work in all open application programs, because you will need to restart your computer at the end of this procedure to complete the installation. 2. Insert the Softex power management utility diskette into the diskette drive. 3. Click the Start button, and then click Run... The Run dialog box appears. 4. Type a:\setup, and then click OK or press to install the utility on your hard-disk drive. 5. Follow the instructions and restart your computer to activate the utility. Installing the PC Card Utility Dell provides a PC Card utility that allows you to view and configure settings for your PC Card(s). To install the PC Card utility, perform the following steps: 1. Save your work in all open application programs, because you will need to restart your computer at the end of this procedure to complete the installation. 2. Insert the first Softex PC card controller diskette into the diskette drive. 3. Click the Start button, and then click Run... The Run dialog box appears. 4. Type a:\setup and then click OK or press to install the utility on your hard-disk drive. Follow the instructions on your screen 5. Restart your computer. 6. When the computer completes the starting sequence, the Softex PC Card Controller Diagnostics appears.
-
 1
1 -
2
-
3
-
4
-
5
-
6
-
7
-
8
-
9
-
10
-
11
-
12
-
13
-
14
-
15
-
16
-
17
-
18
-
19
-
20
-
21
-
22
-
23
-
24
-
25
-
26
-
27
-
28
-
29
-
30
-
31
-
32
-
33
-
34
-
35
-
36
-
37
-
38
-
39
-
40
-
41
-
42
-
43
-
44
-
45
-
46
-
47
-
48
-
49
-
50
-
51
-
52
-
53
-
54
-
55
-
56
-
57
-
58
-
59
-
60
-
61
-
62
-
63
-
64
-
65
-
66
-
67
-
68
-
69
-
70
-
71
-
72
-
73
-
74
-
75
-
76
-
77
-
78
-
79
-
80
-
81
-
82
-
83
-
84
-
85
-
86
-
87
-
88
-
89
-
90
-
91
-
92
-
93
-
94
-
95
-
96
-
97
-
98
-
99
-
 100
100 -
 101
101 -
 102
102 -
 103
103 -
 104
104 -
 105
105 -
 106
106 -
 107
107 -
 108
108 -
 109
109 -
 110
110 -
111
-
112
-
113
-
114
-
115
-
116
-
117
-
118
-
119
-
120
-
121
-
122
-
123
-
124
-
125
-
126
-
127
-
128
-
129
-
130
-
131
-
132
-
133
-
134
-
135
-
136
-
137
-
138
-
139
-
140
-
141
-
142
-
143
-
144
-
145
-
146
-
147
-
148
-
149
-
150
-
151
-
152
-
153
-
154
-
155
-
156
-
157
-
158
-
159
-
160
-
161
-
162
-
163
-
164
-
165
-
166
-
167
-
168
-
169
-
170
-
171
-
172
-
173
-
174
-
175
-
176
-
177
-
178
-
179
-
180
-
181
-
182
-
183
-
184
-
185
-
186
-
187
-
188
-
189
-
190
-
191
-
192
-
193
-
194
-
195
-
196
-
197
-
198
-
199
-
200
-
201
-
202
-
203
-
204
-
205
-
206
-
207
-
208
 |
 |