Dell Latitude CPi User Guide - Page 106
Installing Audio Drivers, NeoMagic MagicWare Audio Driver 256AV/3Dx Series Driver
 |
View all Dell Latitude CPi manuals
Add to My Manuals
Save this manual to your list of manuals |
Page 106 highlights
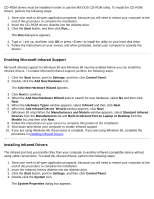
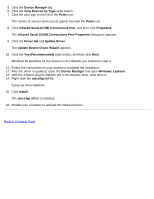
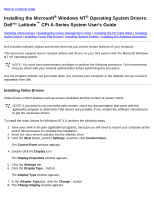
7. Follow the instructions on your screen, and when prompted, restart your computer to activate the utility. Installing Audio Drivers Dell provides audio drivers so you can customize the sound features of your computer. To install the audio drivers, perform the following steps: 1. Save your work in all open application programs, because you will need to restart your computer at the end of this procedure to complete the installation. 2. Insert the audio driver diskette into the diskette drive. 3. Click the Start button, point to Settings, and then click Control Panel. 4. Double-click the Multimedia icon. The Multimedia Properties dialog box appears. 5. Click the Devices tab. 6. Click Add... The Add dialog box appears, displaying a list of drivers. 7. Click the Unlisted or Updated Driver option, and then click OK. The Install Driver dialog box appears. 8. Verify that A:\ is highlighted, and then click OK. The Add Unlisted or Updated Driver window appears. 9. Verify that the NeoMagic MagicWare Audio Driver 256AV/3Dx Series Driver is highlighted, and then click OK. The Audio dialog box appears. 10. Click OK. 11. After installation is complete, restart your computer to activate the drivers. Installing Touch Pad Drivers Touch pad drivers and associated utilities allow you to use and customize the integrated touch pad or an external mouse. To install the touch pad drivers, perform the following steps: 1. Save your work in all open application programs, because you will need to restart your computer at the end of this procedure to complete the installation. 2. Insert the touch pad drivers diskette into the diskette drive. 3. Click the Start button, and then click Run... The Run dialog box appears. 4. Type a:\setup, and then click OK or press to install the utility on your hard-disk drive. 5. Follow the instructions on your screen, and when prompted, restart the computer to activate the
-
 1
1 -
2
-
3
-
4
-
5
-
6
-
7
-
8
-
9
-
10
-
11
-
12
-
13
-
14
-
15
-
16
-
17
-
18
-
19
-
20
-
21
-
22
-
23
-
24
-
25
-
26
-
27
-
28
-
29
-
30
-
31
-
32
-
33
-
34
-
35
-
36
-
37
-
38
-
39
-
40
-
41
-
42
-
43
-
44
-
45
-
46
-
47
-
48
-
49
-
50
-
51
-
52
-
53
-
54
-
55
-
56
-
57
-
58
-
59
-
60
-
61
-
62
-
63
-
64
-
65
-
66
-
67
-
68
-
69
-
70
-
71
-
72
-
73
-
74
-
75
-
76
-
77
-
78
-
79
-
80
-
81
-
82
-
83
-
84
-
85
-
86
-
87
-
88
-
89
-
90
-
91
-
92
-
93
-
94
-
95
-
96
-
97
-
98
-
99
-
100
-
 101
101 -
 102
102 -
 103
103 -
 104
104 -
 105
105 -
 106
106 -
 107
107 -
 108
108 -
 109
109 -
 110
110 -
 111
111 -
112
-
113
-
114
-
115
-
116
-
117
-
118
-
119
-
120
-
121
-
122
-
123
-
124
-
125
-
126
-
127
-
128
-
129
-
130
-
131
-
132
-
133
-
134
-
135
-
136
-
137
-
138
-
139
-
140
-
141
-
142
-
143
-
144
-
145
-
146
-
147
-
148
-
149
-
150
-
151
-
152
-
153
-
154
-
155
-
156
-
157
-
158
-
159
-
160
-
161
-
162
-
163
-
164
-
165
-
166
-
167
-
168
-
169
-
170
-
171
-
172
-
173
-
174
-
175
-
176
-
177
-
178
-
179
-
180
-
181
-
182
-
183
-
184
-
185
-
186
-
187
-
188
-
189
-
190
-
191
-
192
-
193
-
194
-
195
-
196
-
197
-
198
-
199
-
200
-
201
-
202
-
203
-
204
-
205
-
206
-
207
-
208
 |
 |