Dell Latitude CPi User Guide - Page 111
When to Use the Dell Diagnostics, Before You Start Testing, Starting the Dell Diagnostics
 |
View all Dell Latitude CPi manuals
Add to My Manuals
Save this manual to your list of manuals |
Page 111 highlights
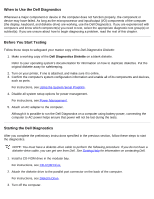
When to Use the Dell Diagnostics Whenever a major component or device in the computer does not function properly, the component or device may have failed. As long as the microprocessor and input/output (I/O) components of the computer (the display, keyboard, and diskette drive) are working, use the Dell Diagnostics. If you are experienced with computers and know which component(s) you need to test, select the appropriate diagnostic test group(s) or subtest(s). If you are unsure about how to begin diagnosing a problem, read the rest of this chapter. Before You Start Testing Follow these steps to safeguard your master copy of the Dell Diagnostics Diskette: 1. Make a working copy of the Dell Diagnostics Diskette on a blank diskette. Refer to your operating system's documentation for information on how to duplicate diskettes. Put the original diskette away for safekeeping. 2. Turn on your printer, if one is attached, and make sure it is online. 3. Confirm the computer's system configuration information and enable all of its components and devices, such as ports. For instructions, see Using the System Setup Program. 4. Disable all system setup options for power management. For instructions, see Power Management. 5. Attach an AC adapter to the computer. Although it is possible to run the Dell Diagnostics on a computer using battery power, connecting the computer to AC power helps ensure that power will not be lost during the tests. Starting the Dell Diagnostics After you complete the preliminary instructions specified in the previous section, follow these steps to start the diagnostics. NOTE: You must have a diskette-drive cable to perform the following procedure. If you do not have a diskette-drive cable, you can get one from Dell. See Getting Help for information on contacting Dell. 1. Install a CD-ROM drive in the modular bay. For instructions, see CD-ROM Drive. 2. Attach the diskette drive to the parallel port connector on the back of the computer. For instructions, see Diskette Drive. 3. Turn off the computer.
-
 1
1 -
2
-
3
-
4
-
5
-
6
-
7
-
8
-
9
-
10
-
11
-
12
-
13
-
14
-
15
-
16
-
17
-
18
-
19
-
20
-
21
-
22
-
23
-
24
-
25
-
26
-
27
-
28
-
29
-
30
-
31
-
32
-
33
-
34
-
35
-
36
-
37
-
38
-
39
-
40
-
41
-
42
-
43
-
44
-
45
-
46
-
47
-
48
-
49
-
50
-
51
-
52
-
53
-
54
-
55
-
56
-
57
-
58
-
59
-
60
-
61
-
62
-
63
-
64
-
65
-
66
-
67
-
68
-
69
-
70
-
71
-
72
-
73
-
74
-
75
-
76
-
77
-
78
-
79
-
80
-
81
-
82
-
83
-
84
-
85
-
86
-
87
-
88
-
89
-
90
-
91
-
92
-
93
-
94
-
95
-
96
-
97
-
98
-
99
-
100
-
101
-
102
-
103
-
104
-
105
-
 106
106 -
 107
107 -
 108
108 -
 109
109 -
 110
110 -
 111
111 -
 112
112 -
 113
113 -
 114
114 -
 115
115 -
 116
116 -
117
-
118
-
119
-
120
-
121
-
122
-
123
-
124
-
125
-
126
-
127
-
128
-
129
-
130
-
131
-
132
-
133
-
134
-
135
-
136
-
137
-
138
-
139
-
140
-
141
-
142
-
143
-
144
-
145
-
146
-
147
-
148
-
149
-
150
-
151
-
152
-
153
-
154
-
155
-
156
-
157
-
158
-
159
-
160
-
161
-
162
-
163
-
164
-
165
-
166
-
167
-
168
-
169
-
170
-
171
-
172
-
173
-
174
-
175
-
176
-
177
-
178
-
179
-
180
-
181
-
182
-
183
-
184
-
185
-
186
-
187
-
188
-
189
-
190
-
191
-
192
-
193
-
194
-
195
-
196
-
197
-
198
-
199
-
200
-
201
-
202
-
203
-
204
-
205
-
206
-
207
-
208
 |
 |