Samsung CLX-8380ND User Manual (user Manual) (ver.5.00) (English)
Samsung CLX-8380ND Manual
 |
View all Samsung CLX-8380ND manuals
Add to My Manuals
Save this manual to your list of manuals |
Samsung CLX-8380ND manual content summary:
- Samsung CLX-8380ND | User Manual (user Manual) (ver.5.00) (English) - Page 1
- Samsung CLX-8380ND | User Manual (user Manual) (ver.5.00) (English) - Page 2
of this user's guide. • CLX-8380ND is model name of Samsung Electronics Co., Ltd. • Samsung and Samsung logo are trademarks of Samsung Electronics Co., Ltd Inc. • UFST® and MicroType™ are registered trademarks of Monotype Imaging Inc. • TrueType, LaserWriter and Macintosh are trademarks of Apple - Samsung CLX-8380ND | User Manual (user Manual) (ver.5.00) (English) - Page 3
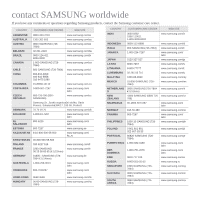
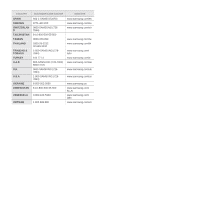
1300 362 603 www.samsung.com/au AUSTRIA 0800-SAMSUNG (7267864) www.samsung.com/at BELGIUM 02 201 2418 www.samsung.com/be BRAZIL 0800-124-421 4004-0000 www.samsung.com/br CANADA 1-800-SAMSUNG (7267864) www.samsung.com/ca CHILE 800-SAMSUNG (726-7864) www.samsung.com/cl CHINA 800 - Samsung CLX-8380ND | User Manual (user Manual) (ver.5.00) (English) - Page 4
1 800 588 889 WEB SITE www.samsung.com/es www.samsung.com/se www.samsung.com/ch www.samsung.com/tw www.samsung.com/th www.samsung.com/ latin www.samsung.com/tr www.samsung.com/ae www.samsung.com/uk www.samsung.com/us www.samsung.ua www.samsung.com/ kz_ru www.samsung.com/ latin www.samsung.com/vn - Samsung CLX-8380ND | User Manual (user Manual) (ver.5.00) (English) - Page 5
CONTENTS About this user's guide ...i Finding more information ...i Safety and Regulatory Information ...ii 1. Introduction Supplied software ...2.1 Printer driver features ...2.2 System requirements ...2.2 3. Getting Started Setting up the hardware ...3.1 Setting up the network ...3.1 Supported - Samsung CLX-8380ND | User Manual (user Manual) (ver.5.00) (English) - Page 6
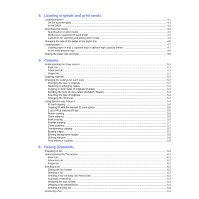
print media ...4.3 Media sizes supported in each mode ...4.4 Guidelines Faxing (Optional) Preparing to fax ...6.1 Understanding the Fax screen ...6.1 Basic tab ...6.1 Advanced tab ...6.2 Image tab ...6.2 Sending a fax ...6.2 Setting the fax header ...6.2 Sending a fax ...6.2 Sending a fax manually - Samsung CLX-8380ND | User Manual (user Manual) (ver.5.00) (English) - Page 7
by server 6.12 Forwarding a received fax to other destination by server 6.12 Setting up the end fax tone ...6.12 Setting up receiving faxes in color ...6.12 7. Scanning Understanding the Scan screen ...7.1 Basic tab ...7.1 Advanced tab ...7.2 Image tab ...7.2 Output tab ...7.2 User authentication - Samsung CLX-8380ND | User Manual (user Manual) (ver.5.00) (English) - Page 8
Scanning ...9.2 Scan to USB ...9.2 Basic tab ...9.2 Advanced tab ...9.2 Image tab ...9.3 Output tab ...9.3 Changing the scan feature settings ...9.3 Duplex ...9.3 Resolution ...9.3 Original Size ...9.3 Original Type ...9.4 Color ...10.2 Copy Setup ...10.4 Fax Setup ...10.4 Network Setup ...10.6 - Samsung CLX-8380ND | User Manual (user Manual) (ver.5.00) (English) - Page 9
...10.6 Optional Service ...10.7 Adjusting the color contrast ...10.8 Printing a report ...10.9 11. Maintenance Printing a machine report ...11.1 Monitoring the supplies life ...11.1 Finding the serial number ...11.1 Sending the imaging unit reorder notification ...11.1 Sending the toner reorder - Samsung CLX-8380ND | User Manual (user Manual) (ver.5.00) (English) - Page 10
the added memory in the PS printer properties 14.2 Replacing the Stapler ...14.2 Enabling Fax feature after installing the fax option kit 14.3 15. Specifications General specifications ...15.1 Printer specifications ...15.2 Copier specifications ...15.2 Scanner specifications ...15.3 Facsimile - Samsung CLX-8380ND | User Manual (user Manual) (ver.5.00) (English) - Page 11
that you follow the instructions in the guide to prepare the machine. Online User's Guide Printer Driver Help Provides you with step-by-step instructions for using your machine's full features, and contains information for maintaining your machine, troubleshooting, and installing accessories. This - Samsung CLX-8380ND | User Manual (user Manual) (ver.5.00) (English) - Page 12
Power cord supplied with your machine should be used for safe operation. If you are using a cord which is longer than 2 m with 110 V machine, then it should be 16 AWG* or bigger. 17 Use only No.26 AWG* or larger telephone line cord. 18 SAVE THESE INSTRUCTIONS. Laser Safety Statement The printer is - Samsung CLX-8380ND | User Manual (user Manual) (ver.5.00) (English) - Page 13
nearest Samsung dealer. Power Saver This printer contains the ENERGY STAR program see http://www.energystar.gov accordance with the instructions, may cause harmful try to correct the interference by one or more of the following measures: the Industry and Science Canada. Cet appareil numérique - Samsung CLX-8380ND | User Manual (user Manual) (ver.5.00) (English) - Page 14
Fax Branding The Telephone Consumer Protection Act of 1991 makes it unlawful for any person to use a computer or other electronic device to send any message via a telephone facsimile machine unless such message clearly contains in a margin at the top or bottom of each transmitted page or on the - Samsung CLX-8380ND | User Manual (user Manual) (ver.5.00) (English) - Page 15
FAX) This Samsung product has been self-certified by Samsung the event of problems, you should contact the Euro QA Lab of Samsung Electronics Co., Ltd PROCUREMENT OF SUBSTITUTE GOODS OR SERVICES; LOSS OF USE, DATA, at program startup or in documentation (online or textual) provided with the package. - Samsung CLX-8380ND | User Manual (user Manual) (ver.5.00) (English) - Page 16
LIABLE FOR ANY DIRECT, INDIRECT, INCIDENTAL, SPECIAL, EXEMPLARY, OR CONSEQUENTIAL DAMAGES (INCLUDING, BUT NOT LIMITED TO, PROCUREMENT OF SUBSTITUTE GOODS OR SERVICES; LOSS OF USE, DATA, OR PROFITS; OR BUSINESS INTERRUPTION) HOWEVER CAUSED AND ON ANY THEORY OF LIABILITY, WHETHER IN CONTRACT, STRICT - Samsung CLX-8380ND | User Manual (user Manual) (ver.5.00) (English) - Page 17
E-mail, SMB, FTP or Networks scanning. • Simply use the touch screen keyboard to enter email addresses and send the scanned image immediately. • Scan in color and use the precise compressions of JPEG, TIFF and PDF formats. Set a specific time to transmit a Fax (Optional) • You can specify a certain - Samsung CLX-8380ND | User Manual (user Manual) (ver.5.00) (English) - Page 18
supported by your machine. ( : Included, O: Optional*) Features SCX-8380ND USB 2.0 USB Memory PostScript Emulation DADF (Duplex Automatic Document Feeder) Hard Disk Fax option kit O Optional tray 2/3 O High Capacity Feeder O Stand O Stacker & Stapler (Finisher) O Staple Cartridge - Samsung CLX-8380ND | User Manual (user Manual) (ver.5.00) (English) - Page 19
Side cover 8 Front cover 9 Multi-purpose tray 10 Tray 1 11 Optional tray* 12 Stand* 13 CCD Lock 14 Output support 15 Multi-purpose tray extension 16 Multi-purpose tray paper width guides 17 Scanner glass 18 Transfer unit 19 Toner cartridge 20 Imaging unit 21 Waste toner container 1.3 - Samsung CLX-8380ND | User Manual (user Manual) (ver.5.00) (English) - Page 20
Rear view • The symbol * is a mark for the optional device. 1 Finisher (Stacker & Stapler)* 2 Finisher output tray (Stacker & Stapler)* 3 Finisher cover (Stacker & Stapler)* 4 USB memory port 5 Extension telephone socket (EXT)* 6 Telephone line socket (LINE)* 7 USB port 8 Network port 9 Dummy for - Samsung CLX-8380ND | User Manual (user Manual) (ver.5.00) (English) - Page 21
also turn the power on and off with this button. (Page 3.6) 5 Numeric keypad: Dials fax number, and enters the number 12 Stop: Stops an mode, redials the last number, or in edit mode, inserts a pause into a fax number. Caution When you use the touch screen, use your finger only. The screen - Samsung CLX-8380ND | User Manual (user Manual) (ver.5.00) (English) - Page 22
• Fax: Enters the Fax menu. (Optional) • Scan: Enters Scan to Email, NetScan, Scan to Server menu. • Stored Documents: Enters the Stored Documents menu. (Page 11 as Fax may be grayed out, depending on the optional kit or program installed in your machine. • To switch the display screen and see other - Samsung CLX-8380ND | User Manual (user Manual) (ver.5.00) (English) - Page 23
Order a new toner cartridge. You can temporarily improve print quality by redistributing the toner. (Page 11.4) Note Check the message on the display screen, and follow the instruction on the message or refer to Troubleshooting part. (Page 12.1) If the problem persists, call for service. Menu map - Samsung CLX-8380ND | User Manual (user Manual) (ver.5.00) (English) - Page 24
and type. Machine Status Supplies Life tab (Page 10.1) Toner Cartridge-C Toner Cartridge-M Toner Cartridge-Y Toner Cartridge-K Imaging Unit-C Imaging Unit-M Imaging Unit-Y Imaging Unit-K Fuser Kit Feed Roller Kit-Tray 1 Feed Roller Kit-Tray 2 Feed Roller Kit-Tray 3 Feed Roller Kit - Bypass Tray - Samsung CLX-8380ND | User Manual (user Manual) (ver.5.00) (English) - Page 25
full advantage of your printer's features. • PostScript Printer Description (PPD) file: Use the PostScript driver to print documents with complex fonts and graphics in the PS language. • Scanner driver: TWAIN and Windows Image Acquisition (WIA) drivers are available for scanning documents on your - Samsung CLX-8380ND | User Manual (user Manual) (ver.5.00) (English) - Page 26
supported by your printer drivers: Feature PCL 6 Windows PostScript Windows Macintosh Toner save O O X Print quality O O O option Poster printing O X X Multiple O pages per sheet (N-up) Fit to page the software. • Windows Terminal Service is compatible with this machine. - Samsung CLX-8380ND | User Manual (user Manual) (ver.5.00) (English) - Page 27
2.4GHz (IntelCore2) 512 MB (1024 MB) 1 GB (2GB) Note • It is necessary to claim swap partition of 300 MB or larger for working with large scanned images. • The Linux scanner driver supports the optical resolution at maximum. 2.3 - Samsung CLX-8380ND | User Manual (user Manual) (ver.5.00) (English) - Page 28
may be contaminated by toner, which can cause damage to the printer or bad printing scan lid and lock the scanner lock. 2 Unpack the machine and check all the enclosed items. 3 Remove the tape holding the machine tightly. 4 Install both the toner cartridges and imaging units. 5 Load paper. (See page - Samsung CLX-8380ND | User Manual (user Manual) (ver.5.00) (English) - Page 29
to email. - Customize server settings and set up address book for scanning to the FTP or SMB servers. - Customize printer, copy, and fax settings. • SetIP: Utility program allowing you to select a network interface and manually configure the IP addresses for use with the TCP/ IP protocol. See page - Samsung CLX-8380ND | User Manual (user Manual) (ver.5.00) (English) - Page 30
page and to register yourself as a user of Samsung printers in order to receive information from Samsung. If you so desire, select the corresponding checkbox(es) and click Finish. Note • If your printer does not work properly after the installation, try to reinstall the printer driver. See Software - Samsung CLX-8380ND | User Manual (user Manual) (ver.5.00) (English) - Page 31
Setup.exe to install this program. 6 Follow the instructions in the window and complete the installation. Starting the program 1 From the Windows Start menu, select Programs > Samsung Network Printer Utilities > SetIP. 2 Select the name of your printer and click . Note If you cannot find your - Samsung CLX-8380ND | User Manual (user Manual) (ver.5.00) (English) - Page 32
above sea level. The following information will guide you on how to set your machine to the time and date, they are used in Delay fax and Delay Print, also they are printed on reports. message appears, enter password with number keypad and press OK. (Page 3.5) 4 Press the General tab > Date & Time > - Samsung CLX-8380ND | User Manual (user Manual) (ver.5.00) (English) - Page 33
fuser unit. • Power Save: Turns off all the fans even for the fuser unit after certain time. 7 Press OK. Setting the default tray and paper You can select the tray and paper you would like to keep using for printing job. (Page set the default values for copy, fax, email, scan and paper all at once. 1 - Samsung CLX-8380ND | User Manual (user Manual) (ver.5.00) (English) - Page 34
driver from the provided software CD. 2 Double-click the Smart Panel icon on the Windows task bar (or Notification Area in Linux). You can also click Smart Panel on the status bar in Mac OS X. 3 Click Printer Setting. If your machine is connected to a network, SyncThru Web Service , Code Page 864, - Samsung CLX-8380ND | User Manual (user Manual) (ver.5.00) (English) - Page 35
on the scanner glass. To get the best scan quality, especially for colored or gray-scaled images, use the scanner glass. 1 Lift and open the scanner lid. 2 Place the original face down on the scanner glass and align it with the registration guide at the top left corner of the glass. 3 Close - Samsung CLX-8380ND | User Manual (user Manual) (ver.5.00) (English) - Page 36
to separate the pages before loading originals. and produce sharper, more vibrant images. • Surface smoothness: The smoothness guide. Caution Using print media that does not meet these specifications may cause problems, requiring repairs. Such repairs are not covered by Samsung's warranty or service - Samsung CLX-8380ND | User Manual (user Manual) (ver.5.00) (English) - Page 37
size (custom) 216 x 900 mm (8.5 x 35.43 inches) a. Maximum capacity may differ depending on media weight, thickness, and environmental conditions. b. High capacity feeder is not supported A6. 4.3 - Samsung CLX-8380ND | User Manual (user Manual) (ver.5.00) (English) - Page 38
24 lb bond) only b. Only the optional fax kit is installed. Guidelines for selecting and storing print one flap that folds over to seal must use adhesives compatible with the printer's fusing temperature for 0.1 second. Check your machine's specification to view the fusing temperature, see page - Samsung CLX-8380ND | User Manual (user Manual) (ver.5.00) (English) - Page 39
Caution • Recommended media: Transparency for a Color Laser Printers produced by HP, Xerox and 3M. see page 15.1. • Letterhead ink must be non-flammable and should not adversely affect printer cause problems, requiring repairs. Such repairs are not covered by Samsung's warranty or service agreements - Samsung CLX-8380ND | User Manual (user Manual) (ver.5.00) (English) - Page 40
stack of paper until it lightly touches the side of the stack. Do not press the guide too tightly to the edge of the paper; the guide may bend the paper. 1 1 paper length guide 2 2 paper width guide Note If you have installed an optional high capacity feeder, refer to Quick Install Sheet to - Samsung CLX-8380ND | User Manual (user Manual) (ver.5.00) (English) - Page 41
you do not adjust the paper width guides, it may cause paper jams. 3 After loading paper, set the paper type and size for the tray. See page 4.9 for copying and faxing or Software section for PCprinting. Note If you experience problems with paper feed, place one sheet at a time in the multi-purpose - Samsung CLX-8380ND | User Manual (user Manual) (ver.5.00) (English) - Page 42
It is useful for single page printing on letterhead or colored paper. Tips on using the multi-purpose tray • Load only one size of print media at only the specified print media to avoid paper jams and print quality problems. (Page 4.2) • Flatten any curl on postcards, envelopes, and labels before - Samsung CLX-8380ND | User Manual (user Manual) (ver.5.00) (English) - Page 43
or skew. 5 After loading paper, set the paper type and size for the multipurpose tray. See page 4.9 for copying and faxing or the Software section for PC-printing. Note The settings made from the printer driver override the settings on the control panel. 6 After printing, fold the multi-purpose tray - Samsung CLX-8380ND | User Manual (user Manual) (ver.5.00) (English) - Page 44
manually as appropriate to the original. • Light, Dark: Adjusts the brightness level to make a copy that is easier to read, when the original contains faint markings and dark images. (Page 5.4) • Paper Supply: Selects the paper supply tray. Advanced tab • ID Copy: Prints 2-sided originals on one - Samsung CLX-8380ND | User Manual (user Manual) (ver.5.00) (English) - Page 45
fax or else except the Job Status screen. The default copy setting can be changed in Admin Setting. (Page cancel and press Delete. • Custom: Selects the scanning area of the original. Press the cardinal point the size of originals, but this option supports only when originals are Legal, Letter, or - Samsung CLX-8380ND | User Manual (user Manual) (ver.5.00) (English) - Page 46
arrows to reduce or enlarge an image on the paper. Press more to see the values. • Original(100%): Prints texts or images the same size as originals. • scanning the second page of your original. Press more to see the detail values. • 1 -> 1 Sided: Scans one side of an original and prints on one - Samsung CLX-8380ND | User Manual (user Manual) (ver.5.00) (English) - Page 47
facing down and press Yes, then the machine starts scanning the second page of your original. Press more to see the values. • Collated: Prints output in sets tab or the Image tab of the Copy screen, you can select specific copy features. ID card copying The machine prints one side of the original - Samsung CLX-8380ND | User Manual (user Manual) (ver.5.00) (English) - Page 48
the Start button on the control panel. now follow the instruction on display to finish the ID copy for four images. 2-up or 4-up copying (N-up) The machine reduces the size of the original images and prints 2 or 4 pages onto one sheet of paper. 1 2-up copying 4-up copying 1 Load the originals - Samsung CLX-8380ND | User Manual (user Manual) (ver.5.00) (English) - Page 49
scanned and printed one by one in the following order: Clone copying The machine prints multiple original images on a single page. The number of images is automatically determined by the original image Sided - Reduce/Enlarge to Original(100%) - Paper Supply to Tray. 5 Press On to activate this - Samsung CLX-8380ND | User Manual (user Manual) (ver.5.00) (English) - Page 50
copying. Booklet copying The machine automatically prints on one or both sides of the paper, which are then folded to produce a booklet with all of the pages in the correct sequence. The machine will also reduce and correctly adjust the position of each image to fit on the selected paper. 1 Place - Samsung CLX-8380ND | User Manual (user Manual) (ver.5.00) (English) - Page 51
Erasing background images This feature is helpful when copying originals containing color in the background bottom as you want using arrows. This option supports both on the scanner glass or in DADF the DADF. (Page 4.1) 2 Press Copy from the Main screen. 3 Press the Image tab > Scan Enhance. 4 Press - Samsung CLX-8380ND | User Manual (user Manual) (ver.5.00) (English) - Page 52
is varies from one country to another. Note If you want to add fax feature to the machine, check the option lists (Page 13.1) and contact the purchasing point to order. When you purchase a fax kit, install the kit by following the steps described in the Fax Kit Setup Guide which is enclosed - Samsung CLX-8380ND | User Manual (user Manual) (ver.5.00) (English) - Page 53
on the same machine you are using, or the one on a remote machine. Each mailbox has a corresponding mailbox number, name and password. (Page 6.9) • Back: Returns to the Basic tab. Image tab Sending a fax This part explains how to send a fax, and the special methods of transmission. Note When you - Samsung CLX-8380ND | User Manual (user Manual) (ver.5.00) (English) - Page 54
button on the control panel to show ten recent fax numbers and select a fax number. 7 Press Start when you hear a high-pitched fax signal from the remote fax machine. Note Color faxes are only supported when faxes are sent manually. (Page 6.6) Automatic resending When the number you have dialed is - Samsung CLX-8380ND | User Manual (user Manual) (ver.5.00) (English) - Page 55
scanned original data into memory. Note To cancel delaying a fax, press Off before sending is activated. Sending a priority fax This function is used when a high priority fax Press Fax from the Main screen. 2 Place the originals face up in the DADF. 3 Adjust the document settings in the Image tab - Samsung CLX-8380ND | User Manual (user Manual) (ver.5.00) (English) - Page 56
While the machine is receiving a fax, you can not do the copy job. Receiving faxes manually using an extension telephone This feature and press OK. (Page 3.5) 3 Press the Setup tab > Fax Setup > Received Fax Printing > Duplex. 4 Select appropriate option. • Off: Prints only one side of the paper - Samsung CLX-8380ND | User Manual (user Manual) (ver.5.00) (English) - Page 57
scanned colored paper or newspaper originals. Press Fax > the Image Fax > the Image tab > Color Mode. Select option and OK. • Mono: Transmits a fax in black and white. • Color: Transmits a fax in color. Note Color Mode faxes are only supported when faxes are sent manually. (Page 6.3) Setting up a fax - Samsung CLX-8380ND | User Manual (user Manual) (ver.5.00) (English) - Page 58
ID, Fax No. and Included group information if it is grouped. (Page 6.7) • Apply: Inputs the selected fax number to the sending fax number list Setting up a fax phonebook using SyncThru Web Service You can store fax numbers conveniently from the networked computer using SyncThru Web Service. 1 Open - Samsung CLX-8380ND | User Manual (user Manual) (ver.5.00) (English) - Page 59
Using the polling option Polling is used when one fax machine requests another to send a document. Receiver dials the fax number and enters the Passcode when requested. (Page 6.8) 4 Receiver presses Start to receive the stored fax. Printing (Deleting) the polling document 1 Press Fax from the Main - Samsung CLX-8380ND | User Manual (user Manual) (ver.5.00) (English) - Page 60
Poll From Remote to poll a fax from the remote machine's Mailbox at receiver need to be retrieve a fax from you. This feature allows 3 Press the Setup tab > Fax Setup. 4 Press the down arrow to be notified when a fax is received into Mailbox. 13 Press in it. 1 Press Fax from the Main screen. - Samsung CLX-8380ND | User Manual (user Manual) (ver.5.00) (English) - Page 61
settings in the Image tab and the Basic tab. 4 Press the Advanced tab > Mailbox > Send to Remote. 5 Enter Remote Fax No, Mailbox No . When the login message pops up, enter password and press OK. (Page 3.5) 3 Press the Setup tab > Fax Setup. 4 Press down arrow on the right side. 5 Press Toll Save - Samsung CLX-8380ND | User Manual (user Manual) (ver.5.00) (English) - Page 62
login message pops up, enter password and press OK. (Page 3.5) 3 Press the Setup tab > Fax Setup. 4 Press down arrow on the right side. 5 Press fax by an email, you firstly set the mail server and IP address in SyncThru Web Service. • If this Fax Forward Settings feature to On, you cannot use a fax - Samsung CLX-8380ND | User Manual (user Manual) (ver.5.00) (English) - Page 63
pops up, enter password and press OK. (Page 3.5) 3 Press the Setup tab > Fax Setup. 4 Press down arrow on the right side. 5 Press Rx Color Printing. 6 Press On. 7 Press OK. Forwarding a received fax to other destination by server Note If Forward to Email Setting is on, this option will be grayed - Samsung CLX-8380ND | User Manual (user Manual) (ver.5.00) (English) - Page 64
Web Service.(Page 11.9) Press Scan to Email, NetScan or Scan to Server. • Scan to Email: Scans and sends the scanned output to the destination by email. (Page 7.4) • NetScan: Scans and sends the scanned output to the destination with the Samsung Network Scan Manager program. (Page 7.6) • Scan to - Samsung CLX-8380ND | User Manual (user Manual) (ver.5.00) (English) - Page 65
: Inputs the recipient's address just by pressing stored addresses. You can store frequently used email addresses from your computer using the SyncThru Web Service. (Page 7.5) • Duplex: Selects whether the machine scans on one side of the paper (1 Sided), both sides of the paper (2 Sided), or both - Samsung CLX-8380ND | User Manual (user Manual) (ver.5.00) (English) - Page 66
Service. • If user authentication has been activated, only authorized local users or on the DB server (SMB, LDAP, Kerberos) can send scanned data to the network (email, FTP, SMB). • For network scanning on the General Setup of the User Authentication web page. 4 Click Add. 5 Select an index number - Samsung CLX-8380ND | User Manual (user Manual) (ver.5.00) (English) - Page 67
the network administrator has set the authentication in SyncThru Web Service. (Page 11.9) 3 Press Scan to Email. 4 Set the scan features in the Advanced, Image, or Output tabs. (Page 7.2) 5 Press the Basic tab to enter the email address. • From: Sender's address. Touch From and then the keyboard - Samsung CLX-8380ND | User Manual (user Manual) (ver.5.00) (English) - Page 68
varies depending on the server and the operating systems. Entering email addresses by the address book Once you have stored the frequently used addresses into the address book, you can simply enter email addresses. 1 Press Local or Global from the Basic tab of Scan to Email. The search window shows - Samsung CLX-8380ND | User Manual (user Manual) (ver.5.00) (English) - Page 69
CD-ROM, since the printer software and should include the Network Scan program. See page 3.2 for detailed information on installation steps. 1 In Windows, select Start > Programs > Samsung Network Printer Utilities > Network Scan > Network Scan. The Samsung Network Scan Manager window opens. 2 Click - Samsung CLX-8380ND | User Manual (user Manual) (ver.5.00) (English) - Page 70
configured in Samsung Network Scan Manager. 6 Select one from the application list and press Select. 7 Press Start on the control panel to start scanning. 8 The original will be scanned and sent to your computer. Scanning originals and sending via SMB/ FTP (Scan to Server) You can scan an image and - Samsung CLX-8380ND | User Manual (user Manual) (ver.5.00) (English) - Page 71
continuous tone photographs. Color Mode Use this option to scan the original in Mono, Gray or Color mode. Press Scan > Scan to Email (Or Scan to Server) > the Image tab > Color Mode. Select the appropriate option and press OK. • Color: Uses color to display an image. 24 bits per pixel, 8 bits for - Samsung CLX-8380ND | User Manual (user Manual) (ver.5.00) (English) - Page 72
. • PDF: Scans originals in PDF format. • Single-Page TIFF: Scans the originals in TIFF (Tagged Image File Format), and several originals are scanned as an each individual TIFF file. • Multi-Page TIFF: Scans originals in TIFF (Tagged Image File Format), but several originals are scanned as one file - Samsung CLX-8380ND | User Manual (user Manual) (ver.5.00) (English) - Page 73
. 2 For Windows 2000, select Settings and then Printers. For Windows XP/2003, select Printers and Faxes. For Windows Vista, select Control Panel > Hardware and Sound > Printers. 3 Double-click the Samsung CLX-8380 Series PCL 6 icon. (Or Samsung CLX-8380 Series PS) 4 From the Document menu, select - Samsung CLX-8380ND | User Manual (user Manual) (ver.5.00) (English) - Page 74
memory device one by one or all at once by reformatting the device. • USB Print: You can directly print files stored on an USB memory device. You can print TIFF, BMP, JPEG, PDF, and PRN files. (Page 9.5) • Scan to USB: You can specify image size, file format, or color mode for each scanning to USB - Samsung CLX-8380ND | User Manual (user Manual) (ver.5.00) (English) - Page 75
see the device's User's Guide. Scanning to an USB memory device You can scan a document and save the scanned image onto a USB memory device. When you scan folder on the USB memory device. • Duplex: Selects whether the machine scans on one side of the paper (1 Sided), both sides of the paper (2 Sided - Samsung CLX-8380ND | User Manual (user Manual) (ver.5.00) (English) - Page 76
Image tab • Original Type: Selects whether the original is text, text/photo or photo. (Page 9.4) • Color Mode: Selects the color options of the scan output. If the original is color and you want to scan in color, press Color Mode. (Page 9.4) • Darkness: Adjusts the degree of darkness of the scan - Samsung CLX-8380ND | User Manual (user Manual) (ver.5.00) (English) - Page 77
option to produce a high quality document. Higher quality you select a larger file size you get. Press USB > Scan to USB > the Output tab > Quality. • Color: Uses color to display an image. 24 bits per pixel, 8 bits for each RGB, is used for 1 pixel. • Gray: Uses the black gradation to display an - Samsung CLX-8380ND | User Manual (user Manual) (ver.5.00) (English) - Page 78
. • PDF: Scans originals in PDF format. • Single-Page TIFF: Scans the originals in TIFF (Tagged Image File Format), and several originals are scanned as an each individual TIFF file. • Multi-Page TIFF: Scans originals in TIFF (Tagged Image File Format), but several originals are scanned as one file - Samsung CLX-8380ND | User Manual (user Manual) (ver.5.00) (English) - Page 79
type. • General tab: Sets the basic parameters of the machine such as location, date, time, and more. (Page 10.2) • Setup tab: Sets the values for fax, network, login, and an option to service for enabling the feature listed on the screen. • Print/Report tab: Prints configuration or font list and - Samsung CLX-8380ND | User Manual (user Manual) (ver.5.00) (English) - Page 80
. • Default Option: Changes all the default values for copying, faxing, emailing, scanning and paper at once. (Page page 3.6) • Home: Allows user to arrange each function in the display screen. Note: Depending on the optional kit you installed or the category you selected, the selectable options on - Samsung CLX-8380ND | User Manual (user Manual) (ver.5.00) (English) - Page 81
screen. The machine gives you the notification of the drum and toner to reorder, and resets the used fuser counter, bias transfer roller, feed roller and document feeder friction pad counter. The machine prints the test image patterns using Image Quality Test Patterns. You can set the machine to - Samsung CLX-8380ND | User Manual (user Manual) (ver.5.00) (English) - Page 82
the number of images or copying positions manually. (Page 5.5) Note The fax options are fax options explained herein, it means that the grayed out function does not supported in your communication environment. Option Description Machine ID & Fax No Receive Start Code Error Correction Mode Fax - Samsung CLX-8380ND | User Manual (user Manual) (ver.5.00) (English) - Page 83
dialed is same as the delay fax number. (Page 6.11) You can forward a sent or received fax to other destination by a fax or an email. (Page 6.11) This setting selects whether the end fax tone is on or off. (Page 6.12) This function allows you to recieve faxes in color. (Page 6.12) If you have set - Samsung CLX-8380ND | User Manual (user Manual) (ver.5.00) (English) - Page 84
Network Setup You may set up the network with the machine's touch screen. Before doing that, you must have the information concerning the type of network protocols and computer system you use. If you are not sure which setting to use, contact your network administrator to configure this machine - Samsung CLX-8380ND | User Manual (user Manual) (ver.5.00) (English) - Page 85
> Optional Service. Option Description Copy Enables or disables the Copy menu from the main screen. Analog Fax After installing the fax kit, select this option Enable to use this machine as a fax machine. Scan to Email Enables or disables the Scan to Email menu from the scan screen. NetScan - Samsung CLX-8380ND | User Manual (user Manual) (ver.5.00) (English) - Page 86
and clearer, which means the machine prints the colored image on the paper more like the one in the monitor. Select On to activate this feature. You can set the frequency of performing the function by pages, temperature of a machine or LSU. • Page Condition: The machine performs this feature after - Samsung CLX-8380ND | User Manual (user Manual) (ver.5.00) (English) - Page 87
Report: The machine prints the confirmation report after each fax job, only when you send a fax to one destination. Report (Continue) E-mail Confirmation Report The report shows the job of scanning and sending it via Scan to Email. • On: The report is printed whether a job successfully completed - Samsung CLX-8380ND | User Manual (user Manual) (ver.5.00) (English) - Page 88
supplies life • Finding the serial number • Sending the imaging unit reorder notification • Sending the toner reorder notification • Checking Stored Documents • Cleaning your machine • Maintaining the toner cartridge • Redistributing toner • Replacing the toner cartridge • Replacing the imaging unit - Samsung CLX-8380ND | User Manual (user Manual) (ver.5.00) (English) - Page 89
of printout in the popup window. Cleaning your machine To maintain print and scan quality, follow the cleaning procedures below each time the toner cartridge is replaced or if print and scan quality problems occur. Caution • Cleaning the machine cabinet with cleaning materials that contain large - Samsung CLX-8380ND | User Manual (user Manual) (ver.5.00) (English) - Page 90
the machine is damaged. Contact a service representative when print quality problems occur. 4 Pull the corresponding toner cartridge out from the machine. 5 Thoroughly roll the toner cartridge five or six times to distribute the toner evenly inside the cartridge. Note If toner gets on your clothing - Samsung CLX-8380ND | User Manual (user Manual) (ver.5.00) (English) - Page 91
type of the toner cartridge for your machine. (Page 13.1) 1 Turn the machine off, then wait a few minutes for the machine to cool. Note Toner particles can be released inside the machine but it does not mean the machine is damaged. Contact a service representative when print quality problems occur - Samsung CLX-8380ND | User Manual (user Manual) (ver.5.00) (English) - Page 92
new toner cartridge in until it locks in place. Replacing the imaging unit Expected cartridge life The useful life of the imaging unit is approximately 30,000 pages. The screen displays Replace [xxx] Imaging Unit when the imaging unit is near the end of life. Otherwise your printer stops printing - Samsung CLX-8380ND | User Manual (user Manual) (ver.5.00) (English) - Page 93
, wipe it off with a dry cloth and wash clothing in cold water. Hot water sets toner into fabric. Caution • Be careful not to scratch the surface of the imaging unit. • To prevent damage, do not expose the imaging unit to light for more than a few minutes. Cover it with a piece of paper to protect - Samsung CLX-8380ND | User Manual (user Manual) (ver.5.00) (English) - Page 94
container needs to be replaced. Otherwise your printer stops printing. To replace the waste toner container: 1 Turn the machine off, then wait a few minutes for the machine to cool. 2 Open the side cover. 12 Turn the imaging unit locking levers inwards until it locks in place and close the inner - Samsung CLX-8380ND | User Manual (user Manual) (ver.5.00) (English) - Page 95
items will need to be replaced after the specified number of pages or when the life span of each item has expired. Items Transfer belt unit Part Name Cartridge-transfer Transfer roller (T2) Fuser unit MEA unit-TR(2) ELA unit fuser DADF rubber pad RMO-ADF rubber DADF feed roller MEA-ADF - Samsung CLX-8380ND | User Manual (user Manual) (ver.5.00) (English) - Page 96
can manage the machine via Samsung's SyncThru Web Service, an embedded web server. Use SyncThru Web Service to: • View the printer properties. • Set the machine to send email notifications and update you on the machine's status. • Get support for using the machine. To access SyncThru Web Service - Samsung CLX-8380ND | User Manual (user Manual) (ver.5.00) (English) - Page 97
. 1 Remove any remaining pages from the DADF. 2 Open the DADF cover. 3 Gently remove the jammed paper from the DADF. Note If you see no paper in this area, refer to Roller misfeed. (Page 12.2) 4 Close the DADF cover. Then reload the pages you removed, if any, in the DADF. 12.1 - Samsung CLX-8380ND | User Manual (user Manual) (ver.5.00) (English) - Page 98
right using both hands. 1 3 Open the document input tray upwards and pull the document gently out of the DADF. 1 scanner lid if you do not see the paper in this area, stop and go to step 3. 3 Open the white document background. 4 Close the DADF cover and the document input tray. Then - Samsung CLX-8380ND | User Manual (user Manual) (ver.5.00) (English) - Page 99
jammed in the stacker. Paper jammed in the stacker exit part. Page 12.10 Page 12.11 Caution To avoid tearing the paper, pull the jammed paper out gently and slowly. Follow the instructions in the following sections to clear the jam. In the tray 1 1 Open the side cover. 12.3 - Samsung CLX-8380ND | User Manual (user Manual) (ver.5.00) (English) - Page 100
2 Open the guide in the direction shown. 5 Remove the jammed paper by gently pulling it straight out. 3 the machine, then insert it completely. If the paper does not move when you pull, or if you do not see any paper in this area, stop and go to step 4. 4 Lift the front part of the tray up - Samsung CLX-8380ND | User Manual (user Manual) (ver.5.00) (English) - Page 101
the inner cover of tray 2. If the paper does not move when you pull, or if you do not see the paper in this area, stop and go to step 3. 5 Remove the paper in the direction shown. does not move when you pull, or if you do not see any paper in this area, stop and go to step 4. 12.5 - Samsung CLX-8380ND | User Manual (user Manual) (ver.5.00) (English) - Page 102
the paper is stuck, stop pulling and continue on to step 5. If the paper does not move when you pull, or if you do not see any paper in this area, stop and go to step 4. 12.6 - Samsung CLX-8380ND | User Manual (user Manual) (ver.5.00) (English) - Page 103
7 Insert the paper tray and close the two covers. In the multi-purpose tray 1 If the paper is not feeding properly, pull the paper out of the machine. 2 Open and close the side cover. Printing automatically resumes. 12.7 - Samsung CLX-8380ND | User Manual (user Manual) (ver.5.00) (English) - Page 104
the side cover. 3 Open the guide in the direction shown and pull the jammed paper gently out of the machine. 2 Remove the jammed paper, in the direction shown. 4 Open and close the front cover to resume printing. If you do not see any paper in this area, go to step 3. 12.8 - Samsung CLX-8380ND | User Manual (user Manual) (ver.5.00) (English) - Page 105
In the duplex unit area If the duplex unit is not inserted correctly, paper jam may occur. Make sure that the duplex unit is inserted correctly. 1 Open the side cover. 2 Remove the jammed paper. 3 Close the side cover. Printing automatically resumes. 3 Close the side cover. 12.9 - Samsung CLX-8380ND | User Manual (user Manual) (ver.5.00) (English) - Page 106
. 3 Remove the jammed paper. 4 Slide in the stacker until you hear the sound 'click'. 5 Close the stacker front cover. 3 Remove the jammed paper. 12.10 - Samsung CLX-8380ND | User Manual (user Manual) (ver.5.00) (English) - Page 107
toner cartridge. Install a Samsunggenuine imaging unit, designed for your machine. Install the imaging unit. If it is already installed, try to reinstall the imaging unit. If the problem persists, please call for service. Replace a imaging unit with a Samsunggenuine imaging unit. (Page - Samsung CLX-8380ND | User Manual (user Manual) (ver.5.00) (English) - Page 108
]. Please turn off then on Fuser unit is not installed correctly. Install it LSU error: [zzz]. Please turn off then on Meaning Suggested solutions Not supplied toner to the imaging unit. • Remove the sealing tape from the imaging unit. • Thoroughly roll the toner cartridge five or six times, and - Samsung CLX-8380ND | User Manual (user Manual) (ver.5.00) (English) - Page 109
lowering guide 1a or 1b. Open the stacker door and remove jammed paper by lowering guide 1a or 1b. Clear the jam. (Page 12.9) Clear the jam. (Page 12.8) Unlock the CCD lock. (Page 1.3) Or turn off the machine and on again. Try again. If the problem persists, call for service. 12.13 - Samsung CLX-8380ND | User Manual (user Manual) (ver.5.00) (English) - Page 110
is not valid for this machine. Check user? guide Transfer belt unit is worn. Replace it Meaning There is a problem in the sensor signal. The toner supply is low. Stapler is run out. The staple cartridge is not installed. There is a problem in the system operation. The IP address is used in other - Samsung CLX-8380ND | User Manual (user Manual) (ver.5.00) (English) - Page 111
Samsung CLX-8380 Series PS as your default printer in your Windows. Check the machine for the following: • The side cover is not closed. Close the side cover. • Paper is jammed. Clear the paper jam. (Page 12.3) • No paper is loaded. Load paper. (Page 4.7) • The toner cartridge or the imaging unit - Samsung CLX-8380ND | User Manual (user Manual) (ver.5.00) (English) - Page 112
the toner, if necessary. If necessary, replace the toner cartridge. The file may have blank pages. Check the file to ensure that it does not contain blank pages. Some parts, such as the controller or the board, may be defective. Contact a service representative. 12.16 - Samsung CLX-8380ND | User Manual (user Manual) (ver.5.00) (English) - Page 113
the print resolution and turn the toner save mode off. See the help screen of the printer driver and refer to Software section, respectively. • A combination of faded or smeared defects may indicate that the toner cartridge needs cleaning. Contact a service representative. • The surface of the LSU - Samsung CLX-8380ND | User Manual (user Manual) (ver.5.00) (English) - Page 114
a cleaning sheet through several times to clean the cartridge; contact a service representative. After the printout, if you still have the same problems, remove the imaging unit and then, install a new one. (Page 11.4) • Parts of the machine may have toner on them. If the defects occur on the back - Samsung CLX-8380ND | User Manual (user Manual) (ver.5.00) (English) - Page 115
smears appear: • The imaging unit may be installed improperly. Remove the cartridge and reinsert it. • The imaging unit may be defective. Remove the toner cartridge and install a new one. (Page 11.4) • If the problem persists, the machine may require repair. Contact a service representative. If the - Samsung CLX-8380ND | User Manual (user Manual) (ver.5.00) (English) - Page 116
in scan mode because of the large amount of memory required to analyze and reproduce the scanned image. Set your computer to the ECP printer mode through BIOS setting. It will help to increase the speed. For details about how to set BIOS, refer to your computer user's guide. 12.20 - Samsung CLX-8380ND | User Manual (user Manual) (ver.5.00) (English) - Page 117
sending the fax had a temporary document jam. Check your scan unit for marks and clean it. (Page 11.2) The other fax machine may be turned off, out of paper, or cannot answer incoming calls. Speak with the other machine operator and ask her/him to solve out the problem. 12.21 - Samsung CLX-8380ND | User Manual (user Manual) (ver.5.00) (English) - Page 118
a PDF file as an image. Linux The machine does not staple correctly when printing more than one copy with a collate option Turning off collation options on applications (including CUPS pstops collation option) may solve this problem. If you want to use the collation option, go to printer driver - Samsung CLX-8380ND | User Manual (user Manual) (ver.5.00) (English) - Page 119
possible conflicts, only one of them is allowed to gain control over the device at a time. The other "consumer" will encounter a "device busy" response. This usually happens while starting the scan procedure, and an appropriate message box appears. • To identify the source of the problem, you should - Samsung CLX-8380ND | User Manual (user Manual) (ver.5.00) (English) - Page 120
termination of the driver keeps the port locked and therefore unavailable for subsequent print jobs. If this situation occurred, try to release the port. Problem Some color images come out all black. Some color images come out in unexpected color. The machine does not print whole pages and its - Samsung CLX-8380ND | User Manual (user Manual) (ver.5.00) (English) - Page 121
only allowed for printing on the cover page. Other characters will be broken on the printout. When printing a document in Macintosh with Acrobat Reader 6.0 or higher, colors print incorrectly. Make sure that the resolution setting in your printer driver matches the one in Acrobat Reader. 12.25 - Samsung CLX-8380ND | User Manual (user Manual) (ver.5.00) (English) - Page 122
Magenta) CLX-Y8380A (Yellow) Imaging unit Waste toner container Approx. 30,000 pages Approx. 48,000 imagesb CLX-R838XK (Black) CLX-R838XC (Cyan) CLX-R838XM (Magenta) CLX-R838XY (Yellow) CLX-W8380A a. Declared yield value in accordance with ISO/IEC 19798. b. Image counts are based on one color on - Samsung CLX-8380ND | User Manual (user Manual) (ver.5.00) (English) - Page 123
payfor-print service on your machine. SCX-STP000 SCX-KIT20F SmarThru Workflow Windows 2000/XP/ 2003. This feature lets you send additional information along with the scanned document to a specified network location. SCX-KIT11S How to purchase To order Samsung-authorized supplies or accessories - Samsung CLX-8380ND | User Manual (user Manual) (ver.5.00) (English) - Page 124
Samsung fax option kit Precautions to take when installing accessories Disconnect the power cord Never remove the control board cover while the power is being supplied for optional memory module. (Page 13.1) 1 Turn the machine printer cable, and turn the machine on. 14.1 - Samsung CLX-8380ND | User Manual (user Manual) (ver.5.00) (English) - Page 125
. For details about installing the PS printer driver, see Software section. 2 Click the Windows Start menu. 3 For Windows 2000, select Settings and then Printers. For Windows XP/2003, select Printers and Faxes. 4 Select the Samsung CLX-8380 Series PS printer. 5 Click the right mouse button on - Samsung CLX-8380ND | User Manual (user Manual) (ver.5.00) (English) - Page 126
Fax feature after installing the fax option kit After installing the Fax kit, you have to set up the machine in order to use this function. 1 Press Machine Setup on the control panel. 2 Press Admin Setting. 3 When the login message appears, enter password with number keypad and press OK. (Page - Samsung CLX-8380ND | User Manual (user Manual) (ver.5.00) (English) - Page 127
• Imaging unit Approx. 30,000 pages • Waste toner container Approx. 48,000 imagesf Memory External dimension (W x D x H) Weight (including consumables) Package weight Fusing temperature Standard: 576 MB (512 MB main memory and 64 MB fixed memory) Maximum: Expandable to 1088 MB Slots: One available - Samsung CLX-8380ND | User Manual (user Manual) (ver.5.00) (English) - Page 128
• From coldboot: Less than 135 seconds Color • From ready: Less than 14 seconds • 4 dpi) Printer language PCL5ce, PCL6, PostScript 3, PDF Direct V1.4 OS latest software version. Copier specifications Item Copy than 135 seconds Copy resolution Zoom rate DADF • Scan: Up to 300 x 300 dpi (text, - Samsung CLX-8380ND | User Manual (user Manual) (ver.5.00) (English) - Page 129
dpi Scan to USB NetScan 100, 200, 300 dpi Scan to Email 100, 200, 300, 400, 600 dpi Scan to Server Network Scan File format PDF, TIFF, JPEGb Effective scanning length Effective scanning width Color bit by ITU-T No.1 chart, Memory Tx, ECM. b. Rx stands for receiving a fax. 15.2 - Samsung CLX-8380ND | User Manual (user Manual) (ver.5.00) (English) - Page 130
can print (or scan) on both sides of the paper. A printer equipped with a Duplex can print double-sided of paper. Duty Cycle Duty cycle is the page quantity which does not affect printer performance for a month. Generally the printer has the lifespan limitation such as pages per year. The lifespan - Samsung CLX-8380ND | User Manual (user Manual) (ver.5.00) (English) - Page 131
the pay-for-print service on your machine. FTP A File Transfer Protocol (FTP) is a commonly used protocol for exchanging files over any network that supports the TCP/IP protocol (such as the Internet or an intranet). Fuser Unit The part of a laser printer that melts the toner onto the print media - Samsung CLX-8380ND | User Manual (user Manual) (ver.5.00) (English) - Page 132
an interpreter to generate an image. Printer Driver A program used to send commands and transfer data from the computer to the printer. Print Media The media like paper, envelopes, labels, and transparencies which can be used on a printer, a scanner, a fax or, a copier. PPM Pages Per Minute (PPM) is - Samsung CLX-8380ND | User Manual (user Manual) (ver.5.00) (English) - Page 133
by various image processing applications. Toner Cartridge A kind of bottle within a machine like printer which contains toner. Toner is a powder used in laser printers and photocopiers, which forms the text and images on the printed paper. Toner can be melted by the heat of the fuser, causing it - Samsung CLX-8380ND | User Manual (user Manual) (ver.5.00) (English) - Page 134
output option 10.3 setting a fax header 6.2 sound 10.3 supplies management 10.3 system timeout 10.2 tray management 10.3 tray setting 3.6 display screen 1.5 driver feature 2.2 installation 3.2 duplex copying 5.3 faxing 6.5 scanning 7.8, 9.3 1 E email address entering email addresses to input field - Samsung CLX-8380ND | User Manual (user Manual) (ver.5.00) (English) - Page 135
I ID copy 5.5 ID stamp in copying 10.4 Individual email addresses for scanning 7.5 individual fax number 6.7 Interrupt 1.5 J jam clearing paper from the duplex unit area 12.9 clearing paper from the exit area 12.8 clearing paper from the fuser unit 12.9 clearing paper from the multi-purpose tray 12 - Samsung CLX-8380ND | User Manual (user Manual) (ver.5.00) (English) - Page 136
components imaging unit 11.5 toner cartridge 11.4 replacing stapler 14.2 Report 10.9 Resolution faxing 6.6 scanning 7.8, 9.3 S Scan to Email 7.4 confirmation 10.9 Scan to Server 7.7 confirmation 10.9 scanned file format 7.9, 9.5 scanning color mode 7.8, 9.4 darkness 7.9, 9.4 enabling the scan kit - Samsung CLX-8380ND | User Manual (user Manual) (ver.5.00) (English) - Page 137
Samsung Printer Software section - Samsung CLX-8380ND | User Manual (user Manual) (ver.5.00) (English) - Page 138
Tab ...15 Paper Tab ...16 Graphics Tab ...17 Extras Tab ...18 About Tab ...18 Printer Tab ...18 Using a Favorite Setting 19 Using Help ...19 Chapter 3: ADVANCED PRINTING Printing Multiple Pages on One Sheet of Paper (N-Up Printing 20 Printing Posters ...21 Printing Booklets ...21 Printing on Both - Samsung CLX-8380ND | User Manual (user Manual) (ver.5.00) (English) - Page 139
Using the right-click menu 26 Chapter 6: SHARING THE PRINTER LOCALLY Setting Up a Host Computer 27 Setting Up a Client Computer 27 Chapter 7: SCANNING Scanning Using Samsung SmarThru Office 28 Using Samsung SmarThru Office 28 Uninstalling Samsung SmarThru Office 30 Using Onscreen Help File 30 - Samsung CLX-8380ND | User Manual (user Manual) (ver.5.00) (English) - Page 140
Panel ...32 Opening the Troubleshooting Guide 33 Changing the Smart Panel Program Settings 33 Chapter 9: USING YOUR PRINTER IN LINUX Getting Started ...34 Installing the Unified Linux Driver 34 Installing the Unified Linux Driver 34 Uninstalling the Unified Linux Driver 35 Using the Unified - Samsung CLX-8380ND | User Manual (user Manual) (ver.5.00) (English) - Page 141
Scanning ...47 Scanning with USB ...47 Scanning with network 47 4 - Samsung CLX-8380ND | User Manual (user Manual) (ver.5.00) (English) - Page 142
Windows user's guide or online help. Installing Printer Software You can install the printer software for local printing or network printing. To install the printer software on the computer, perform the appropriate installation procedure depending on the printer in use. A printer driver is software - Samsung CLX-8380ND | User Manual (user Manual) (ver.5.00) (English) - Page 143
click Finish. You are now sent to the Samsung web site. Otherwise, just click Finish. NOTE: After setup is complete, if your printer driver doesn't work properly, reinstall the printer driver. See "Reinstalling Printer Software" on page 11. Custom Installation You can choose individual components - Samsung CLX-8380ND | User Manual (user Manual) (ver.5.00) (English) - Page 144
Next. Otherwise, just click Next and skip to step 9. 8 If the test page prints out correctly, click Yes. If not, click No to reprint it. 9 To register yourself as a user of Samsung Printers in order to receive information from Samsung, select the checkbox and click Finish. You are now sent to the - Samsung CLX-8380ND | User Manual (user Manual) (ver.5.00) (English) - Page 145
is connected to your network and powered on. For details about connecting to the network, see the supplied printer's User's Guide. 2 Insert the supplied CD-ROM into your CD-ROM drive. The CD-ROM should automatically run, and an installation window appears. If the installation window does not appear - Samsung CLX-8380ND | User Manual (user Manual) (ver.5.00) (English) - Page 146
information from Samsung. If you so desire, select the corresponding checkbox(es) and click Finish. Otherwise, just click Finish. 3 Click Next. NOTE: After setup is complete, if your printer driver doesn't work properly, reinstall the printer driver. See "Reinstalling Printer Software" on page 11 - Samsung CLX-8380ND | User Manual (user Manual) (ver.5.00) (English) - Page 147
, the following window appears. You can also change the printer name, set the printer to be shared on NOTE: After setup is complete, if your printer driver doesn't work properly, reinstall the printer driver. See "Reinstalling Printer Software" on page 11. 10 Installing Printer Software in Windows - Samsung CLX-8380ND | User Manual (user Manual) (ver.5.00) (English) - Page 148
in this User's Guide may differ depending on the printer and interface in use. 5 Select the components you want to reinstall and click Next. If you installed the printer software for local printing and you select your printer driver name, the window asking you to print a test page appears. Do as - Samsung CLX-8380ND | User Manual (user Manual) (ver.5.00) (English) - Page 149
You must install the mono driver on your computer. Following steps guide you through the step by step installation process. 1 Make sure that the printer is connected to your computer and powered on. Or your computer and printer are connected to the network. 2 Insert the supplied CD-ROM into your CD - Samsung CLX-8380ND | User Manual (user Manual) (ver.5.00) (English) - Page 150
sharing window or the print the test page window may appear; make the appropriate selection. 14 Enter your printer name, and click Next. 15 Click Finish to start installing a mono printer driver. NOTE: If your printer is connected to a network, go to printer's Properties and select the Ports tab - Samsung CLX-8380ND | User Manual (user Manual) (ver.5.00) (English) - Page 151
the Name drop-down list. To take advantage of the printer features provided by your printer driver, click Properties or Preferences in the application's Print window. For details, see "Printer Settings" on page 15. If you see Setup, Printer, or Options in your Print window, click it instead. Then - Samsung CLX-8380ND | User Manual (user Manual) (ver.5.00) (English) - Page 152
XP. For other Windows OS, refer to the corresponding Windows User's Guide or online help. 1. Click the Windows Start button. 2. Select Printers and Faxes. 3. Select your printer driver icon. 4. Right-click on the printer driver icon and select Printing Preferences. 5. Change the settings on each tab - Samsung CLX-8380ND | User Manual (user Manual) (ver.5.00) (English) - Page 153
between transparencies. • Printer Separator: Places the same image on the divider sheets as printed on the transparency. • Blank Separator: Places a blank sheet between transparencies. Scaling Printing Scaling Printing allows you to automatically or manually scale your print job on a page. You can - Samsung CLX-8380ND | User Manual (user Manual) (ver.5.00) (English) - Page 154
transferring data from a computer to a printer. If you set this option to Maximum, the printing speed will be high, but the printing quality will be low. • TrueType Options: This option determines what the driver tells the printer about how to image the text in your document. Select the appropriate - Samsung CLX-8380ND | User Manual (user Manual) (ver.5.00) (English) - Page 155
XP. For other Windows OS, refer to the corresponding Windows User's Guide or online help. 1 Click the Windows Start menu. 2 Select Printers and Faxes. 3 Select your printer driver icon. 4 Right-click on the printer driver icon and select Properties. 5 Click the Printer tab and set the options. - Samsung CLX-8380ND | User Manual (user Manual) (ver.5.00) (English) - Page 156
has a help screen that can be activated by clicking the Help button in the printer properties window. These help screens give detailed information about the printer features provided by the printer driver. You can also click from the upper right corner of the window, and then click on any setting - Samsung CLX-8380ND | User Manual (user Manual) (ver.5.00) (English) - Page 157
in the order you specify. You can print up to 16 pages on one sheet. 1 To change the print settings from your software application, access printer properties. See "Printing a Document" on page 14. 2 From the Layout tab, choose Multiple Pages per Side in the Layout Type drop-down list. 3 Select the - Samsung CLX-8380ND | User Manual (user Manual) (ver.5.00) (English) - Page 158
16 sheets of paper, for the purpose of pasting the sheets together to form one poster-size document. 1 To change the print settings from your software application, access printer properties. See "Printing a Document" on page 14. 2 Click the Layout tab, select Poster Printing in the Layout Type drop - Samsung CLX-8380ND | User Manual (user Manual) (ver.5.00) (English) - Page 159
. NOTE: If your printer does not have a duplex unit, you should complete the printing job manually. The printer prints every other page of the document first. After printing the first side of your job, the Printing Tip window appears. Follow the onscreen instructions to complete the printing - Samsung CLX-8380ND | User Manual (user Manual) (ver.5.00) (English) - Page 160
ones to the list. Using an Existing Watermark 1 To change the print settings from your software application, access printer properties. See "Printing a Document" on page see the selected watermark in the preview image. 3 Click OK and start printing. NOTE: The preview image shows how the page will - Samsung CLX-8380ND | User Manual (user Manual) (ver.5.00) (English) - Page 161
or open a document containing text or an image for use in a new page overlay. Position the items exactly as you wish them to appear when printed as an overlay. 2 To save the document as an overlay, access printer properties. See "Printing a Document" on page 14. 3 Click the Extras tab, and click - Samsung CLX-8380ND | User Manual (user Manual) (ver.5.00) (English) - Page 162
XP. For other Windows OS, refer to the corresponding Windows User's Guide or online help. 1. Click the Windows Start button. 2. Select Printers and Faxes. 3. Select your printer driver icon. 4. Right-click on the printer driver icon and select Printing Preferences. 5. Change the settings on each tab - Samsung CLX-8380ND | User Manual (user Manual) (ver.5.00) (English) - Page 163
Windows spooler using the port of the printer driver. It only supports PDF format. To installing this program, you should select Custom installation and put a check mark in this program when you install the printer driver. Using the shortcut icon 1 Select the PDF file you will print and by dragging - Samsung CLX-8380ND | User Manual (user Manual) (ver.5.00) (English) - Page 164
Specifications in your Printer User's Guide. • If you need to know the exact name of your printer, you can check the supplied CD-ROM. Setting Up a Host Computer 1 Start Windows. 2 From the Start menu select Printers and Faxes. 3 Double-click your printer driver icon. 4 From the Printer menu, select - Samsung CLX-8380ND | User Manual (user Manual) (ver.5.00) (English) - Page 165
: • Scanning Using Samsung SmarThru Office • Scanning Process with TWAIN-enabled Software • Scanning Using the WIA Driver NOTE: • Check the Operating System(s) that are compatible with your printer. Please refer to the OS Compatibility section of Printer Specifications in your Printer User's Guide - Samsung CLX-8380ND | User Manual (user Manual) (ver.5.00) (English) - Page 166
following services: •Select Scanner: Select the Local or Network scanner. - Local Scan: After scanning with parallel port or USB port, you can store the scanned output in image or document file. - Network Scan: After scanning via network, you can store the scanned output in JPEG, TIFF, or pdf file - Samsung CLX-8380ND | User Manual (user Manual) (ver.5.00) (English) - Page 167
NOTE: You need to follow the program's instructions for acquiring an image. Please refer to the user's guide of the application. Scanning Using the WIA Driver Your machine also supports the Windows Image Acquisition (WIA) driver for scanning images. WIA is one of the standard components provided by - Samsung CLX-8380ND | User Manual (user Manual) (ver.5.00) (English) - Page 168
and Cameras. 3 Click on Scan a document or picture. Then Windows Fax and Scan application is opened automatically. Scan and then scan driver is opened. 5 Choose your scanning preferences and click Preview to see your preferences affect the picture. 6 Click Scan. NOTE: If you want to cancel the scan - Samsung CLX-8380ND | User Manual (user Manual) (ver.5.00) (English) - Page 169
Now You can order replacement toner cartridge(s) online. Troubleshooting Guide You can view Help to solve problems. Printer Setting If you connect your printer to a network, the SyncThru Web Service window appears instead of the Printer Settings Utility window. Driver Setting (Only for Windows) You - Samsung CLX-8380ND | User Manual (user Manual) (ver.5.00) (English) - Page 170
Opening the Troubleshooting Guide Using the troubleshooting guide, you can view solutions for error status problems. Right-click (in Windows or Linux) or click (in Mac OS X) the Smart Panel icon and select Troubleshooting Guide. Changing the Smart Panel Program Settings Right-click (in Windows or - Samsung CLX-8380ND | User Manual (user Manual) (ver.5.00) (English) - Page 171
Document Getting Started The supplied CD-ROM provides you with Samsung's Unified Linux Driver package for using your machine with a Linux computer. Samsung's Unified Linux Driver package contains printer and scanner drivers, providing the ability to print documents and scan images. The package also - Samsung CLX-8380ND | User Manual (user Manual) (ver.5.00) (English) - Page 172
or Image Manager. NOTE: Installing the driver in the text mode: • If you do not use the graphical interface or have failed the driver installation, you have to use the driver in the text mode. • Follow the step 1 to 3, then type [root@localhost Linux]# ./ install.sh, then follow the instruction on - Samsung CLX-8380ND | User Manual (user Manual) (ver.5.00) (English) - Page 173
print a test page to check if the machine is working properly. • Properties: allows you to view and change the printer properties. For details, see page 38. You can use the onscreen help by clicking Help. 3 After changing the configurations, click Exit to close the Unified Driver Configurator. 36 - Samsung CLX-8380ND | User Manual (user Manual) (ver.5.00) (English) - Page 174
one device (printer and scanner), it is necessary to organize proper access of "consumer" applications to these devices via the single I/O port. The Samsung Unified Linux Driver package provides an appropriate port sharing mechanism that is used by Samsung printer and scanner drivers. The drivers - Samsung CLX-8380ND | User Manual (user Manual) (ver.5.00) (English) - Page 175
: allows you to view or select another printer driver. By clicking Options, you can set the default device options. •Jobs: shows the list of print jobs. Click Cancel job to cancel the selected job and select the Show completed jobs check box to see previous jobs on the job list. •Classes: shows - Samsung CLX-8380ND | User Manual (user Manual) (ver.5.00) (English) - Page 176
the LPR GUI window, select your printer from the list, and change the printer and print job properties. For details about the properties window, see page 38. 3 Click OK to start printing. Scanning a Document You can scan a document using the Unified Driver Configurator window. 1 Double-click the - Samsung CLX-8380ND | User Manual (user Manual) (ver.5.00) (English) - Page 177
the Image Quality and Scan Area sections. •Image Quality: allows you to select the color composition and the scan resolution for the image. •Scan Area: allows you to select the page size. The Advanced button enables you to set the page size manually. If you want to use one of the preset scan option - Samsung CLX-8380ND | User Manual (user Manual) (ver.5.00) (English) - Page 178
. Restores the action you canceled. Allows you to scroll through the image. Crops the selected image area. Zooms the image out. Zooms the image in. Allows you to scale the image size; you can enter the size manually, or set the rate to scale proportionally, vertically, or horizontally. Allows - Samsung CLX-8380ND | User Manual (user Manual) (ver.5.00) (English) - Page 179
installed scan driver, click Restart. • After the installation is finished, see "Setting Up the Printer" on page 43 NOTE: Some printers do not support a network interface. Make sure that your printer supports a network interface by referring to Printer Specifications in your Printer User's Guide - Samsung CLX-8380ND | User Manual (user Manual) (ver.5.00) (English) - Page 180
NOTE: Some printers do not support a network interface. Before connecting your printer, make sure that your printer supports a network interface by referring to Printer Specifications in your Printer User's Guide. Mac OS 10.1 or higher 1 Follow the instructions on "Installing Software" on page 42 to - Samsung CLX-8380ND | User Manual (user Manual) (ver.5.00) (English) - Page 181
Guide may differ depending on the printer in use. However the composition of the printer properties window is similar. • You can check your printer name in the supplied •Pages per Sheet: This feature determines how many pages printed on one page. For details, see "Printing Multiple Pages on One Sheet - Samsung CLX-8380ND | User Manual (user Manual) (ver.5.00) (English) - Page 182
appear, your printer does not have this feature. •Fit to Page: This setting color images than that of Standard mode. Device mode is best used for printing fine lines, small characters and color drawings. The color tone of Device mode may be different from that of monitor, the pure toner colors - Samsung CLX-8380ND | User Manual (user Manual) (ver.5.00) (English) - Page 183
of paper on the Pages per Sheet drop-down list. 4 Select the page order from the Layout Direction option. To print a border around each page on the sheet, select the option you want from the Border drop-down list. 5 Click Print, and the printer prints the selected number of pages on one side of each - Samsung CLX-8380ND | User Manual (user Manual) (ver.5.00) (English) - Page 184
to TWAIN-compliant softwares. Please refer to the user's guide of the software. • If scanning does not operate in Image Capture, update Mac OS to the latest version. Image Capture operates propery in Mac OS 10.3.9 or higher and Mac OS 10.4.7 or higher. 47 Using Your Printer with a Macintosh - Samsung CLX-8380ND | User Manual (user Manual) (ver.5.00) (English) - Page 185
scan 31 Color 17 D document, print Macintosh 44 Windows 14 double-sided printing 22 E Extras properties, set 18 F favorites settings, use 19 G Graphics 17 Graphics properties, set 17 H help, use 19, 25 I install printer driver 21 PostScript driver installing 25 print document 14 fit to page 22 from - Samsung CLX-8380ND | User Manual (user Manual) (ver.5.00) (English) - Page 186
Linux 39 SmarThru 28 TWAIN 30 WIA driver 30 scanning from Macintosh 47 setting darkness 17 favorites 19 image mode 17 resolution Windows 17 true-type option 17 software install Macintosh 42 Windows 5 reinstall Windows 11 system requirements Macintosh 42 uninstall Macintosh 42 Windows - Samsung CLX-8380ND | User Manual (user Manual) (ver.5.00) (English) - Page 187
Ver. 5.00
-
 1
1 -
 2
2 -
 3
3 -
 4
4 -
 5
5 -
 6
6 -
 7
7 -
8
-
9
-
10
-
11
-
12
-
13
-
14
-
15
-
16
-
17
-
18
-
19
-
20
-
21
-
22
-
23
-
24
-
25
-
26
-
27
-
28
-
29
-
30
-
31
-
32
-
33
-
34
-
35
-
36
-
37
-
38
-
39
-
40
-
41
-
42
-
43
-
44
-
45
-
46
-
47
-
48
-
49
-
50
-
51
-
52
-
53
-
54
-
55
-
56
-
57
-
58
-
59
-
60
-
61
-
62
-
63
-
64
-
65
-
66
-
67
-
68
-
69
-
70
-
71
-
72
-
73
-
74
-
75
-
76
-
77
-
78
-
79
-
80
-
81
-
82
-
83
-
84
-
85
-
86
-
87
-
88
-
89
-
90
-
91
-
92
-
93
-
94
-
95
-
96
-
97
-
98
-
99
-
100
-
101
-
102
-
103
-
104
-
105
-
106
-
107
-
108
-
109
-
110
-
111
-
112
-
113
-
114
-
115
-
116
-
117
-
118
-
119
-
120
-
121
-
122
-
123
-
124
-
125
-
126
-
127
-
128
-
129
-
130
-
131
-
132
-
133
-
134
-
135
-
136
-
137
-
138
-
139
-
140
-
141
-
142
-
143
-
144
-
145
-
146
-
147
-
148
-
149
-
150
-
151
-
152
-
153
-
154
-
155
-
156
-
157
-
158
-
159
-
160
-
161
-
162
-
163
-
164
-
165
-
166
-
167
-
168
-
169
-
170
-
171
-
172
-
173
-
174
-
175
-
176
-
177
-
178
-
179
-
180
-
181
-
182
-
183
-
184
-
185
-
186
-
187
 |
 |
