Samsung CLX-8380ND User Manual (user Manual) (ver.5.00) (English) - Page 56
Receiving faxes manually using an extension telephone, Receiving in secure receiving mode
 |
View all Samsung CLX-8380ND manuals
Add to My Manuals
Save this manual to your list of manuals |
Page 56 highlights
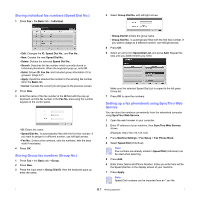
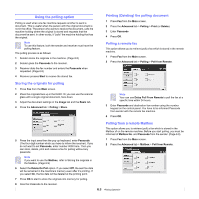
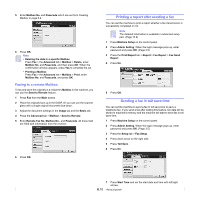
Note • If you have set your machine to this mode and your answering machine is switched off, or no answering machine is connected to EXT socket, your machine automatically goes into Fax mode after a predefined number of rings. • If your answering machine has a user-selectable ring counter, set the machine to answer incoming calls within 1 ring. • If you are in Telephone mode when the answering machine is connected to your machine, you must switch off the answering machine, or the outgoing message from the answering machine will interrupt your phone conversation. • While the machine is receiving a fax, you can not do the copy job. Receiving faxes manually using an extension telephone This feature works best when you are using an extension telephone connected to the EXT socket on the back of your machine. You can receive a fax from someone you are talking to on the extension telephone, without going to the fax machine. When you receive a call on the extension phone and hear fax tones, press the keys 9 on the extension phone. The machine receives the fax. Press the buttons slowly in sequence. If you still hear the fax tone from the remote machine, try pressing 9 once again. To change the 9 to, for example, 3 , follow the next steps. 1 Press Machine Setup on the control panel. 2 Select Admin Setting. When the login message pops up, then enter password and press OK. (Page 3.5) 3 Press the Setup tab > Fax Setup > Receive Start Code. 4 Select On. 5 Press left/right arrows to display number 3. 3 Press the Setup tab > Fax Setup > Secure Receive. 4 Select On. 5 Enter Passcode with 4 digit number using the number keypad on the control panel. Note To deactivate the Secure Receive feature, press Off. In this case, the received fax will be printed out. Printing received faxes on both sides of the paper Set this duplex feature to save paper. When the machine prints the received fax data, it prints them on both sides of the paper. 1 Press Machine Setup on the control panel. 2 Select Admin Setting. When the login message pops up, then enter password and press OK. (Page 3.5) 3 Press the Setup tab > Fax Setup > Received Fax Printing > Duplex. 4 Select appropriate option. • Off: Prints only one side of the paper. • Long Edge: Prints both sides of the paper, however the binding will be the long edge. • Short Edge: Prints both sides of the paper, however the binding will be the short edge. 5 Press OK. Receiving faxes in memory Since your machine is a multi-tasking device, it can receive faxes while you are making copies or printing. If you receive a fax while you are copying or printing, your machine stores incoming faxes in its memory. Then, as soon as you finish copying or printing, the machine automatically prints the fax. 6 Press OK. Receiving in secure receiving mode You may need to prevent your received faxes from being accessed by unauthorized people. You can turn on secure receiving mode to restrict printing of received faxes when the machine is unattended. In secure receiving mode, all incoming faxes go into memory. 1 Press Machine Setup on the control panel. 2 Select Admin Setting. When the login message pops up, then enter password and press OK. (Page 3.5) Adjusting the document settings Before sending a fax, you can adjust the document settings, such as resolution, darkness, color, duplex and so forth. Refer to explanation of this section. Note The document setting herein is for only current job. If you want to change the default setting on document settings, refer to Admin Setting > General tab > Default Settings. (Page 10.2) Duplex This function is especially intended for two-sided originals. You can select whether the machine sends the fax on one side or both sides of the paper. Load the originals onto the DADF to use this function. 6.5
-
 1
1 -
2
-
3
-
4
-
5
-
6
-
7
-
8
-
9
-
10
-
11
-
12
-
13
-
14
-
15
-
16
-
17
-
18
-
19
-
20
-
21
-
22
-
23
-
24
-
25
-
26
-
27
-
28
-
29
-
30
-
31
-
32
-
33
-
34
-
35
-
36
-
37
-
38
-
39
-
40
-
41
-
42
-
43
-
44
-
45
-
46
-
47
-
48
-
49
-
50
-
 51
51 -
 52
52 -
 53
53 -
 54
54 -
 55
55 -
 56
56 -
 57
57 -
 58
58 -
 59
59 -
 60
60 -
 61
61 -
62
-
63
-
64
-
65
-
66
-
67
-
68
-
69
-
70
-
71
-
72
-
73
-
74
-
75
-
76
-
77
-
78
-
79
-
80
-
81
-
82
-
83
-
84
-
85
-
86
-
87
-
88
-
89
-
90
-
91
-
92
-
93
-
94
-
95
-
96
-
97
-
98
-
99
-
100
-
101
-
102
-
103
-
104
-
105
-
106
-
107
-
108
-
109
-
110
-
111
-
112
-
113
-
114
-
115
-
116
-
117
-
118
-
119
-
120
-
121
-
122
-
123
-
124
-
125
-
126
-
127
-
128
-
129
-
130
-
131
-
132
-
133
-
134
-
135
-
136
-
137
-
138
-
139
-
140
-
141
-
142
-
143
-
144
-
145
-
146
-
147
-
148
-
149
-
150
-
151
-
152
-
153
-
154
-
155
-
156
-
157
-
158
-
159
-
160
-
161
-
162
-
163
-
164
-
165
-
166
-
167
-
168
-
169
-
170
-
171
-
172
-
173
-
174
-
175
-
176
-
177
-
178
-
179
-
180
-
181
-
182
-
183
-
184
-
185
-
186
-
187
 |
 |