Samsung CLX-8380ND User Manual (user Manual) (ver.5.00) (English) - Page 153
Paper Tab, Source, Scaling Printing
 |
View all Samsung CLX-8380ND manuals
Add to My Manuals
Save this manual to your list of manuals |
Page 153 highlights
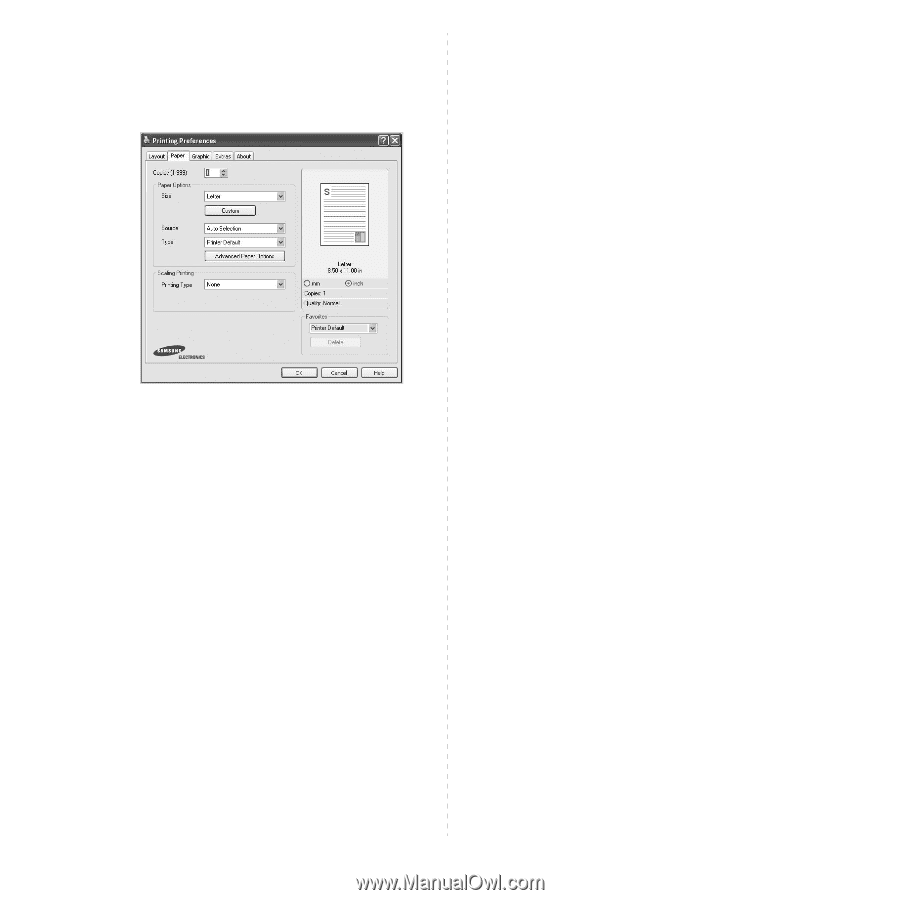
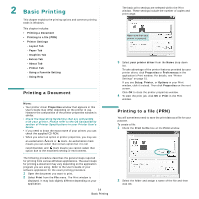
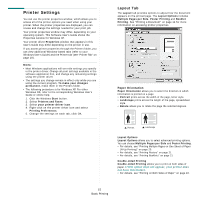
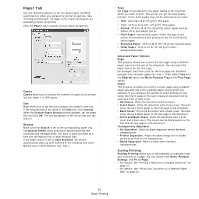
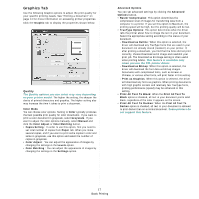
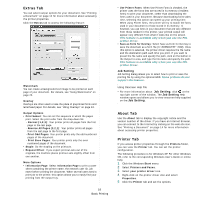
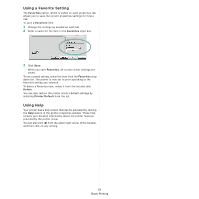
Paper Tab Use the following options to set the basic paper handling specifications when you access the printer properties. See "Printing a Document" on page 14 for more information on accessing printer properties. Click the Paper tab to access various paper properties. Copies Copies allows you to choose the number of copies to be printed. You can select 1 to 999 copies. Size Size allows you to set the size of paper you loaded in the tray. If the required size is not listed in the Size box, click Custom. When the Custom Paper Setting window appears, set the paper size and click OK. The setting appears in the list so that you can select it. Source Make sure that Source is set to the corresponding paper tray. Use Manual Feeder when printing on special materials like envelopes and transparencies. You have to load one sheet at a time into the Manual Tray or Multi-Purpose Tray. If the paper source is set to Auto Selection, the printer automatically picks up print material in the following tray order: Manual Tray or Multi-Purpose Tray, Tray n. Type Set Type to correspond to the paper loaded in the tray from which you want to print. This will let you get the best quality printout. If not, print quality may not be acheived as you want. • Thin: Less than 19 lb (70 g/m2) thin paper. • Thick: 24 lb to 32 lb (90~120 g/m2) thick paper. • Cotton: 20 lb to 24 lb (75~90 g/m2) cotton paper such as Gilbert 25 % and Gilbert 100 %. • Plain Paper: Normal plain paper. Select this type if your printer is monochrome and printing on the 16 lb (60 g/m2) cotton paper. • Recycled Paper: 20 lb to 24 lb (75~90 g/m2) recycled paper. • Color Paper: 20 lb to 24 lb (75~90 g/m2) colorbackgrounded paper. Advanced Paper Options Page This property allows you to print the first page using a different paper type from the rest of the document. You can select the paper source for the first page. For example, load thick stock for the first page into the Multipurpose Tray, and plain paper into Tray n. Then, select Tray n in the Source option and Multi-Purpose Tray in the First Page option. Cover This property provides you to print a cover page using a specific paper size and type from a specific paper source which you selected. If you configure the options to make printing on twosided, the first 2 pages or the last 2 pages of document will be used as a front or back cover. • No Covers: Prints the document without covers. • Front Cover: Prints the document with a front cover. The front cover can be a blank paper or the first page in the document. • Back Cover: Prints the document with a back cover. The back cover can be a blank paper or the last page in the document. • Front and Back Cover: Prints the document with a front cover and a back cover. The covers can be blank papers or the first and the last pages in the document. Transparency Separator • No Separator: Does not place separator sheets between transparencies. • Printer Separator: Places the same image on the divider sheets as printed on the transparency. • Blank Separator: Places a blank sheet between transparencies. Scaling Printing Scaling Printing allows you to automatically or manually scale your print job on a page. You can choose from None, Reduce/ Enlarge, and Fit to Page. • For details, see "Printing a Reduced or Enlarged Document" on page 22. • For details, see "Fitting Your Document to a Selected Paper Size" on page 22. 16 Basic Printing
-
 1
1 -
2
-
3
-
4
-
5
-
6
-
7
-
8
-
9
-
10
-
11
-
12
-
13
-
14
-
15
-
16
-
17
-
18
-
19
-
20
-
21
-
22
-
23
-
24
-
25
-
26
-
27
-
28
-
29
-
30
-
31
-
32
-
33
-
34
-
35
-
36
-
37
-
38
-
39
-
40
-
41
-
42
-
43
-
44
-
45
-
46
-
47
-
48
-
49
-
50
-
51
-
52
-
53
-
54
-
55
-
56
-
57
-
58
-
59
-
60
-
61
-
62
-
63
-
64
-
65
-
66
-
67
-
68
-
69
-
70
-
71
-
72
-
73
-
74
-
75
-
76
-
77
-
78
-
79
-
80
-
81
-
82
-
83
-
84
-
85
-
86
-
87
-
88
-
89
-
90
-
91
-
92
-
93
-
94
-
95
-
96
-
97
-
98
-
99
-
100
-
101
-
102
-
103
-
104
-
105
-
106
-
107
-
108
-
109
-
110
-
111
-
112
-
113
-
114
-
115
-
116
-
117
-
118
-
119
-
120
-
121
-
122
-
123
-
124
-
125
-
126
-
127
-
128
-
129
-
130
-
131
-
132
-
133
-
134
-
135
-
136
-
137
-
138
-
139
-
140
-
141
-
142
-
143
-
144
-
145
-
146
-
147
-
 148
148 -
 149
149 -
 150
150 -
 151
151 -
 152
152 -
 153
153 -
 154
154 -
 155
155 -
 156
156 -
 157
157 -
 158
158 -
159
-
160
-
161
-
162
-
163
-
164
-
165
-
166
-
167
-
168
-
169
-
170
-
171
-
172
-
173
-
174
-
175
-
176
-
177
-
178
-
179
-
180
-
181
-
182
-
183
-
184
-
185
-
186
-
187
 |
 |