Samsung CLX-8380ND User Manual (user Manual) (ver.5.00) (English) - Page 92
Replacing the imaging unit, Expected cartridge life
 |
View all Samsung CLX-8380ND manuals
Add to My Manuals
Save this manual to your list of manuals |
Page 92 highlights
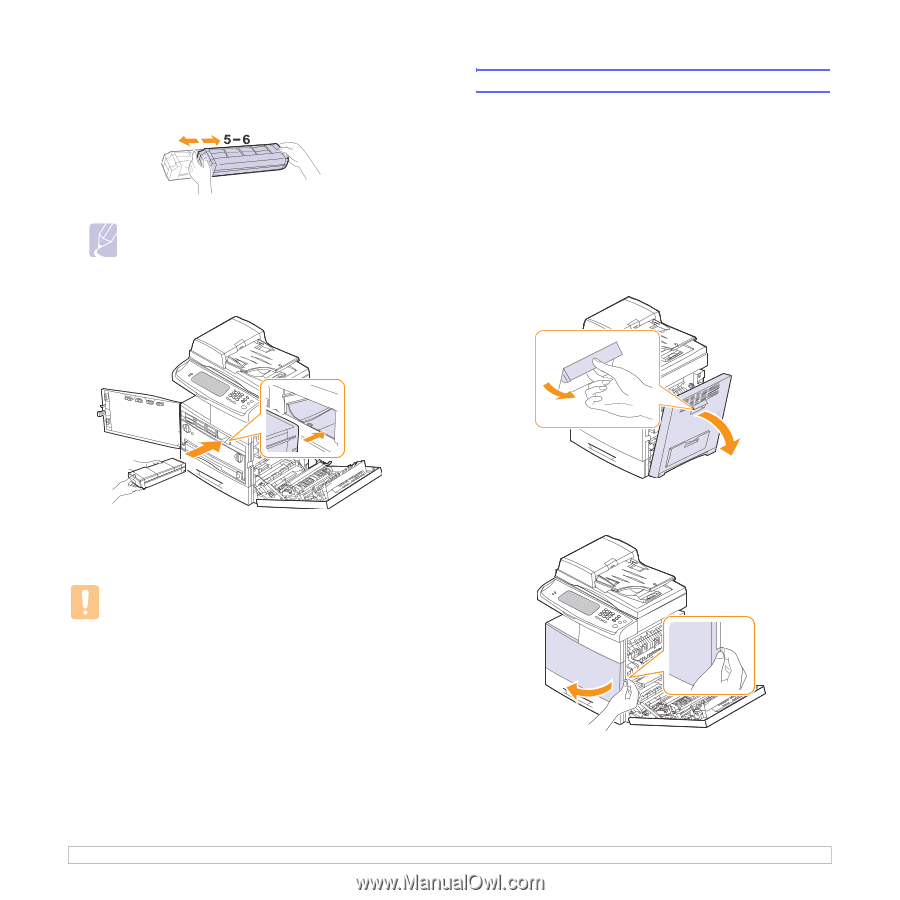
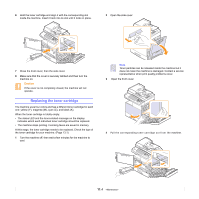
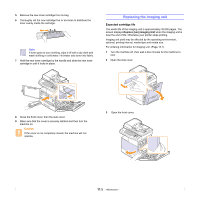
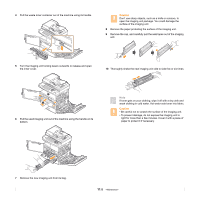
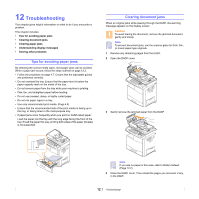
5 Remove the new toner cartridge from its bag. 6 Thoroughly roll the new cartridge five or six times to distribute the toner evenly inside the cartridge. Note If toner gets on your clothing, wipe it off with a dry cloth and wash clothing in cold water. Hot water sets toner into fabric. 7 Hold the new toner cartridge by the handle and slide the new toner cartridge in until it locks in place. Replacing the imaging unit Expected cartridge life The useful life of the imaging unit is approximately 30,000 pages. The screen displays Replace [xxx] Imaging Unit when the imaging unit is near the end of life. Otherwise your printer stops printing. Imaging unit yield may be affected by the operating environment, optional, printing interval, media type and media size. For ordering information for imaging unit. (Page 13.1) 1 Turn the machine off, then wait a few minutes for the machine to cool. 2 Open the side cover. 8 Close the front cover, then the side cover. 9 Make sure that the cover is securely latched and then turn the machine on. Caution If the cover is not completely closed, the machine will not operate. 3 Open the front cover. 11.5
-
 1
1 -
2
-
3
-
4
-
5
-
6
-
7
-
8
-
9
-
10
-
11
-
12
-
13
-
14
-
15
-
16
-
17
-
18
-
19
-
20
-
21
-
22
-
23
-
24
-
25
-
26
-
27
-
28
-
29
-
30
-
31
-
32
-
33
-
34
-
35
-
36
-
37
-
38
-
39
-
40
-
41
-
42
-
43
-
44
-
45
-
46
-
47
-
48
-
49
-
50
-
51
-
52
-
53
-
54
-
55
-
56
-
57
-
58
-
59
-
60
-
61
-
62
-
63
-
64
-
65
-
66
-
67
-
68
-
69
-
70
-
71
-
72
-
73
-
74
-
75
-
76
-
77
-
78
-
79
-
80
-
81
-
82
-
83
-
84
-
85
-
86
-
 87
87 -
 88
88 -
 89
89 -
 90
90 -
 91
91 -
 92
92 -
 93
93 -
 94
94 -
 95
95 -
 96
96 -
 97
97 -
98
-
99
-
100
-
101
-
102
-
103
-
104
-
105
-
106
-
107
-
108
-
109
-
110
-
111
-
112
-
113
-
114
-
115
-
116
-
117
-
118
-
119
-
120
-
121
-
122
-
123
-
124
-
125
-
126
-
127
-
128
-
129
-
130
-
131
-
132
-
133
-
134
-
135
-
136
-
137
-
138
-
139
-
140
-
141
-
142
-
143
-
144
-
145
-
146
-
147
-
148
-
149
-
150
-
151
-
152
-
153
-
154
-
155
-
156
-
157
-
158
-
159
-
160
-
161
-
162
-
163
-
164
-
165
-
166
-
167
-
168
-
169
-
170
-
171
-
172
-
173
-
174
-
175
-
176
-
177
-
178
-
179
-
180
-
181
-
182
-
183
-
184
-
185
-
186
-
187
 |
 |