HP Designjet 4000 HP Designjet 4000 Printer Series - Quick Reference Guide - Page 127
Paper advance calibration, Drawings/text, Images, Select Pattern, After calibration, Paper advance,
 |
View all HP Designjet 4000 manuals
Add to My Manuals
Save this manual to your list of manuals |
Page 127 highlights
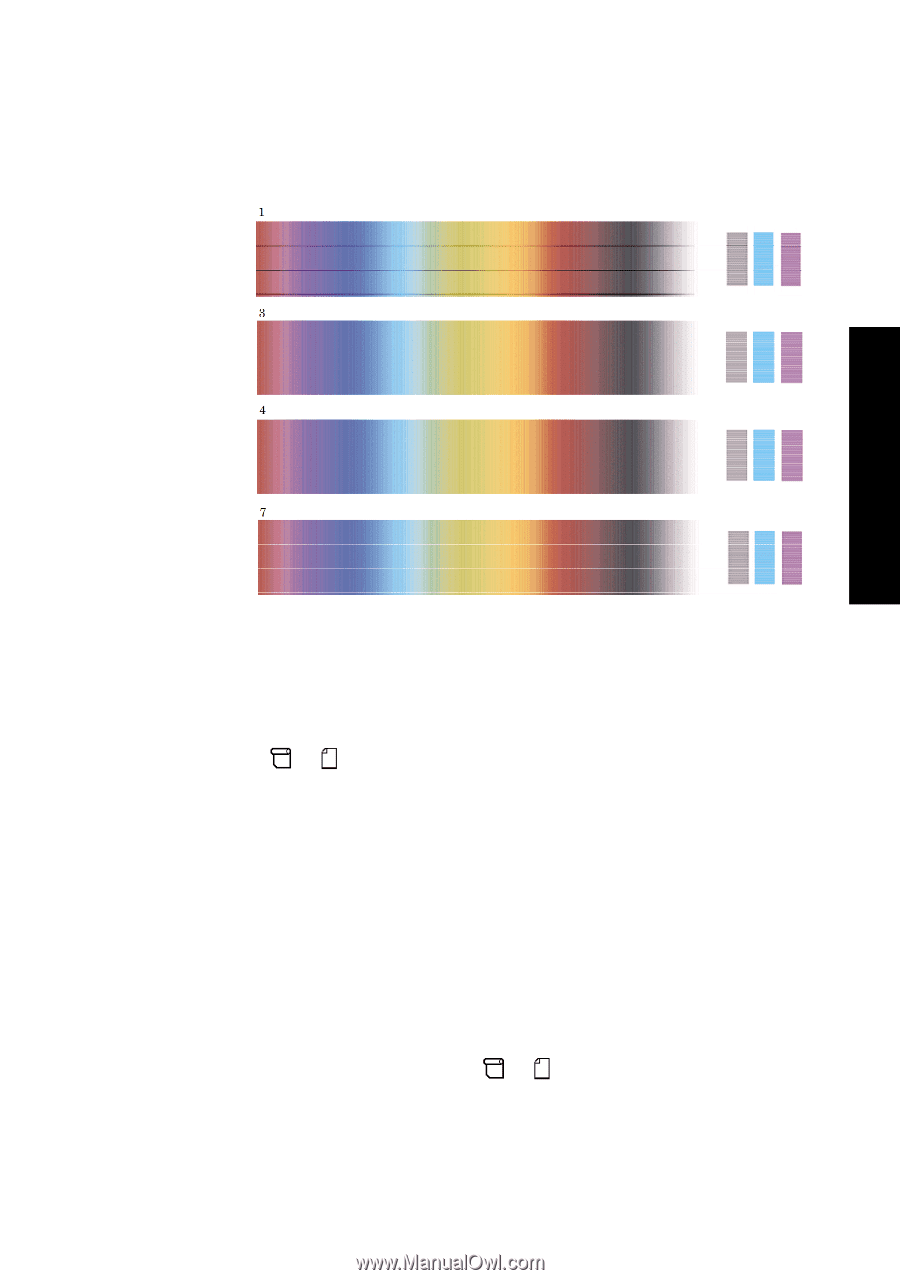
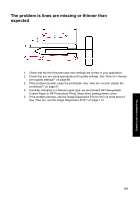
How do I perform paper advance calibration? • Where you have two patterns next to each other which do not show signs of banding, see below, use the patterns above and below these two to help you select. For example, if the pattern above the two equal ones contains less banding then choose the pattern just below it. • Where you have three patterns which show no signs of banding, select the middle pattern. - If you look at part B of the print, you will probably see that it appears darker in some patterns than in others. The best pattern is the one that appears lightest, most uniform, and least grainy. 7. Select the or icon, and then Paper advance calibration > Drawings/text or Images > Select Pattern. 8. Select the number of the pattern (1 to 7) that printed best. If you found it difficult to choose between two patterns e.g. patterns 3 and 4, then select "Between pattern 3 and 4" The calibration is complete. After calibration If you find that the paper advance calibration has reduced but not eliminated your print quality problem, you could try step 7 again and select a different number. If you are seeing light bands, try selecting a lower number than your original selection; if you are seeing dark bands, try a higher number. If you later want to cancel your calibration and restore the paper advance setting with which the printer left the factory, select the or icon, and then Paper advance calibration > Drawings/text or Images > Select Pattern > Factory Default. 125
-
 1
1 -
2
-
3
-
4
-
5
-
6
-
7
-
8
-
9
-
10
-
11
-
12
-
13
-
14
-
15
-
16
-
17
-
18
-
19
-
20
-
21
-
22
-
23
-
24
-
25
-
26
-
27
-
28
-
29
-
30
-
31
-
32
-
33
-
34
-
35
-
36
-
37
-
38
-
39
-
40
-
41
-
42
-
43
-
44
-
45
-
46
-
47
-
48
-
49
-
50
-
51
-
52
-
53
-
54
-
55
-
56
-
57
-
58
-
59
-
60
-
61
-
62
-
63
-
64
-
65
-
66
-
67
-
68
-
69
-
70
-
71
-
72
-
73
-
74
-
75
-
76
-
77
-
78
-
79
-
80
-
81
-
82
-
83
-
84
-
85
-
86
-
87
-
88
-
89
-
90
-
91
-
92
-
93
-
94
-
95
-
96
-
97
-
98
-
99
-
100
-
101
-
102
-
103
-
104
-
105
-
106
-
107
-
108
-
109
-
110
-
111
-
112
-
113
-
114
-
115
-
116
-
117
-
118
-
119
-
120
-
121
-
 122
122 -
 123
123 -
 124
124 -
 125
125 -
 126
126 -
 127
127 -
 128
128 -
 129
129 -
 130
130 -
 131
131 -
 132
132 -
133
-
134
-
135
-
136
-
137
-
138
-
139
-
140
-
141
-
142
-
143
-
144
-
145
-
146
-
147
-
148
-
149
-
150
-
151
-
152
-
153
-
154
-
155
-
156
-
157
-
158
-
159
-
160
-
161
-
162
-
163
-
164
-
165
-
166
-
167
-
168
-
169
-
170
-
171
-
172
-
173
-
174
-
175
-
176
-
177
-
178
 |
 |