HP Designjet 4000 HP Designjet 4000 Printer Series - Quick Reference Guide - Page 20
on the table. Bear in mind that you may need two people to handle it. - supplies
 |
View all HP Designjet 4000 manuals
Add to My Manuals
Save this manual to your list of manuals |
Page 20 highlights
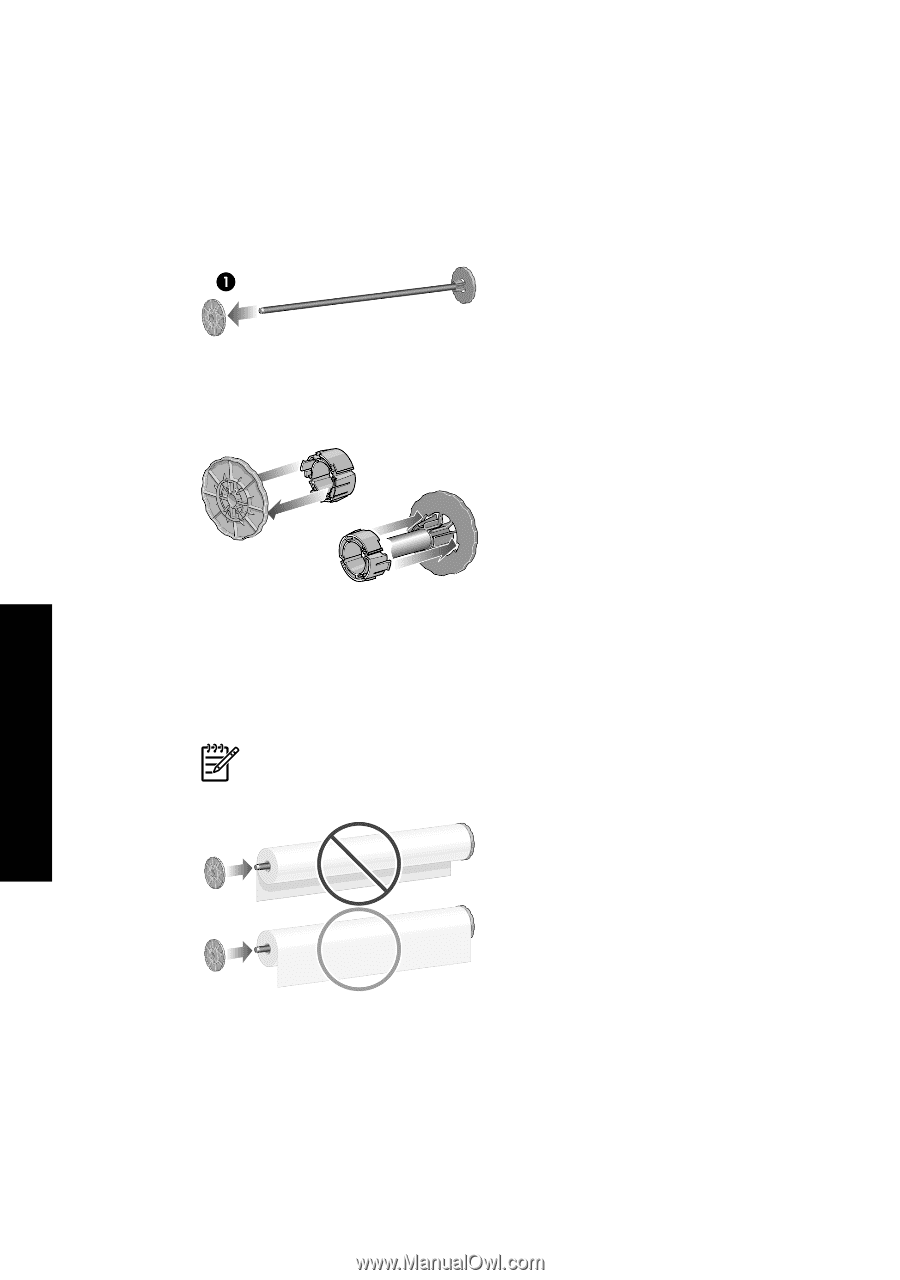
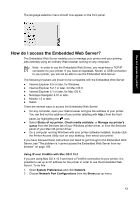
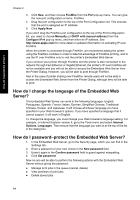
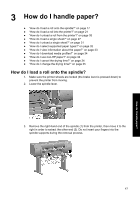
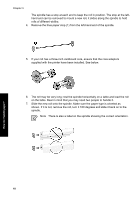
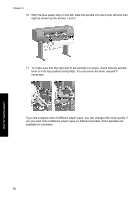
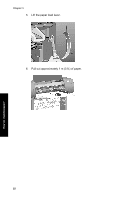
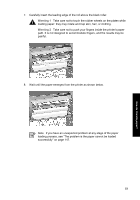
Chapter 3 The spindle has a stop at each end to keep the roll in position. The stop at the lefthand end can be removed to mount a new roll, it slides along the spindle to hold rolls of different widths. 4. Remove the blue paper stop (1) from the left-hand end of the spindle. 5. If your roll has a three-inch cardboard core, ensure that the core adaptors supplied with the printer have been installed. See below: 6. The roll may be very long; rest the spindle horizontally on a table and load the roll on the table. Bear in mind that you may need two people to handle it. 7. Slide the new roll onto the spindle. Make sure the paper type is oriented as shown. If it is not, remove the roll, turn it 180 degrees and slide it back on to the spindle. Note There is also a label on the spindle showing the correct orientation. 18 How do I handle paper?
-
 1
1 -
2
-
3
-
4
-
5
-
6
-
7
-
8
-
9
-
10
-
11
-
12
-
13
-
14
-
 15
15 -
 16
16 -
 17
17 -
 18
18 -
 19
19 -
 20
20 -
 21
21 -
 22
22 -
 23
23 -
 24
24 -
 25
25 -
26
-
27
-
28
-
29
-
30
-
31
-
32
-
33
-
34
-
35
-
36
-
37
-
38
-
39
-
40
-
41
-
42
-
43
-
44
-
45
-
46
-
47
-
48
-
49
-
50
-
51
-
52
-
53
-
54
-
55
-
56
-
57
-
58
-
59
-
60
-
61
-
62
-
63
-
64
-
65
-
66
-
67
-
68
-
69
-
70
-
71
-
72
-
73
-
74
-
75
-
76
-
77
-
78
-
79
-
80
-
81
-
82
-
83
-
84
-
85
-
86
-
87
-
88
-
89
-
90
-
91
-
92
-
93
-
94
-
95
-
96
-
97
-
98
-
99
-
100
-
101
-
102
-
103
-
104
-
105
-
106
-
107
-
108
-
109
-
110
-
111
-
112
-
113
-
114
-
115
-
116
-
117
-
118
-
119
-
120
-
121
-
122
-
123
-
124
-
125
-
126
-
127
-
128
-
129
-
130
-
131
-
132
-
133
-
134
-
135
-
136
-
137
-
138
-
139
-
140
-
141
-
142
-
143
-
144
-
145
-
146
-
147
-
148
-
149
-
150
-
151
-
152
-
153
-
154
-
155
-
156
-
157
-
158
-
159
-
160
-
161
-
162
-
163
-
164
-
165
-
166
-
167
-
168
-
169
-
170
-
171
-
172
-
173
-
174
-
175
-
176
-
177
-
178
 |
 |