HP Designjet 4000 HP Designjet 4000 Printer Series - Quick Reference Guide - Page 90
Source Space, Profile, Intent, Driver settings, Print, Quality
 |
View all HP Designjet 4000 manuals
Add to My Manuals
Save this manual to your list of manuals |
Page 90 highlights
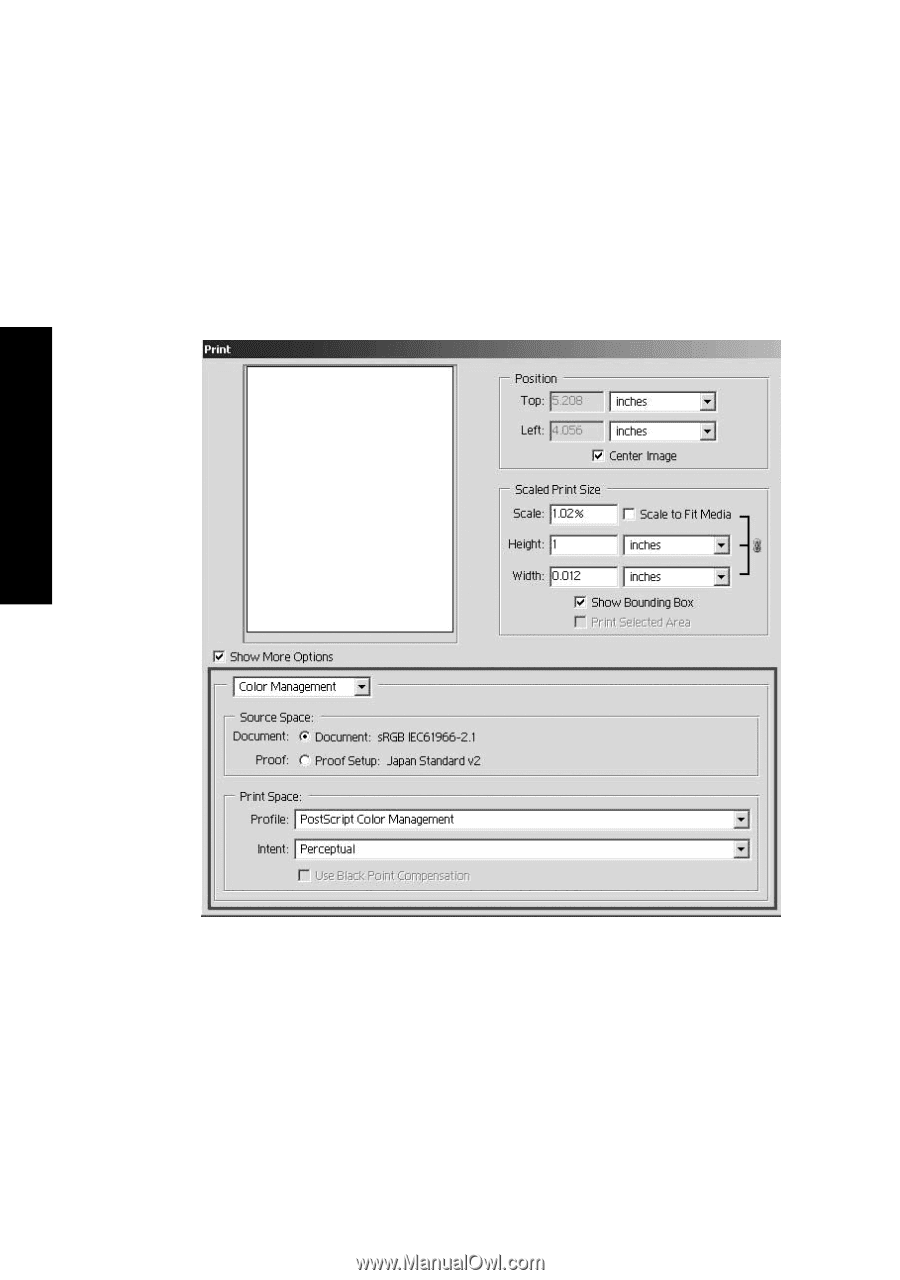
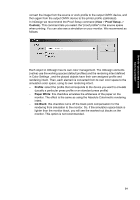
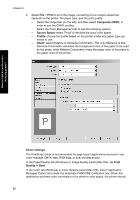
How do I get accurate colors from my printer? Chapter 6 4. When you are ready to print the image, open the Print with Preview window from the File menu. In the Color Management tab you can select: - Source Space: 'Document' (automatically assigned for you). This is the color space in which you have been working while editing the image. - Profile: select PostScript Color Management. With this option, the application tells the driver which source profile and rendering intent should be used for the conversion to the print space. In this case the driver will use the 'Document' profile and the rendering intent selected below. The driver's Input Profile and Rendering Intent settings are overridden. - Intent: see "How do I set the rendering intent?" on page 78. Driver settings The application's PostScript Color Management option will override the color settings of the driver (Input Profile and Rendering Intent). In this case, the driver will use the application's "Document" profile and selected rendering intent. Then, we have only to select in the driver: ● In the Paper/Quality tab (Windows) or Image Quality panel (Mac OS), set Print Quality to Best. ● In the Color tab (Windows) or Color Options panel (Mac OS), check the Automatic PANTONE Calibration box. 88
-
 1
1 -
2
-
3
-
4
-
5
-
6
-
7
-
8
-
9
-
10
-
11
-
12
-
13
-
14
-
15
-
16
-
17
-
18
-
19
-
20
-
21
-
22
-
23
-
24
-
25
-
26
-
27
-
28
-
29
-
30
-
31
-
32
-
33
-
34
-
35
-
36
-
37
-
38
-
39
-
40
-
41
-
42
-
43
-
44
-
45
-
46
-
47
-
48
-
49
-
50
-
51
-
52
-
53
-
54
-
55
-
56
-
57
-
58
-
59
-
60
-
61
-
62
-
63
-
64
-
65
-
66
-
67
-
68
-
69
-
70
-
71
-
72
-
73
-
74
-
75
-
76
-
77
-
78
-
79
-
80
-
81
-
82
-
83
-
84
-
 85
85 -
 86
86 -
 87
87 -
 88
88 -
 89
89 -
 90
90 -
 91
91 -
 92
92 -
 93
93 -
 94
94 -
 95
95 -
96
-
97
-
98
-
99
-
100
-
101
-
102
-
103
-
104
-
105
-
106
-
107
-
108
-
109
-
110
-
111
-
112
-
113
-
114
-
115
-
116
-
117
-
118
-
119
-
120
-
121
-
122
-
123
-
124
-
125
-
126
-
127
-
128
-
129
-
130
-
131
-
132
-
133
-
134
-
135
-
136
-
137
-
138
-
139
-
140
-
141
-
142
-
143
-
144
-
145
-
146
-
147
-
148
-
149
-
150
-
151
-
152
-
153
-
154
-
155
-
156
-
157
-
158
-
159
-
160
-
161
-
162
-
163
-
164
-
165
-
166
-
167
-
168
-
169
-
170
-
171
-
172
-
173
-
174
-
175
-
176
-
177
-
178
 |
 |