Kyocera FS-9100DN FS-9100/9500 Operation Guide Rev-1.3 - Page 131
Using the Document Finisher (DF-75
 |
UPC - 632983001066
View all Kyocera FS-9100DN manuals
Add to My Manuals
Save this manual to your list of manuals |
Page 131 highlights
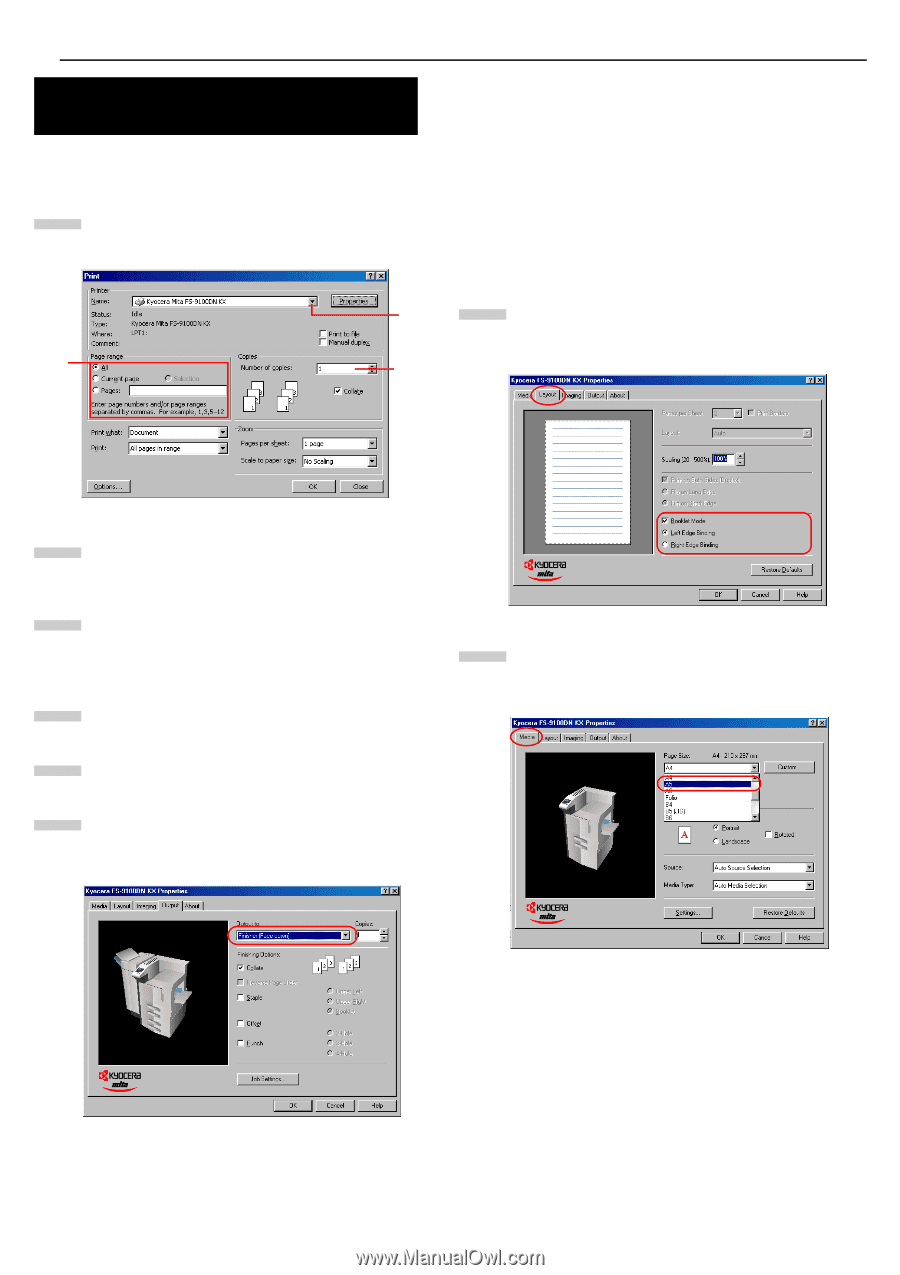
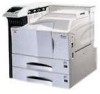
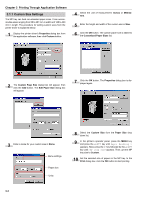
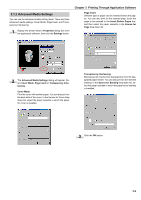
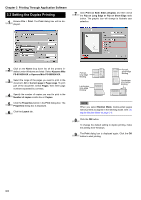
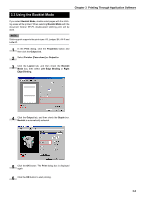
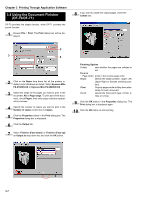
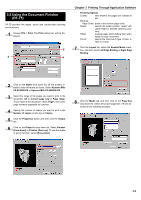
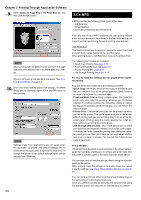
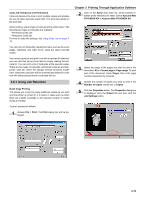
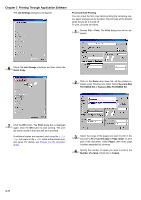
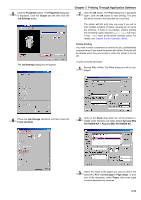
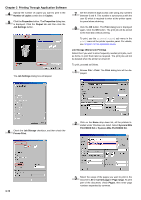
3.5 Using the Document Finisher (DF-75) DF-75 provides the staple, punch and double-sided stitching print functions. 1 Browse File > Print. The Print dialog box will be displayed. 2 3 4 Chapter 3 Printing Through Application Software Finishing Options Collate: sets whether the pages are collated or not. Reverse Page Order: prints in the reverse page order. Staple: selects the staple position: Upper Left, Upper Right or Booklet (stitching posi- tion). Offset: outputs pages while shifting them alter- nately for each document. Punch: selects the hole punch type: 2-Hole, 3- Hole or 4-Hole. 7 Click the Layout tab, check the Booklet Mode checkbox, and then select Left Edge Binding or Right Edge Binding. 2 Click on the Name drop down list, all the printers installed under Windows are listed. Select Kyocera Mita FS-9100DN KX or Kyocera Mita FS-9500DN KX. 3 Select the range of the pages you want to print in the document, All or Current page only in Page range. To print part of the document, check Pages, then enter page numbers separated by commas. 4 Specify the number of copies you want to print in the Number of copies combo box in Copies. 5 Click the Properties button and then click the Output tab. 6 Click on the Output to drop down list. Select Finisher [Face-down] or Finisher [Face-up]. To use the staple or punch function, select [Face-down]. 8 Click the Media tab, and then click on the Page Size drop down list. Select the proper page size. A5 was selected for the following example. 3-8
-
 1
1 -
2
-
3
-
4
-
5
-
6
-
7
-
8
-
9
-
10
-
11
-
12
-
13
-
14
-
15
-
16
-
17
-
18
-
19
-
20
-
21
-
22
-
23
-
24
-
25
-
26
-
27
-
28
-
29
-
30
-
31
-
32
-
33
-
34
-
35
-
36
-
37
-
38
-
39
-
40
-
41
-
42
-
43
-
44
-
45
-
46
-
47
-
48
-
49
-
50
-
51
-
52
-
53
-
54
-
55
-
56
-
57
-
58
-
59
-
60
-
61
-
62
-
63
-
64
-
65
-
66
-
67
-
68
-
69
-
70
-
71
-
72
-
73
-
74
-
75
-
76
-
77
-
78
-
79
-
80
-
81
-
82
-
83
-
84
-
85
-
86
-
87
-
88
-
89
-
90
-
91
-
92
-
93
-
94
-
95
-
96
-
97
-
98
-
99
-
100
-
101
-
102
-
103
-
104
-
105
-
106
-
107
-
108
-
109
-
110
-
111
-
112
-
113
-
114
-
115
-
116
-
117
-
118
-
119
-
120
-
121
-
122
-
123
-
124
-
125
-
 126
126 -
 127
127 -
 128
128 -
 129
129 -
 130
130 -
 131
131 -
 132
132 -
 133
133 -
 134
134 -
 135
135 -
 136
136 -
137
-
138
-
139
-
140
-
141
-
142
-
143
 |
 |