Kyocera FS-9100DN FS-9100/9500 Operation Guide Rev-1.3 - Page 48
Hard Disk, >Read Data, DataH001, ENTER, Writing Data
 |
UPC - 632983001066
View all Kyocera FS-9100DN manuals
Add to My Manuals
Save this manual to your list of manuals |
Page 48 highlights
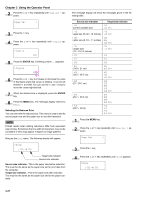
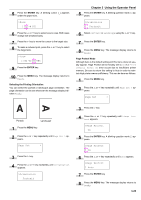
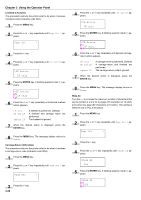
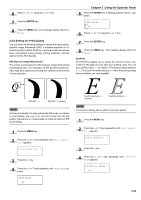
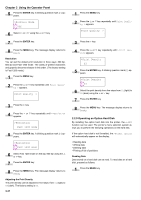
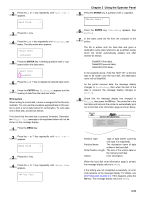
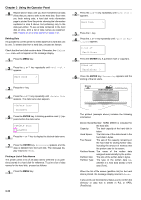
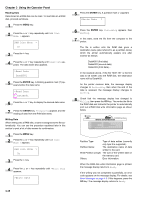
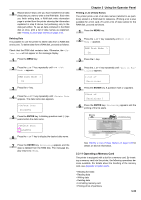
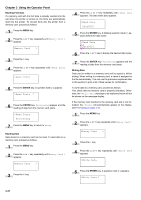
2 Press the 3 or 4 key repeatedly until Hard Disk > appears. Hard Disk > 3 Press the 2 key. 4 Press the 3 or 4 key repeatedly until >Read Data appears. The data name also appears. >Read Data DataH001 5 Press the ENTER key. A blinking question mark (?) appears before the data name. >Read Data ?DataH001 6 Press the 3 or 4 key to display the desired data name. 7 Press the ENTER key. Processing appears and the reading of data from the hard disk starts. Writing Data When writing to a hard disk, a name is assigned to the file automatically. You can use the procedure explained later in this section to print a list of data names for confirmation. To write data onto a hard disk, proceed as follows. First check that the hard disk is properly formatted. Otherwise, the >Write Data message to be explained below will not be shown on the message display. 1 Press the MENU key. 2 Press the 3 or 4 key repeatedly until Hard Disk > appears. Hard Disk > 3 Press the 2 key. 4 Press the 3 or 4 key repeatedly until >Write Data appears. >Write Data Chapter 3 Using the Operator Panel 5 Press the ENTER key. A question mark (?) appears. >Write Data ? 6 Press the ENTER key. Processing appears, then Waiting. 7 In this state, send the file from the computer to the printer. The file is written onto the hard disk and given a destination name (also referred to as a partition name) which the printer automatically assigns one after another as follows: DataH001 (first data), DataH002 (second data), DataH003 (third data)... In the example above, if the file TEST.TXT is the first data to be written onto the hard disk, the destination name will be DataH001. As the printer receives data, the message display changes to Processing, then when the end of the data is received, the message display changes to Waiting. 8 Check that the message display has changed to Waiting, then press the GO key. This writes file to the hard disk and instructs the printer to automatically print out a hard disk write information page as shown below. FS-9500DN Page Printer WRITE INFORMATION Partition Type: Type of data written (currently only type 2 is supported). Partition Name: The destination name of data written to the hard disk. Write Partition Length: The size of the written data on the memory hard disk. Others: Error information. When the hard disk write information page is printed, the message display returns to Ready. If the writing was not completed successfully, an error code appears on the message display. For details, see Error Messages on page 4-6. If this happens, press the GO key. The message display returns to Ready. 3-32
-
 1
1 -
2
-
3
-
4
-
5
-
6
-
7
-
8
-
9
-
10
-
11
-
12
-
13
-
14
-
15
-
16
-
17
-
18
-
19
-
20
-
21
-
22
-
23
-
24
-
25
-
26
-
27
-
28
-
29
-
30
-
31
-
32
-
33
-
34
-
35
-
36
-
37
-
38
-
39
-
40
-
41
-
42
-
 43
43 -
 44
44 -
 45
45 -
 46
46 -
 47
47 -
 48
48 -
 49
49 -
 50
50 -
 51
51 -
 52
52 -
 53
53 -
54
-
55
-
56
-
57
-
58
-
59
-
60
-
61
-
62
-
63
-
64
-
65
-
66
-
67
-
68
-
69
-
70
-
71
-
72
-
73
-
74
-
75
-
76
-
77
-
78
-
79
-
80
-
81
-
82
-
83
-
84
-
85
-
86
-
87
-
88
-
89
-
90
-
91
-
92
-
93
-
94
-
95
-
96
-
97
-
98
-
99
-
100
-
101
-
102
-
103
-
104
-
105
-
106
-
107
-
108
-
109
-
110
-
111
-
112
-
113
-
114
-
115
-
116
-
117
-
118
-
119
-
120
-
121
-
122
-
123
-
124
-
125
-
126
-
127
-
128
-
129
-
130
-
131
-
132
-
133
-
134
-
135
-
136
-
137
-
138
-
139
-
140
-
141
-
142
-
143
 |
 |
