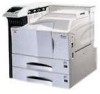
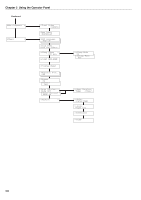
Kyocera FS-9100DN FS-9100/9500 Operation Guide Rev-1.3 - Page 30
>Private/Stored, Arlen, >Arlen, Agenda, >Agenda, Copies, Delete, e-MPS, Harold, ENTER - driver download
 |
UPC - 632983001066
View all Kyocera FS-9100DN manuals
Add to My Manuals
Save this manual to your list of manuals |
Page 30 highlights
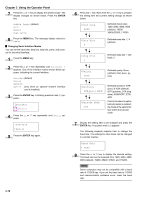
6 Press the 3 or 4 key to display the desired user name (Arlen, in this example). >Private/Stored ?Arlen 7 Press the ENTER key. The user name and the job name (Agenda, in this example) entered in the printer driver appear with a blinking question mark (?). >Arlen ?Agenda 8 Press the 3 or 4 key to display the desired job title. 9 Press the ENTER key. The ID input line appears. Enter the four-digit access code entered in the printer driver and press the ENTER key. To enter the ID, Press the 1 or 2 key to move the cursor to the number to be changed and then enter the correct number by pressing the 3 or 4 key. >Agenda ID 0000 10 You can set the number of copies to be printed. To increase the copy count, press the 3 key; to decrease the copy count, press the 4 key. >Agenda Copies 001 11 Press the ENTER key to finalize the copy count. The printer prints the specified number of copies for the job. Q Deleting a Private Job 1 Follow steps 1 through 8 in the above section. 2 When the title of the job to be printed is displayed (Agenda, in this example), press the ENTER key. Enter the four-digit access code entered in the printer driver and press the ENTER key. >Agenda Copies 001 3 Press the 4 key repeatedly until Delete appears for the number of copies. >Agenda Delete Chapter 3 Using the Operator Panel 4 Press the ENTER key. The private job is deleted from the hard disk. Storing a Print Job You can download a job to the hard disk without printing it. This allows you to store print jobs that are frequently needed such as fax cover pages, check lists, and order forms, for printing at any later time using the operator panel. The print jobs are not deleted even when the printer is turned off. Q Releasing a Stored Job To print a stored job through the operator panel: 1 Press the MENU key. 2 Press the 3 or 4 key repeatedly until e-MPS > appears. e-MPS > 3 Press the 2 key. 4 Press the 3 or 4 key repeatedly until >Private/ Stored appears. The name entered for User Name in the printer driver (Harold, in this example) also appears. >Private/Stored Harold 5 Press the ENTER key. A blinking question mark (?) before a user name appears. >Private/Stored ?Harold 6 Press the 3 or 4 key to display the desired user name (Arlen, in this example). >Private/Stored ?Arlen 7 Press the ENTER key. The user name and the job name entered in the printer driver (Agenda, in this example) appear with a blinking question mark (?) before the letter. >Arlen ?Agenda 8 Press the 3 or 4 key to display the desired job title. 3-14
-
 1
1 -
2
-
3
-
4
-
5
-
6
-
7
-
8
-
9
-
10
-
11
-
12
-
13
-
14
-
15
-
16
-
17
-
18
-
19
-
20
-
21
-
22
-
23
-
24
-
 25
25 -
 26
26 -
 27
27 -
 28
28 -
 29
29 -
 30
30 -
 31
31 -
 32
32 -
 33
33 -
 34
34 -
 35
35 -
36
-
37
-
38
-
39
-
40
-
41
-
42
-
43
-
44
-
45
-
46
-
47
-
48
-
49
-
50
-
51
-
52
-
53
-
54
-
55
-
56
-
57
-
58
-
59
-
60
-
61
-
62
-
63
-
64
-
65
-
66
-
67
-
68
-
69
-
70
-
71
-
72
-
73
-
74
-
75
-
76
-
77
-
78
-
79
-
80
-
81
-
82
-
83
-
84
-
85
-
86
-
87
-
88
-
89
-
90
-
91
-
92
-
93
-
94
-
95
-
96
-
97
-
98
-
99
-
100
-
101
-
102
-
103
-
104
-
105
-
106
-
107
-
108
-
109
-
110
-
111
-
112
-
113
-
114
-
115
-
116
-
117
-
118
-
119
-
120
-
121
-
122
-
123
-
124
-
125
-
126
-
127
-
128
-
129
-
130
-
131
-
132
-
133
-
134
-
135
-
136
-
137
-
138
-
139
-
140
-
141
-
142
-
143
 |
 |