Kyocera FS-9100DN FS-9100/9500 Operation Guide Rev-1.3 - Page 141
Using Code Job, KM-NET Printer Disk Manager
 |
UPC - 632983001066
View all Kyocera FS-9100DN manuals
Add to My Manuals
Save this manual to your list of manuals |
Page 141 highlights
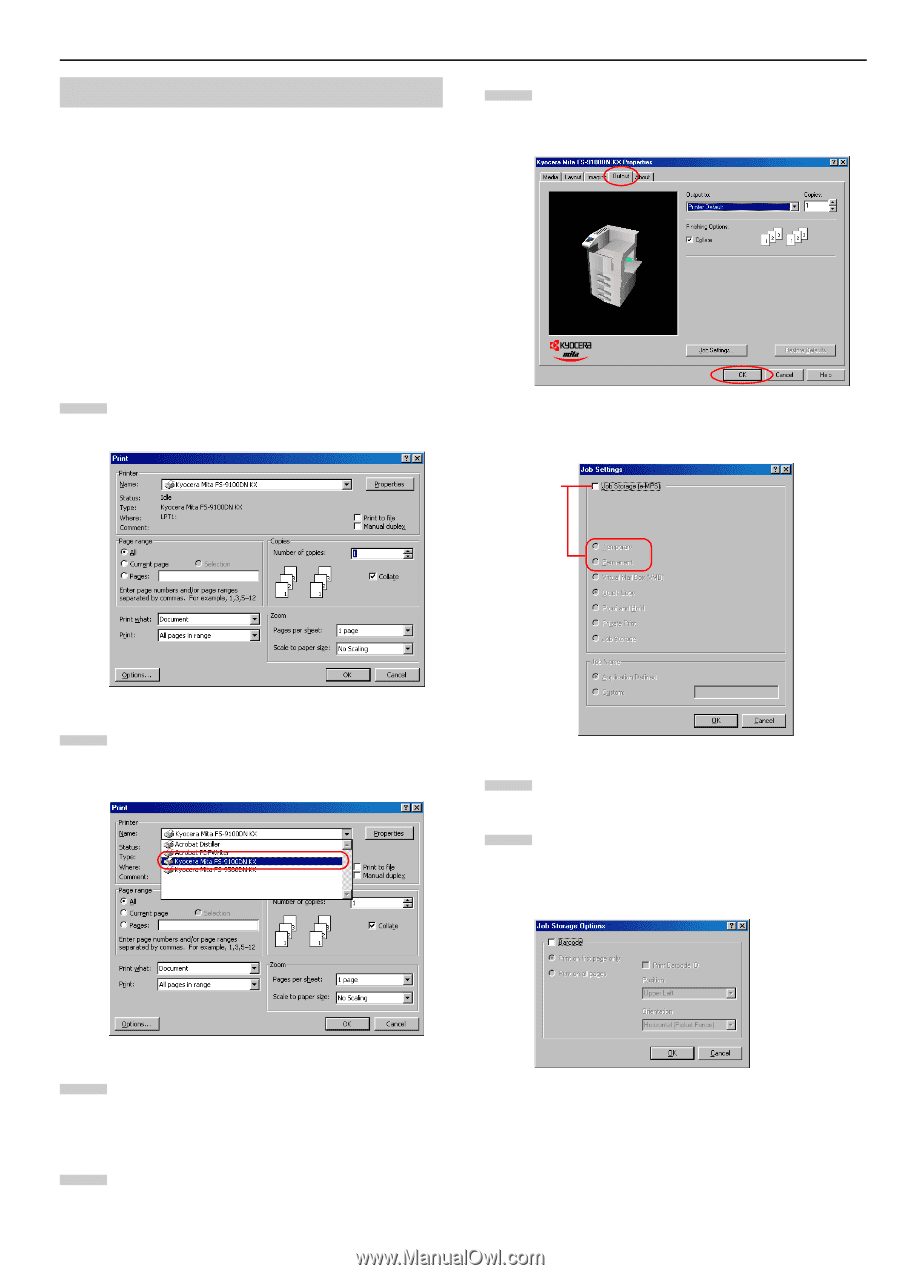
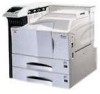
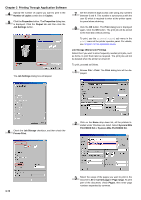
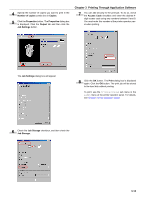
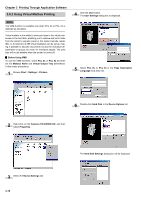
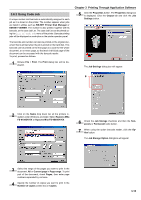
3.6.3 Using Code Job A unique number and barcode is automatically assigned to each job as it is stored on the printer. The number appears when jobs are listed in utilities such as KM-NET Printer Disk Manager or KM-NET VIEWER. The number is also printed, together with its barcode, on the code Job List. The code Job List can be printed using the list of Code Job menu of the printer. Barcode printing jobs will be displayed as code jobs on the printer operator panel. The barcode and number can also be printed on the original document that is printed when the job is stored on the hard disk. This barcode can be printed on the first page as a code for the whole document, or on every page, so that each individual page of the document can be accessed with the barcode reader. To print, proceed as follows. 1 Browse File > Print. The Print dialog box will be displayed. Chapter 3 Printing Through Application Software 5 Click the Properties button. The Properties dialog box is displayed. Click the Output tab and click the Job Settings button. The Job Settings dialog box will appear. 6 2 Click on the Name drop down list, all the printers installed under Windows are listed. Select Kyocera Mita FS-9100DN KX or Kyocera Mita FS-9500DN KX. 6 Check the Job Storage checkbox and then the Temporary or Permanent radio button. 7 When using the option barcode reader, click the Option button. The Job Storage Option dialogbox will appear 3 Select the range of the pages you want to print in the document, All or Current page in Page range. To print part of the document, check Pages, then enter page numbers separated by commas. 4 Specify the number of copies you want to print in the Number of copies combo box in Copies. 3-18
-
 1
1 -
2
-
3
-
4
-
5
-
6
-
7
-
8
-
9
-
10
-
11
-
12
-
13
-
14
-
15
-
16
-
17
-
18
-
19
-
20
-
21
-
22
-
23
-
24
-
25
-
26
-
27
-
28
-
29
-
30
-
31
-
32
-
33
-
34
-
35
-
36
-
37
-
38
-
39
-
40
-
41
-
42
-
43
-
44
-
45
-
46
-
47
-
48
-
49
-
50
-
51
-
52
-
53
-
54
-
55
-
56
-
57
-
58
-
59
-
60
-
61
-
62
-
63
-
64
-
65
-
66
-
67
-
68
-
69
-
70
-
71
-
72
-
73
-
74
-
75
-
76
-
77
-
78
-
79
-
80
-
81
-
82
-
83
-
84
-
85
-
86
-
87
-
88
-
89
-
90
-
91
-
92
-
93
-
94
-
95
-
96
-
97
-
98
-
99
-
100
-
101
-
102
-
103
-
104
-
105
-
106
-
107
-
108
-
109
-
110
-
111
-
112
-
113
-
114
-
115
-
116
-
117
-
118
-
119
-
120
-
121
-
122
-
123
-
124
-
125
-
126
-
127
-
128
-
129
-
130
-
131
-
132
-
133
-
134
-
135
-
 136
136 -
 137
137 -
 138
138 -
 139
139 -
 140
140 -
 141
141 -
 142
142 -
 143
143
 |
 |