Kyocera KM-C3232E Fax System (N) Operation Guide Rev-1.2 - Page 149
> Modifying registered information, Deleting destinations, Adding destinations
 |
View all Kyocera KM-C3232E manuals
Add to My Manuals
Save this manual to your list of manuals |
Page 149 highlights
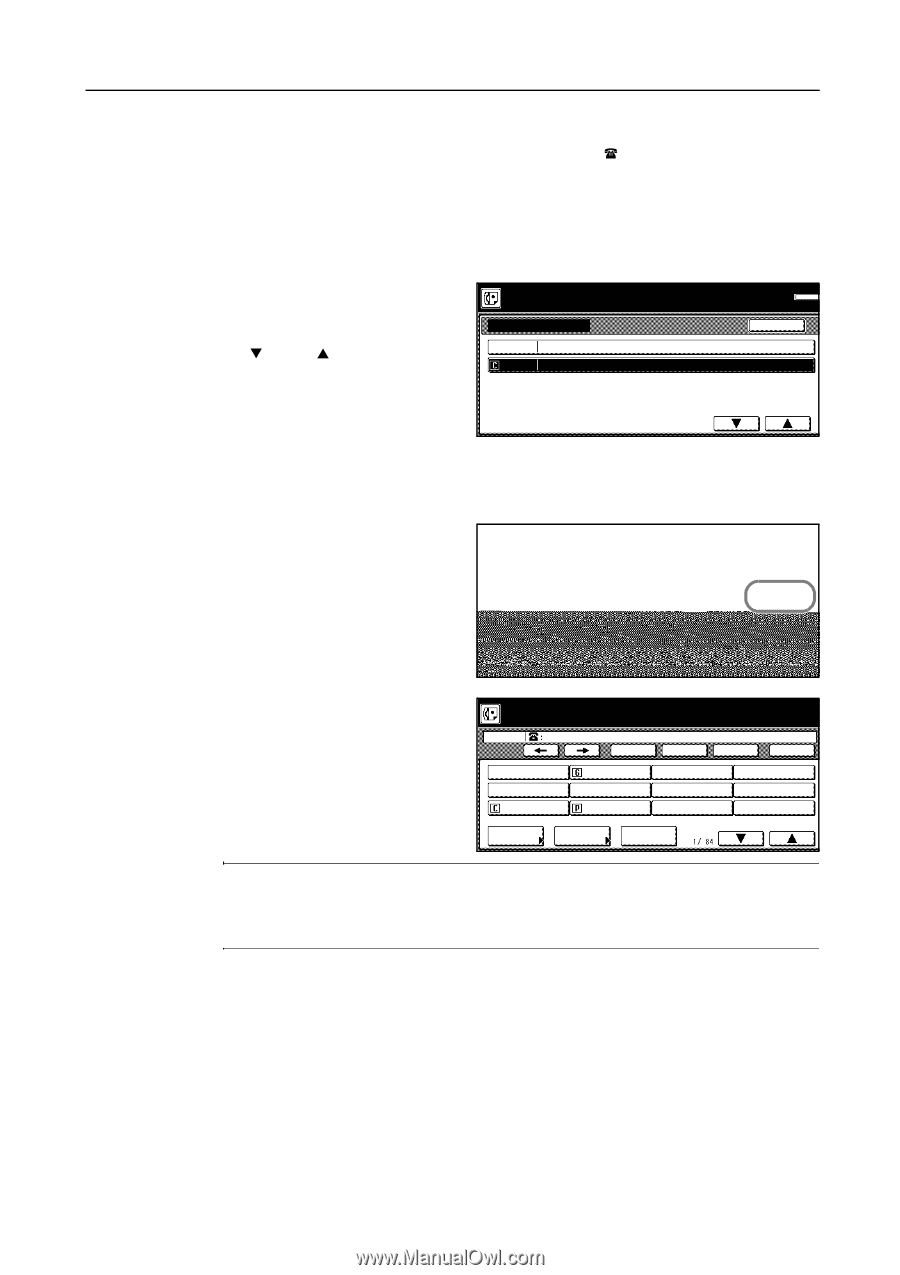
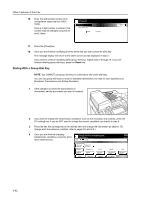
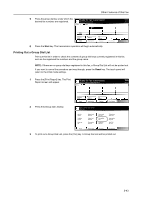
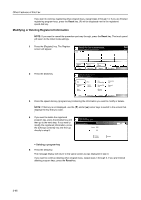
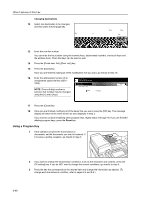
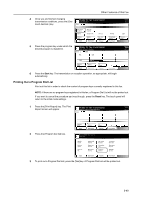
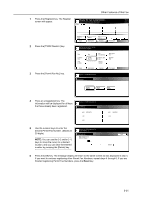
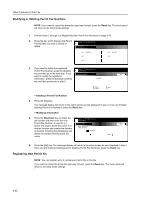
Other Features of this Fax > Modifying registered information 6 If you want to change the destination fax number(s), press the [ ] key and go to the next step. If you want to modify the abbreviated number (the displayed number of the speed-dial key under which the program key is registered), press the [Abbr. #] key and then go directly to step 16. If you want to modify any other basic information, press the key that corresponds to that information and refer to Registering New Program Keys on page 5-44. Deleting destinations 7 Press the destination that you want to delete until it is highlighted. Multiple Register the dial. Program Dial(Send) 0006. selections are possible. If the destination Add/change/del des. you want to delete is not displayed, use the [T] and/or [S] cursor keys to switch 0001. ABC 03. to the screen that displays the 0003. FREE + 1236546. destination that you want. Memory OCT-11 Back 1/1. 8 To delete the selected destination(s), press the [Delete] key and then the [Yes] key. Adding destinations 9 Press the [Add] key. dial. al(Send) 0006. el des. ABC 03. FREE + 1236546. 1/1. Memory usage: .0% OCT-11-2005 16:00 Back Close Add Change Delete 10 Enter the additional fax number(s). Register the dial. Program Dial(Send) 0006. Enter Destination. Dest 1 FREE + 123568_. Delete ABC CDE Pause Space Subadd. FREE Address book GDE Abbrev. Next destinat. NOTE: You can enter the fax number(s) using the numeric keys, one-touch keys and the address book. Chain dial keys can be used as well. If you want to enter multiple fax numbers with the numeric keys, press the [Next destinat.] ([Next dest.]) key after each fax number. 11 Once you are finished entering all of the fax numbers that you want, press the [Finish dest. Set] ([Dest. set]) key. 5-47
-
 1
1 -
2
-
3
-
4
-
5
-
6
-
7
-
8
-
9
-
10
-
11
-
12
-
13
-
14
-
15
-
16
-
17
-
18
-
19
-
20
-
21
-
22
-
23
-
24
-
25
-
26
-
27
-
28
-
29
-
30
-
31
-
32
-
33
-
34
-
35
-
36
-
37
-
38
-
39
-
40
-
41
-
42
-
43
-
44
-
45
-
46
-
47
-
48
-
49
-
50
-
51
-
52
-
53
-
54
-
55
-
56
-
57
-
58
-
59
-
60
-
61
-
62
-
63
-
64
-
65
-
66
-
67
-
68
-
69
-
70
-
71
-
72
-
73
-
74
-
75
-
76
-
77
-
78
-
79
-
80
-
81
-
82
-
83
-
84
-
85
-
86
-
87
-
88
-
89
-
90
-
91
-
92
-
93
-
94
-
95
-
96
-
97
-
98
-
99
-
100
-
101
-
102
-
103
-
104
-
105
-
106
-
107
-
108
-
109
-
110
-
111
-
112
-
113
-
114
-
115
-
116
-
117
-
118
-
119
-
120
-
121
-
122
-
123
-
124
-
125
-
126
-
127
-
128
-
129
-
130
-
131
-
132
-
133
-
134
-
135
-
136
-
137
-
138
-
139
-
140
-
141
-
142
-
143
-
 144
144 -
 145
145 -
 146
146 -
 147
147 -
 148
148 -
 149
149 -
 150
150 -
 151
151 -
 152
152 -
 153
153 -
 154
154 -
155
-
156
-
157
-
158
-
159
-
160
-
161
-
162
-
163
-
164
-
165
-
166
-
167
-
168
-
169
-
170
-
171
-
172
-
173
-
174
-
175
-
176
-
177
-
178
-
179
-
180
-
181
-
182
-
183
-
184
-
185
-
186
-
187
-
188
-
189
-
190
-
191
-
192
-
193
-
194
-
195
-
196
-
197
-
198
-
199
-
200
-
201
-
202
-
203
-
204
-
205
-
206
-
207
-
208
-
209
-
210
-
211
-
212
-
213
-
214
-
215
-
216
-
217
-
218
-
219
-
220
-
221
-
222
-
223
-
224
-
225
-
226
-
227
-
228
-
229
-
230
-
231
-
232
-
233
-
234
-
235
-
236
-
237
-
238
-
239
-
240
-
241
-
242
 |
 |