Kyocera KM-C3232E Fax System (N) Operation Guide Rev-1.2 - Page 158
Turning TX/RX Restriction ON/OFF, Deleting a Reject Fax Number, Reset, Modifying information
 |
View all Kyocera KM-C3232E manuals
Add to My Manuals
Save this manual to your list of manuals |
Page 158 highlights
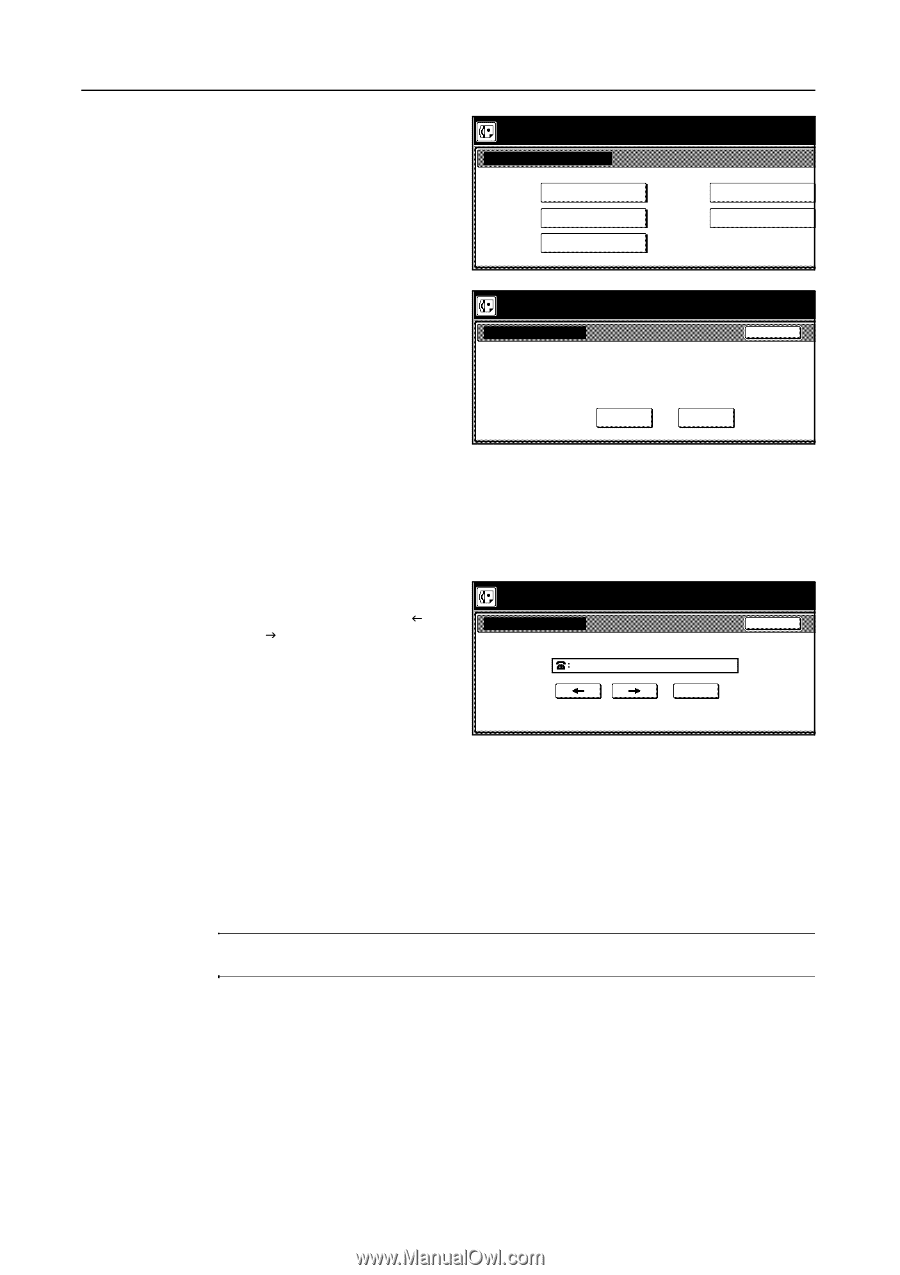
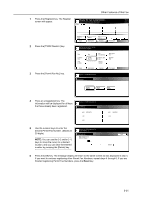
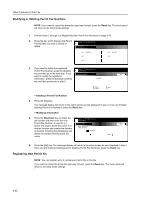
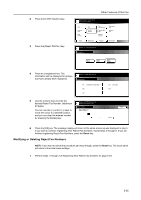
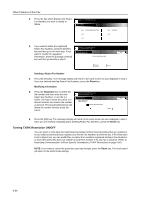
Other Features of this Fax 2 Press the key which displays the Reject Fax Number you want to modify or delete. Register in TX/RX Restriction list. Reject FAX No. #01 12345678901234567890. #02 #03 #04 06123456. #05 3 If you want to delete the registered Reject Fax Number, press the [Delete] Register in TX/RX Restriction list. Rejected FAX number 002. key and then go to the next step. If you Contents change/del. Back want to modify the registered information, press the [Change contents] .12345678901234567890 key and then go directly to step 5. Change contents Delete Deleting a Reject Fax Number 4 Press the [Yes] key. The message display will return to the same screen as was displayed in step 2. If you are finished deleting Reject Fax Numbers, press the Reset key. Modifying information 5 Press the Stop/Clear key to delete the old number and then enter the new Register in TX/RX Restriction list. Rejected FAX number 001. Reject Fax Number, or use the [I] Detail contents Back and/or [J] keys to move the cursor to a Enter using # key. desired location and reenter the number (MAX. 20 digits) as desired. Pressing the [Delete] key will .12345678901234567O8u9t0put delete the number directly above the Delete cursor. 6 Press the [OK] key. The message display will return to the same screen as was displayed in step 2. Once you are finished modifying and/or deleting Reject Fax Numbers, press the Reset key. Turning TX/RX Restriction ON/OFF You can select to only allow fax transmission/reception to/from those facsimiles that are registered in your address book and those registered as Permit Fax Numbers and Permit IDs. If RX Restriction is set to Reject List, you can prohibit fax reception from numbers registered as Reject Fax Numbers, or from other party who does not register its local FAX Number in its own fax in advance. (Refer to Restricting Communication To/From Specific Destinations (TX/RX Restriction) on page 5-50.) NOTE: If you want to cancel the procedure part way through, press the Reset key. The touch panel will return to the initial mode settings. 5-56
-
 1
1 -
2
-
3
-
4
-
5
-
6
-
7
-
8
-
9
-
10
-
11
-
12
-
13
-
14
-
15
-
16
-
17
-
18
-
19
-
20
-
21
-
22
-
23
-
24
-
25
-
26
-
27
-
28
-
29
-
30
-
31
-
32
-
33
-
34
-
35
-
36
-
37
-
38
-
39
-
40
-
41
-
42
-
43
-
44
-
45
-
46
-
47
-
48
-
49
-
50
-
51
-
52
-
53
-
54
-
55
-
56
-
57
-
58
-
59
-
60
-
61
-
62
-
63
-
64
-
65
-
66
-
67
-
68
-
69
-
70
-
71
-
72
-
73
-
74
-
75
-
76
-
77
-
78
-
79
-
80
-
81
-
82
-
83
-
84
-
85
-
86
-
87
-
88
-
89
-
90
-
91
-
92
-
93
-
94
-
95
-
96
-
97
-
98
-
99
-
100
-
101
-
102
-
103
-
104
-
105
-
106
-
107
-
108
-
109
-
110
-
111
-
112
-
113
-
114
-
115
-
116
-
117
-
118
-
119
-
120
-
121
-
122
-
123
-
124
-
125
-
126
-
127
-
128
-
129
-
130
-
131
-
132
-
133
-
134
-
135
-
136
-
137
-
138
-
139
-
140
-
141
-
142
-
143
-
144
-
145
-
146
-
147
-
148
-
149
-
150
-
151
-
152
-
 153
153 -
 154
154 -
 155
155 -
 156
156 -
 157
157 -
 158
158 -
 159
159 -
 160
160 -
 161
161 -
 162
162 -
 163
163 -
164
-
165
-
166
-
167
-
168
-
169
-
170
-
171
-
172
-
173
-
174
-
175
-
176
-
177
-
178
-
179
-
180
-
181
-
182
-
183
-
184
-
185
-
186
-
187
-
188
-
189
-
190
-
191
-
192
-
193
-
194
-
195
-
196
-
197
-
198
-
199
-
200
-
201
-
202
-
203
-
204
-
205
-
206
-
207
-
208
-
209
-
210
-
211
-
212
-
213
-
214
-
215
-
216
-
217
-
218
-
219
-
220
-
221
-
222
-
223
-
224
-
225
-
226
-
227
-
228
-
229
-
230
-
231
-
232
-
233
-
234
-
235
-
236
-
237
-
238
-
239
-
240
-
241
-
242
 |
 |