Kyocera KM-C3232E Fax System (N) Operation Guide Rev-1.2 - Page 215
> Registering the file name factory default setting: [RX] and [TX] - default admin password
 |
View all Kyocera KM-C3232E manuals
Add to My Manuals
Save this manual to your list of manuals |
Page 215 highlights
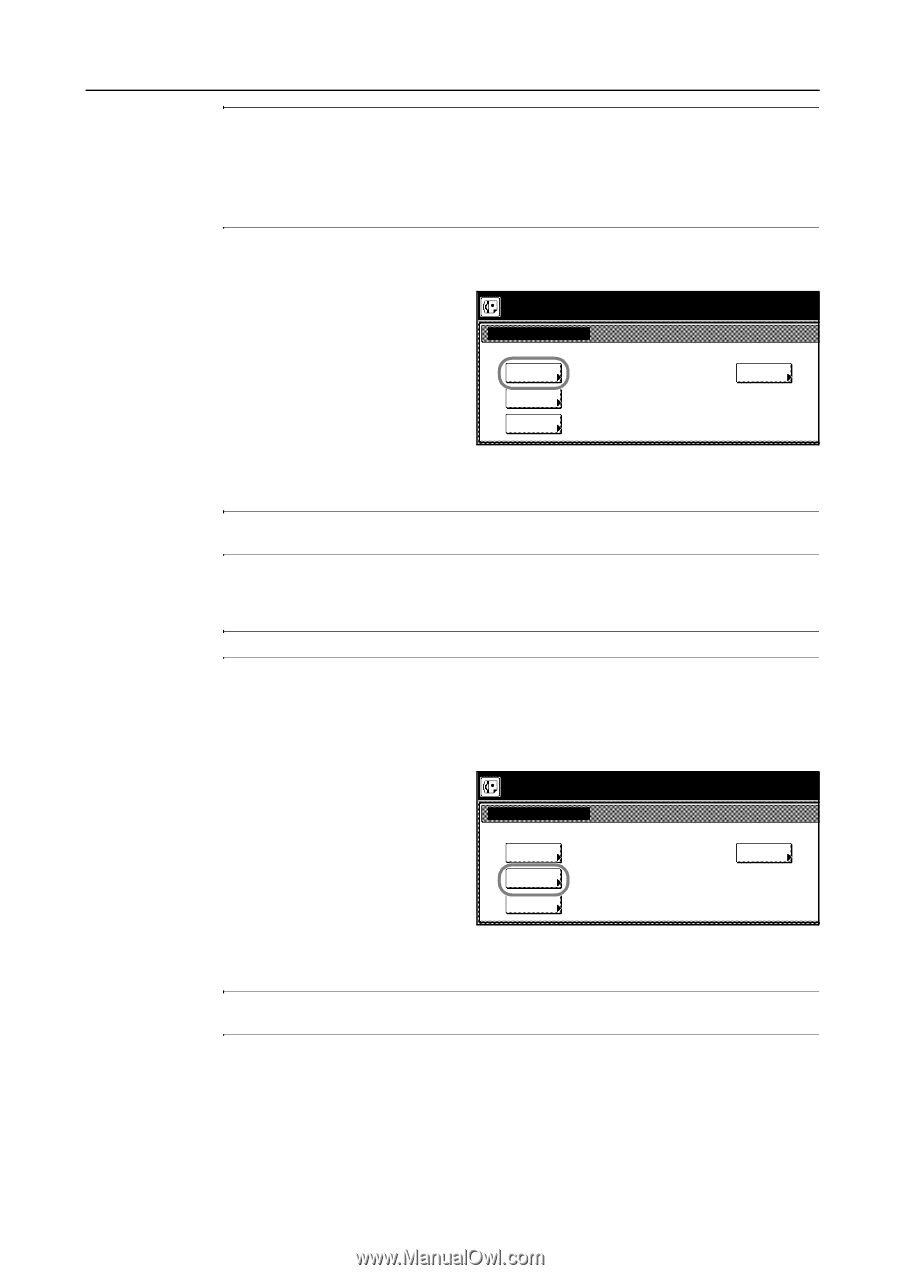
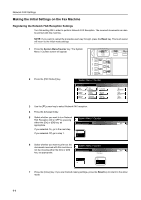
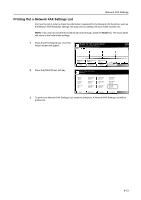
Network FAX Settings NOTE: If you want to register the file name, go to step 3. If you want to register the IP address or host name, go to step 7. If you want to register the administrator's e-mail address, the account name and password for SMTP authorization, go to step 10. If you want to register the save folder number, go to step 22. > Registering the file name (factory default setting: [RX] and [TX]) 3 Press the [File name] key. Register Network FAX. Regist'd contents cnf File name IP addr./ Host name Admin. E-mail ad. Receive: rx Transmit: tx Saving Folder No. Receive Transm 4 If you want to register the file name for received faxes, press the [NetworkFAX Rx.] ([NW-FAX RX]) key. If you want to register the file name for transmitted faxes, press the [Save Tx. original] key. NOTE: The procedure to register the name is the same for both received faxes and transmitted faxes. 5 Enter the desired name using the English alphabet, numerals or other available symbols. (Maximum 13 digits) NOTE: Refer to Entering Characters on page 2-15 when entering the file name. 6 Once you are finished entering the file name, press the [End] key. The message display will return to the same screen as was displayed in step 3. > Registering the IP address or host name 7 Press the [IP addr./Host name] key. Register Network FAX. Regist'd contents cnf File name IP addr./ Host name Admin. E-mail ad. Receive: rx Transmit: tx Saving Folder No. Receive Transm 8 Enter the IP address (numerals) or the host name (using the English alphabet or numerals). (Maximum 32 digits) NOTE: Refer to Entering Characters on page 2-15 when entering the IP address or host name. It is not possible to use the [Space] key when entering this information. 9 Once you are finished entering the IP address or host name, press the [End] key. The message display will return to the same screen as was displayed in step 3. 9-9
-
 1
1 -
2
-
3
-
4
-
5
-
6
-
7
-
8
-
9
-
10
-
11
-
12
-
13
-
14
-
15
-
16
-
17
-
18
-
19
-
20
-
21
-
22
-
23
-
24
-
25
-
26
-
27
-
28
-
29
-
30
-
31
-
32
-
33
-
34
-
35
-
36
-
37
-
38
-
39
-
40
-
41
-
42
-
43
-
44
-
45
-
46
-
47
-
48
-
49
-
50
-
51
-
52
-
53
-
54
-
55
-
56
-
57
-
58
-
59
-
60
-
61
-
62
-
63
-
64
-
65
-
66
-
67
-
68
-
69
-
70
-
71
-
72
-
73
-
74
-
75
-
76
-
77
-
78
-
79
-
80
-
81
-
82
-
83
-
84
-
85
-
86
-
87
-
88
-
89
-
90
-
91
-
92
-
93
-
94
-
95
-
96
-
97
-
98
-
99
-
100
-
101
-
102
-
103
-
104
-
105
-
106
-
107
-
108
-
109
-
110
-
111
-
112
-
113
-
114
-
115
-
116
-
117
-
118
-
119
-
120
-
121
-
122
-
123
-
124
-
125
-
126
-
127
-
128
-
129
-
130
-
131
-
132
-
133
-
134
-
135
-
136
-
137
-
138
-
139
-
140
-
141
-
142
-
143
-
144
-
145
-
146
-
147
-
148
-
149
-
150
-
151
-
152
-
153
-
154
-
155
-
156
-
157
-
158
-
159
-
160
-
161
-
162
-
163
-
164
-
165
-
166
-
167
-
168
-
169
-
170
-
171
-
172
-
173
-
174
-
175
-
176
-
177
-
178
-
179
-
180
-
181
-
182
-
183
-
184
-
185
-
186
-
187
-
188
-
189
-
190
-
191
-
192
-
193
-
194
-
195
-
196
-
197
-
198
-
199
-
200
-
201
-
202
-
203
-
204
-
205
-
206
-
207
-
208
-
209
-
 210
210 -
 211
211 -
 212
212 -
 213
213 -
 214
214 -
 215
215 -
 216
216 -
 217
217 -
 218
218 -
 219
219 -
 220
220 -
221
-
222
-
223
-
224
-
225
-
226
-
227
-
228
-
229
-
230
-
231
-
232
-
233
-
234
-
235
-
236
-
237
-
238
-
239
-
240
-
241
-
242
 |
 |