Sanyo VCC-HD5400 VCC-HD5400 Manual - Page 124
In [MENU BACKUP], click
 |
UPC - 086483075698
View all Sanyo VCC-HD5400 manuals
Add to My Manuals
Save this manual to your list of manuals |
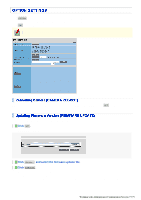
Page 124 highlights
Do not perform any operations on the screen or turn off the camera until the firmware update process is completed. While the firmware is being updated, all camera functions stop working temporarily. You cannot update the firmware while the camera is recording. In this case, an operation confirmation dialog box will open. You can restore all the settings you have configured to the factory default settings. In [NETWORK SETTINGS], select whether or not to restore the settings including the network settings and click SET . WITH: Includes the network settings. WITHOUT: Excludes the network settings. An operation confirmation dialog box opens. The settings for the preset positions and preset position names are not reset. You can save the settings you have configured using the backup function. In [MENU BACKUP], click SET . Then, select SAVE in a save confirmation dialog box and specify the backup destination file. All the settings on the NETWORK SETTINGS screen and the [DATE/TIME] setting on the CLOCK SETTINGS screen are not saved. You can restore the saved configuration settings of the camera from a backup file. 1 Click Browse... to specify a file you want to upload. 2 In [COPY RECORDING AREA SETTINGS], specify the range to restore and click SET . WITH: Includes the recording area settings. WITHOUT: Excludes the recording area settings. The backup file is uploaded to the camera to restore the saved configuration settings. When the upload process is completed, the camera system reboots. All the settings on the NETWORK SETTINGS screen and the [DATE/TIME] setting on the CLOCK SETTINGS screen are not restored. Working with Administrator Configuration Screens 78/79
-
 1
1 -
2
-
3
-
4
-
5
-
6
-
7
-
8
-
9
-
10
-
11
-
12
-
13
-
14
-
15
-
16
-
17
-
18
-
19
-
20
-
21
-
22
-
23
-
24
-
25
-
26
-
27
-
28
-
29
-
30
-
31
-
32
-
33
-
34
-
35
-
36
-
37
-
38
-
39
-
40
-
41
-
42
-
43
-
44
-
45
-
46
-
47
-
48
-
49
-
50
-
51
-
52
-
53
-
54
-
55
-
56
-
57
-
58
-
59
-
60
-
61
-
62
-
63
-
64
-
65
-
66
-
67
-
68
-
69
-
70
-
71
-
72
-
73
-
74
-
75
-
76
-
77
-
78
-
79
-
80
-
81
-
82
-
83
-
84
-
85
-
86
-
87
-
88
-
89
-
90
-
91
-
92
-
93
-
94
-
95
-
96
-
97
-
98
-
99
-
100
-
101
-
102
-
103
-
104
-
105
-
106
-
107
-
108
-
109
-
110
-
111
-
112
-
113
-
114
-
115
-
116
-
117
-
118
-
 119
119 -
 120
120 -
 121
121 -
 122
122 -
 123
123 -
 124
124 -
 125
125 -
 126
126 -
 127
127 -
 128
128 -
 129
129 -
130
-
131
-
132
-
133
-
134
-
135
-
136
-
137
-
138
-
139
-
140
-
141
-
142
-
143
-
144
-
145
 |
 |
