Sanyo VCC-HD5400 VCC-HD5400 Manual - Page 99
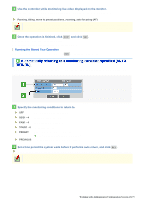
In [SENSITIVITY], select the detection sensitivity., In [FACE DETECTION], select ON to use
 |
UPC - 086483075698
View all Sanyo VCC-HD5400 manuals
Add to My Manuals
Save this manual to your list of manuals |
Page 99 highlights
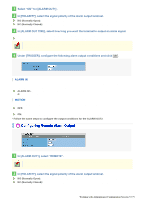
8 In [SENSITIVITY], select the detection sensitivity. You can adjust the detection sensitivity to prevent unwanted detection. The higher the value, the lower the sensitivity. 1 (HIGH) to 9 (LOW) 9 In [FACE DETECTION], select "ON" to use the face detection function. The face detection function judges whether or not the subject includes any intruder by detecting his/her face. If a human face is detected in the detection area when motion is detected, the motion sensor will send a motion alarm. A human face may not be detected if obscured by a hat, sunglasses, or mask, or if the monitoring angle is not appropriate. Checking how the motion sensor works Click SET to determine the configured contents, and then click TEST ( 2 ). If any motion is detected in a grid cell in the detection area, that cell will be shown in red. Correct the detection conditions as required. While the sensor is working, this button is labeled as END . To finish checking the motion sensor, click the button. 10 Click SET and then BACK . The settings are saved and you return to the ALARM SETTINGS screen. You can set lines or areas that represent limit lines or restricted areas on the screen and detect motion that crosses those lines or moves in and out of those areas. You can configure this function for the screens corresponding to the preset positions 1 through 8 only. This function is available only for streams for which you set [CODEC] to "H.264" on the VIDEO & AUDIO SETTINGS screen. Working with Administrator Configuration Screens 53/79
-
 1
1 -
2
-
3
-
4
-
5
-
6
-
7
-
8
-
9
-
10
-
11
-
12
-
13
-
14
-
15
-
16
-
17
-
18
-
19
-
20
-
21
-
22
-
23
-
24
-
25
-
26
-
27
-
28
-
29
-
30
-
31
-
32
-
33
-
34
-
35
-
36
-
37
-
38
-
39
-
40
-
41
-
42
-
43
-
44
-
45
-
46
-
47
-
48
-
49
-
50
-
51
-
52
-
53
-
54
-
55
-
56
-
57
-
58
-
59
-
60
-
61
-
62
-
63
-
64
-
65
-
66
-
67
-
68
-
69
-
70
-
71
-
72
-
73
-
74
-
75
-
76
-
77
-
78
-
79
-
80
-
81
-
82
-
83
-
84
-
85
-
86
-
87
-
88
-
89
-
90
-
91
-
92
-
93
-
 94
94 -
 95
95 -
 96
96 -
 97
97 -
 98
98 -
 99
99 -
 100
100 -
 101
101 -
 102
102 -
 103
103 -
 104
104 -
105
-
106
-
107
-
108
-
109
-
110
-
111
-
112
-
113
-
114
-
115
-
116
-
117
-
118
-
119
-
120
-
121
-
122
-
123
-
124
-
125
-
126
-
127
-
128
-
129
-
130
-
131
-
132
-
133
-
134
-
135
-
136
-
137
-
138
-
139
-
140
-
141
-
142
-
143
-
144
-
145
 |
 |
