Sanyo VCC-HD5400 VCC-HD5400 Manual - Page 89
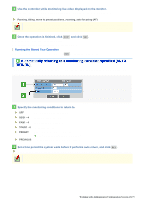
Checking how the motion sensor works
 |
UPC - 086483075698
View all Sanyo VCC-HD5400 manuals
Add to My Manuals
Save this manual to your list of manuals |
Page 89 highlights
Corrects automatically blurring images from a camera installed on a pillar, pole, wall or the like that is subject to shake. Select "ON" and specify a correction level for the sway of the camera in [LEVEL]. Correction may not work for greater or smaller shakes than a given range of magnitude. The sway correction function is temporarily disabled in the following conditions: The camera is panning or tilting. Switching between the color and the black-and-white modes is taking place by means of the DAY/NIGHT function. When the motion sensor detects any motion, the camera will follow the moving object. Select "ON" and, in [SENSITIVITY], specify a detection sensitivity value for the sensor. The higher the value, the lower the sensitivity. Checking how the motion sensor works Click TEST and you can verify how the camera follows the moving object. Correct the detection conditions as required. While the sensor is working, this button is labeled as END . To finish checking the motion sensor, click the button. The automatic pursuit function will not work in the following conditions: The camera is moving in the automatic mode or by means of the preset function. The camera is panning or tilting through manual operation. You cannot use the automatic pursuit function and the motion alarm set on the ALARM SETTINGS screen at the same time. If both functions are being enabled, the automatic pursuit function takes precedence. If you configure the automatic pursuit function after enabling the motion alarm, the motion alarm will be forcibly disabled. When the automatic pursuit function is set, you cannot configure the motion alarm. Click GO to cleanse the contact point of the rotating section. Once the cleaning is finished, the system will perform the initializing operation. Periodical cleaning is recommended, because the contaminated contact point may lead to deterioration of video quality and generation of noise. Click SET for [PRESET POSITION SETTINGS] on the PAN/TILT screen to display the PRESET POSITION SETTINGS screen. On this screen, you can save the orientation of camera lens, the conditions of focus and zoom, and the operation conditions as preset positions. You can also use the PTZ controller to save such preset positions; however, this screen allows you to specify more detailed settings. Working with Administrator Configuration Screens 43/79
-
 1
1 -
2
-
3
-
4
-
5
-
6
-
7
-
8
-
9
-
10
-
11
-
12
-
13
-
14
-
15
-
16
-
17
-
18
-
19
-
20
-
21
-
22
-
23
-
24
-
25
-
26
-
27
-
28
-
29
-
30
-
31
-
32
-
33
-
34
-
35
-
36
-
37
-
38
-
39
-
40
-
41
-
42
-
43
-
44
-
45
-
46
-
47
-
48
-
49
-
50
-
51
-
52
-
53
-
54
-
55
-
56
-
57
-
58
-
59
-
60
-
61
-
62
-
63
-
64
-
65
-
66
-
67
-
68
-
69
-
70
-
71
-
72
-
73
-
74
-
75
-
76
-
77
-
78
-
79
-
80
-
81
-
82
-
83
-
 84
84 -
 85
85 -
 86
86 -
 87
87 -
 88
88 -
 89
89 -
 90
90 -
 91
91 -
 92
92 -
 93
93 -
 94
94 -
95
-
96
-
97
-
98
-
99
-
100
-
101
-
102
-
103
-
104
-
105
-
106
-
107
-
108
-
109
-
110
-
111
-
112
-
113
-
114
-
115
-
116
-
117
-
118
-
119
-
120
-
121
-
122
-
123
-
124
-
125
-
126
-
127
-
128
-
129
-
130
-
131
-
132
-
133
-
134
-
135
-
136
-
137
-
138
-
139
-
140
-
141
-
142
-
143
-
144
-
145
 |
 |
