Sanyo VCC-HD5400 VCC-HD5400 Manual - Page 13
Inserting an SD Memory Card, Connecting an External Hard Disk
 |
UPC - 086483075698
View all Sanyo VCC-HD5400 manuals
Add to My Manuals
Save this manual to your list of manuals |
Page 13 highlights
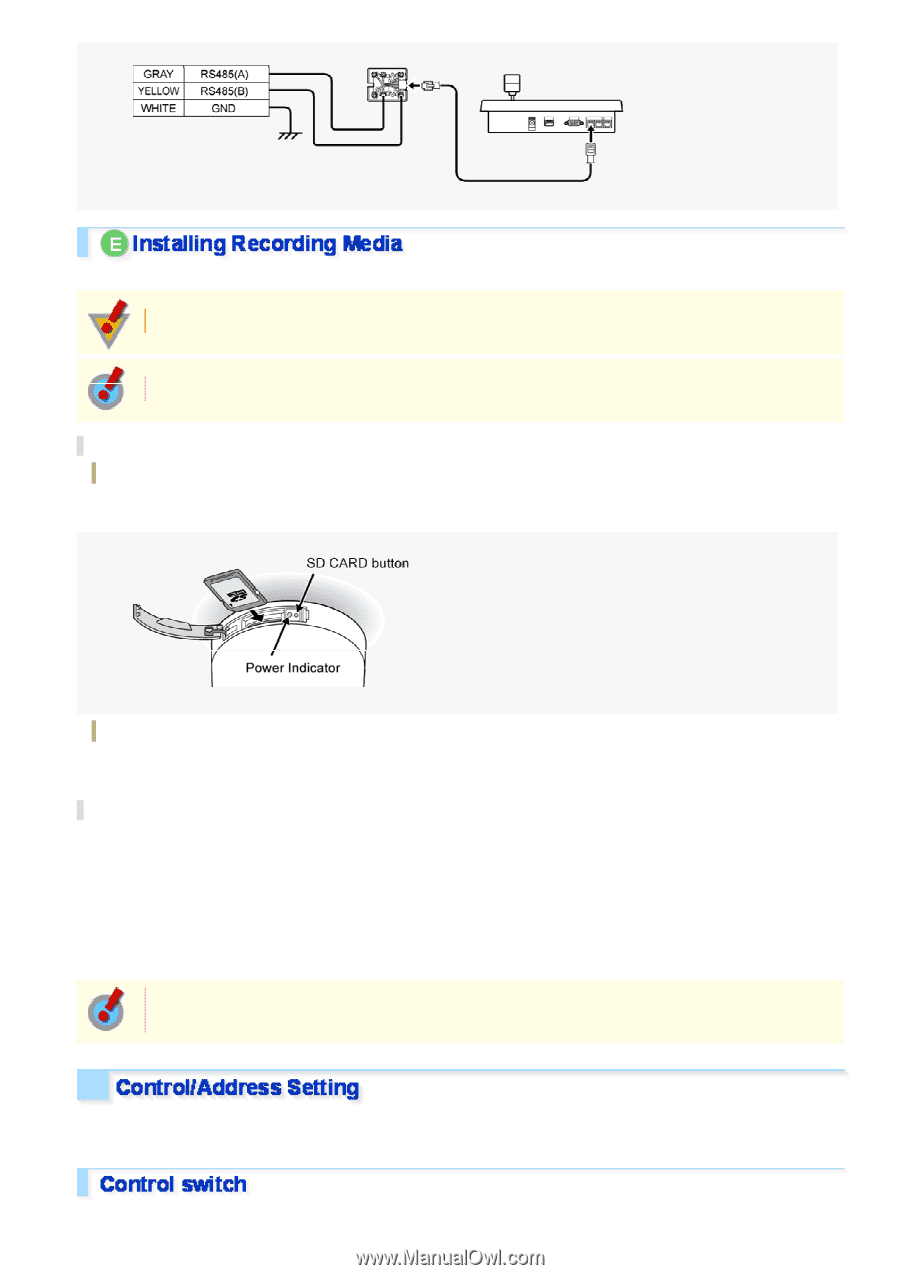
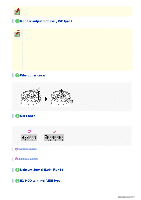
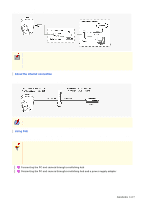
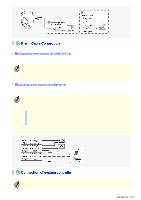
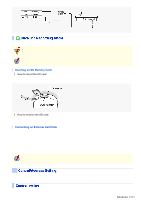
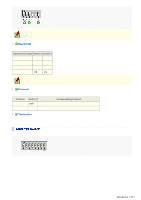
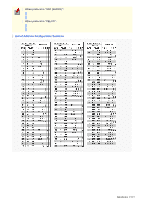
When recording live video on the camera, install an SD memory card or external hard disk on the camera. Always turn the power off when installing a recording medium. When you insert a new recording medium, format it on the SD/HDD screen. Inserting an SD Memory Card How to insert the SD card Open the cover on the side face of the camera, and insert an SD card into the card slot until it is locked with a clicking sound. How to remove the SD card Press the SD CARD button and, after confirming that the indicator lamp has stopped blinking and now stays lit, take out the SD card. Connecting an External Hard Disk Put the hard disk in a dedicated hard disk case (VA-HDC4000, sold separately) and then connect the case to the camera. Connect the mini-USB (type B) connector of the USB cable to the camera, connect the other connector (type A) of the cable to a commercially-available USB adapter (female A to male mini B), and connect the adapter to the hard disk case. For detailed information on the hard disk case including hard disk installation, refer to the instruction manual supplied with the hard disk case. If you remove the hard disk drive, be sure to set [HDD] to "NO USE" on the SD/HDD screen before removal. If you have connected the system controller to the camera, you must configure both the control switch and address switch. Use this switch to configure the baud rate and protocol settings. Introduction 13/15
-
 1
1 -
2
-
3
-
4
-
5
-
6
-
7
-
 8
8 -
 9
9 -
 10
10 -
 11
11 -
 12
12 -
 13
13 -
 14
14 -
 15
15 -
 16
16 -
 17
17 -
 18
18 -
19
-
20
-
21
-
22
-
23
-
24
-
25
-
26
-
27
-
28
-
29
-
30
-
31
-
32
-
33
-
34
-
35
-
36
-
37
-
38
-
39
-
40
-
41
-
42
-
43
-
44
-
45
-
46
-
47
-
48
-
49
-
50
-
51
-
52
-
53
-
54
-
55
-
56
-
57
-
58
-
59
-
60
-
61
-
62
-
63
-
64
-
65
-
66
-
67
-
68
-
69
-
70
-
71
-
72
-
73
-
74
-
75
-
76
-
77
-
78
-
79
-
80
-
81
-
82
-
83
-
84
-
85
-
86
-
87
-
88
-
89
-
90
-
91
-
92
-
93
-
94
-
95
-
96
-
97
-
98
-
99
-
100
-
101
-
102
-
103
-
104
-
105
-
106
-
107
-
108
-
109
-
110
-
111
-
112
-
113
-
114
-
115
-
116
-
117
-
118
-
119
-
120
-
121
-
122
-
123
-
124
-
125
-
126
-
127
-
128
-
129
-
130
-
131
-
132
-
133
-
134
-
135
-
136
-
137
-
138
-
139
-
140
-
141
-
142
-
143
-
144
-
145
 |
 |