Sanyo VCC-HD5400 VCC-HD5400 Manual - Page 37
Stream1, Stream2, Stream3, Stream4, Udp Unicast Local Area, Rtsp Local Area Recording, Multicast,
 |
UPC - 086483075698
View all Sanyo VCC-HD5400 manuals
Add to My Manuals
Save this manual to your list of manuals |
Page 37 highlights
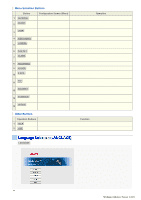
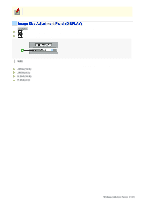
Shows the name of the user currently accessing the camera. Select the stream you want to display on the live screen. STREAM1, STREAM2, STREAM3, STREAM4 The pull-down menu shows a list of permitted streams that are configured in [LIVE STREAM] on the USER REGISTRATION screen (administrator configuration screen). This menu will not be shown to the users without "admin" privilege, if [STREAM SET] is set to "admin" on the USER REGISTRATION screen. You need to configure in advance the video conditions for each stream on the VIDEO & AUDIO SETTINGS screen (administrator configuration screen). Select the H.264 video streaming method (protocol). UDP UNICAST (LOCAL AREA) RTSP (LOCAL AREA RECORDING) HTTP (INTERNET) MULTICAST Click SET to save the settings. To close the screen without saving the settings, click CLOSE . This camera supports bidirectional audio communications, so you can send and receive audio between the camera and your PC. Hearing sounds from camera Sending audio messages to camera To perform bidirectional audio communications, for both the camera and your PC, you must connect a microphone to the audio input jack and a speaker system to the audio output jack. To hear the sounds from the camera, your PC needs a sound card installed. You need to configure in advance the audio settings on the VIDEO & AUDIO SETTINGS screen (administrator configuration screen). 1 Click CLIENT SETTINGS on the control panel. The CLIENT SETTINGS screen appears. Working with Live Screen 9/18
-
 1
1 -
2
-
3
-
4
-
5
-
6
-
7
-
8
-
9
-
10
-
11
-
12
-
13
-
14
-
15
-
16
-
17
-
18
-
19
-
20
-
21
-
22
-
23
-
24
-
25
-
26
-
27
-
28
-
29
-
30
-
31
-
 32
32 -
 33
33 -
 34
34 -
 35
35 -
 36
36 -
 37
37 -
 38
38 -
 39
39 -
 40
40 -
 41
41 -
 42
42 -
43
-
44
-
45
-
46
-
47
-
48
-
49
-
50
-
51
-
52
-
53
-
54
-
55
-
56
-
57
-
58
-
59
-
60
-
61
-
62
-
63
-
64
-
65
-
66
-
67
-
68
-
69
-
70
-
71
-
72
-
73
-
74
-
75
-
76
-
77
-
78
-
79
-
80
-
81
-
82
-
83
-
84
-
85
-
86
-
87
-
88
-
89
-
90
-
91
-
92
-
93
-
94
-
95
-
96
-
97
-
98
-
99
-
100
-
101
-
102
-
103
-
104
-
105
-
106
-
107
-
108
-
109
-
110
-
111
-
112
-
113
-
114
-
115
-
116
-
117
-
118
-
119
-
120
-
121
-
122
-
123
-
124
-
125
-
126
-
127
-
128
-
129
-
130
-
131
-
132
-
133
-
134
-
135
-
136
-
137
-
138
-
139
-
140
-
141
-
142
-
143
-
144
-
145
 |
 |
