Sanyo VCC-HD5400 VCC-HD5400 Manual - Page 19
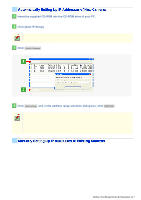
Insert the supplied CD-ROM into the CD-ROM drive of your PC., Click [Auto IP Setup]., Click, and,
 |
UPC - 086483075698
View all Sanyo VCC-HD5400 manuals
Add to My Manuals
Save this manual to your list of manuals |
Page 19 highlights
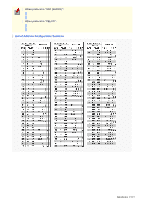
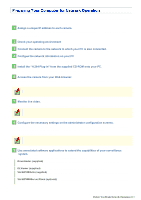
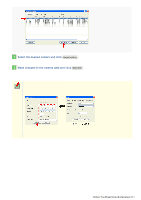
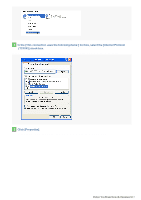
1 Insert the supplied CD-ROM into the CD-ROM drive of your PC. The opening menu appears. 2 Click [Auto IP Setup]. The utility window opens so that you can search cameras. If you encounter a firewall confirmation dialog box, disable the firewall so that your PC can communicate with the camera. 3 Click Search Cameras . The utility searches all cameras on the local network and shows information on each camera one after another. The above screenshot shows an example when your PC is connected to 10 cameras. 4 Click Auto setting and, in the address range selection dialog box, click EXECUTE . The utility automatically assigns a series of new IP addresses, starting from the start address. The "default gateway address of PC + 1" is initially displayed as the start address. To specify your own address range, type both the start and end IP addresses. The utility automatically assigns an IP address to each camera located in the LAN, but not beyond the router. It skips any IP address that is already used. If you find that the searched cameras have overlapping IP addresses (indicated by a status of "CAUTION") or if you need to change a camera title, you can edit the displayed camera data manually as described below. Before You Begin Network Operation 4/13
-
 1
1 -
2
-
3
-
4
-
5
-
6
-
7
-
8
-
9
-
10
-
11
-
12
-
13
-
 14
14 -
 15
15 -
 16
16 -
 17
17 -
 18
18 -
 19
19 -
 20
20 -
 21
21 -
 22
22 -
 23
23 -
 24
24 -
25
-
26
-
27
-
28
-
29
-
30
-
31
-
32
-
33
-
34
-
35
-
36
-
37
-
38
-
39
-
40
-
41
-
42
-
43
-
44
-
45
-
46
-
47
-
48
-
49
-
50
-
51
-
52
-
53
-
54
-
55
-
56
-
57
-
58
-
59
-
60
-
61
-
62
-
63
-
64
-
65
-
66
-
67
-
68
-
69
-
70
-
71
-
72
-
73
-
74
-
75
-
76
-
77
-
78
-
79
-
80
-
81
-
82
-
83
-
84
-
85
-
86
-
87
-
88
-
89
-
90
-
91
-
92
-
93
-
94
-
95
-
96
-
97
-
98
-
99
-
100
-
101
-
102
-
103
-
104
-
105
-
106
-
107
-
108
-
109
-
110
-
111
-
112
-
113
-
114
-
115
-
116
-
117
-
118
-
119
-
120
-
121
-
122
-
123
-
124
-
125
-
126
-
127
-
128
-
129
-
130
-
131
-
132
-
133
-
134
-
135
-
136
-
137
-
138
-
139
-
140
-
141
-
142
-
143
-
144
-
145
 |
 |
