Sanyo VCC-HD5400 VCC-HD5400 Manual - Page 40
Menu Selection Buttons, Other Buttons
 |
UPC - 086483075698
View all Sanyo VCC-HD5400 manuals
Add to My Manuals
Save this manual to your list of manuals |
Page 40 highlights
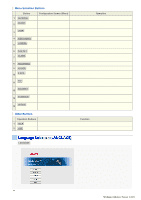
Menu Selection Buttons Button 1 NETWORK CLOCK 2 USER 3 4 VIDEO/AUDIO CAMERA 5 6 PAN/TILT ALARM 7 8 RECORDING 9 SD/HDD E-MAIL 10 FTP 11 SECURITY 12 SCHEDULE 13 OPTION 14 Configuration Screen (Menu) Operation NETWORK SETTINGS Configure the network settings of the camera. CLOCK SETTINGS Configure the clock date/time, daylight saving mode, automatic clock adjustment, and other settings. USER REGISTRATION Register new login users, or change or delete existing user data. VIDEO & AUDIO SETTINGS Configure the video and audio conditions. CAMERA SETTINGS Configure the monitoring conditions and other settings according to the installation environment of the camera. PAN/TILT Configure the pan/tilt conditions. ALARM SETTINGS Configure the alarm input/output settings and the motion sensor function. RECORDING Configure the recording conditions of the camera. SD/HDD Format the SD memory card or external hard disk. E-MAIL SETTINGS Configure the alarm notification e-mail function and other automatic transmission settings. FTP SETTINGS Configure the image streaming conditions if you intend to record images from the camera to an FTP server. SECURITY SETTINGS Configure the security settings for permitting or rejecting the access to the camera from up to 10 PCs. SCHEDULE SETTINGS Configure the time period during which recording with the camera is activated. OPTION SETTINGS Perform operations such as updating the firmware, restoring the factory defaults, and backing up and uploading settings. Other Buttons Operation Buttons Function 1 HELP 2 LIVE Provides an explanation of each function. Closes the configuration screen and returns to the live screen. Click LANGUAGE on the control panel to display the language selection screen. English, French, German, Spanish, Japanese Working with Live Screen 12/18
-
 1
1 -
2
-
3
-
4
-
5
-
6
-
7
-
8
-
9
-
10
-
11
-
12
-
13
-
14
-
15
-
16
-
17
-
18
-
19
-
20
-
21
-
22
-
23
-
24
-
25
-
26
-
27
-
28
-
29
-
30
-
31
-
32
-
33
-
34
-
 35
35 -
 36
36 -
 37
37 -
 38
38 -
 39
39 -
 40
40 -
 41
41 -
 42
42 -
 43
43 -
 44
44 -
 45
45 -
46
-
47
-
48
-
49
-
50
-
51
-
52
-
53
-
54
-
55
-
56
-
57
-
58
-
59
-
60
-
61
-
62
-
63
-
64
-
65
-
66
-
67
-
68
-
69
-
70
-
71
-
72
-
73
-
74
-
75
-
76
-
77
-
78
-
79
-
80
-
81
-
82
-
83
-
84
-
85
-
86
-
87
-
88
-
89
-
90
-
91
-
92
-
93
-
94
-
95
-
96
-
97
-
98
-
99
-
100
-
101
-
102
-
103
-
104
-
105
-
106
-
107
-
108
-
109
-
110
-
111
-
112
-
113
-
114
-
115
-
116
-
117
-
118
-
119
-
120
-
121
-
122
-
123
-
124
-
125
-
126
-
127
-
128
-
129
-
130
-
131
-
132
-
133
-
134
-
135
-
136
-
137
-
138
-
139
-
140
-
141
-
142
-
143
-
144
-
145
 |
 |
