Epson Stylus Pro 9000 User Manual - Page 57
Running a Cleaning Cycle, Head Cleaning utility. See B-24 Macintosh or C-26 Windows
 |
View all Epson Stylus Pro 9000 manuals
Add to My Manuals
Save this manual to your list of manuals |
Page 57 highlights
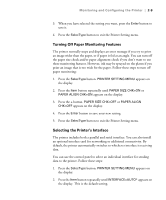
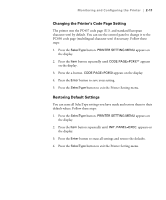
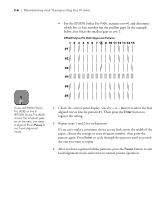
3-2 | Maintaining and Transporting the Printer Note The Ink Pad number under the nozzle check pattern indicates the remaining percentage of the waste ink system. You will need to contact your authorized EPSON servicer when this number is low. The printer will stop and display an error message when the system needs to be replaced. Caution To avoid damaging the printer, don't turn it off until the cleaning cycle is finished and the Pause light has stopped flashing. 4. Press the Enter button. The nozzle check prints as shown below. If all the lines on the check pattern are complete, with no gaps in the dot pattern, the print head doesn't need cleaning: If dots are missing from the pattern, as shown below, you need to run a cleaning cycle. See the following section for instructions. Running a Cleaning Cycle If your printed image is unexpectedly light or faint or dots are missing from the image, you may need to run a cleaning cycle. This unclogs the print head nozzles so they can deliver ink properly. The cleaning process uses ink, so you should run it only if print quality declines. Always run a nozzle check first to confirm that the head needs cleaning; the nozzle check uses only a small amount of ink. If you have installed the EPSON printer driver and utilities, you can run the Head Cleaning utility. See page B-24 (Macintosh) or C-26 (Windows) for instructions. Follow these steps to run the cleaning cycle from the printer's control panel: 1. Make sure none of the Ink Out lights is on or flashing. (If so, you need to replace the indicated ink cartridge before you can run a cleaning cycle.) 2. Press the Cleaning button and hold it for at least 3 seconds. The Pause light flashes as the printer cleans its print head. The cleaning cycle takes about three minutes and does not use any paper. 3. When the Pause light goes off, print a document or run a nozzle check to confirm that the head is clean. 3-2
-
 1
1 -
2
-
3
-
4
-
5
-
6
-
7
-
8
-
9
-
10
-
11
-
12
-
13
-
14
-
15
-
16
-
17
-
18
-
19
-
20
-
21
-
22
-
23
-
24
-
25
-
26
-
27
-
28
-
29
-
30
-
31
-
32
-
33
-
34
-
35
-
36
-
37
-
38
-
39
-
40
-
41
-
42
-
43
-
44
-
45
-
46
-
47
-
48
-
49
-
50
-
51
-
 52
52 -
 53
53 -
 54
54 -
 55
55 -
 56
56 -
 57
57 -
 58
58 -
 59
59 -
 60
60 -
 61
61 -
 62
62 -
63
-
64
-
65
-
66
-
67
-
68
-
69
-
70
-
71
-
72
-
73
-
74
-
75
-
76
-
77
-
78
-
79
-
80
-
81
-
82
-
83
-
84
-
85
-
86
-
87
-
88
-
89
-
90
-
91
-
92
-
93
-
94
-
95
-
96
-
97
-
98
-
99
-
100
-
101
-
102
-
103
-
104
-
105
-
106
-
107
-
108
-
109
-
110
-
111
-
112
-
113
-
114
-
115
-
116
-
117
-
118
-
119
-
120
-
121
-
122
-
123
-
124
-
125
-
126
-
127
-
128
-
129
-
130
-
131
-
132
-
133
-
134
-
135
-
136
-
137
-
138
-
139
-
140
-
141
-
142
-
143
-
144
-
145
-
146
-
147
-
148
-
149
-
150
-
151
-
152
-
153
-
154
-
155
-
156
-
157
-
158
-
159
-
160
-
161
-
162
-
163
-
164
-
165
 |
 |