Epson Stylus Pro 9000 User Manual - Page 79
Print quality problems continued, Problem, Possible cause, Solution - specifications
 |
View all Epson Stylus Pro 9000 manuals
Add to My Manuals
Save this manual to your list of manuals |
Page 79 highlights
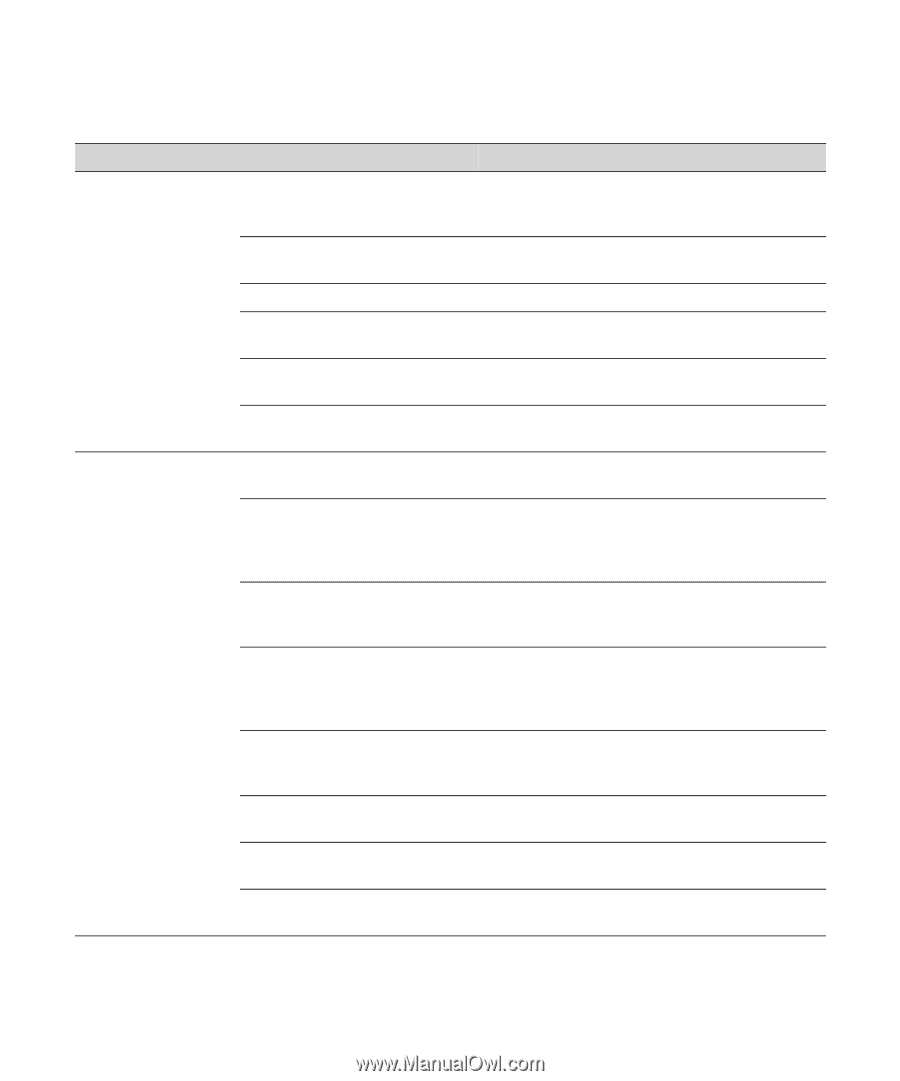
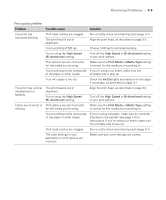
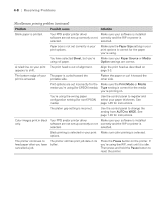
4-4 | Resolving Problems Print quality problems (continued) Problem Possible cause Solution Your print has gaps or Your ink is too old. appears faint. Check the expiration date printed on each cartridge. If the cartridge is too old, replace it as described on page 3-7. Print options are set incorrectly for the media you're using. Make sure the Print Mode or Media Type setting is correct for the media you're printing on. Print head nozzles are clogged. Run a nozzle check and cleaning cycle (page 3-1). Your ink supply is low. Check the Ink Out lights and replace ink cartridges if necessary, as described on page 3-7. The paper configuration setting is Use the control panel to select thinner paper. See too thick. page 1-25 for instructions. The platen gap setting is too wide. Use the control panel to change the setting from WIDE to AUTO. See page 1-20 for instructions. Your print appears blurry or smeared. Print options are set incorrectly for the media you're using. Make sure the Print Mode or Media Type setting is correct for the media you're printing on. You're using the wrong paper configuration setting (for non-EPSON media). Use the control panel to register and select your paper thickness and dry time. See page 1-25 for instructions. If you're using the RIP, you can set a dry time between passes in seconds. Your paper doesn't meet the required specifications or contains too much moisture. Change your paper. You're printing on the wrong side of the paper or other media. If you're using roll paper, make sure it's correctly attached to the spindle. See page 1-5 for instructions. If you're using a cut sheet, make sure the printable side is face up. Ink has leaked in the paper path. Wipe the paper path area of the printer with a soft, clean cloth. See page 3-15 for cleaning instructions. You're using the High Speed (Bi-directional) setting. Turn off the High Speed or Bi-directional setting in your print options. The paper configuration setting is Use the control panel to select thicker paper. See too thin. page 1-25 for instructions. The platen gap setting is too narrow. Use the control panel to change the setting from AUTO to WIDE. See page 1-20 for instructions. 4-4
-
 1
1 -
2
-
3
-
4
-
5
-
6
-
7
-
8
-
9
-
10
-
11
-
12
-
13
-
14
-
15
-
16
-
17
-
18
-
19
-
20
-
21
-
22
-
23
-
24
-
25
-
26
-
27
-
28
-
29
-
30
-
31
-
32
-
33
-
34
-
35
-
36
-
37
-
38
-
39
-
40
-
41
-
42
-
43
-
44
-
45
-
46
-
47
-
48
-
49
-
50
-
51
-
52
-
53
-
54
-
55
-
56
-
57
-
58
-
59
-
60
-
61
-
62
-
63
-
64
-
65
-
66
-
67
-
68
-
69
-
70
-
71
-
72
-
73
-
 74
74 -
 75
75 -
 76
76 -
 77
77 -
 78
78 -
 79
79 -
 80
80 -
 81
81 -
 82
82 -
 83
83 -
 84
84 -
85
-
86
-
87
-
88
-
89
-
90
-
91
-
92
-
93
-
94
-
95
-
96
-
97
-
98
-
99
-
100
-
101
-
102
-
103
-
104
-
105
-
106
-
107
-
108
-
109
-
110
-
111
-
112
-
113
-
114
-
115
-
116
-
117
-
118
-
119
-
120
-
121
-
122
-
123
-
124
-
125
-
126
-
127
-
128
-
129
-
130
-
131
-
132
-
133
-
134
-
135
-
136
-
137
-
138
-
139
-
140
-
141
-
142
-
143
-
144
-
145
-
146
-
147
-
148
-
149
-
150
-
151
-
152
-
153
-
154
-
155
-
156
-
157
-
158
-
159
-
160
-
161
-
162
-
163
-
164
-
165
 |
 |