Epson Stylus Pro 9000 User Manual - Page 69
Installing the New Cutter Blade, close the casing.
 |
View all Epson Stylus Pro 9000 manuals
Add to My Manuals
Save this manual to your list of manuals |
Page 69 highlights
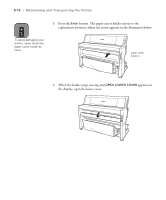
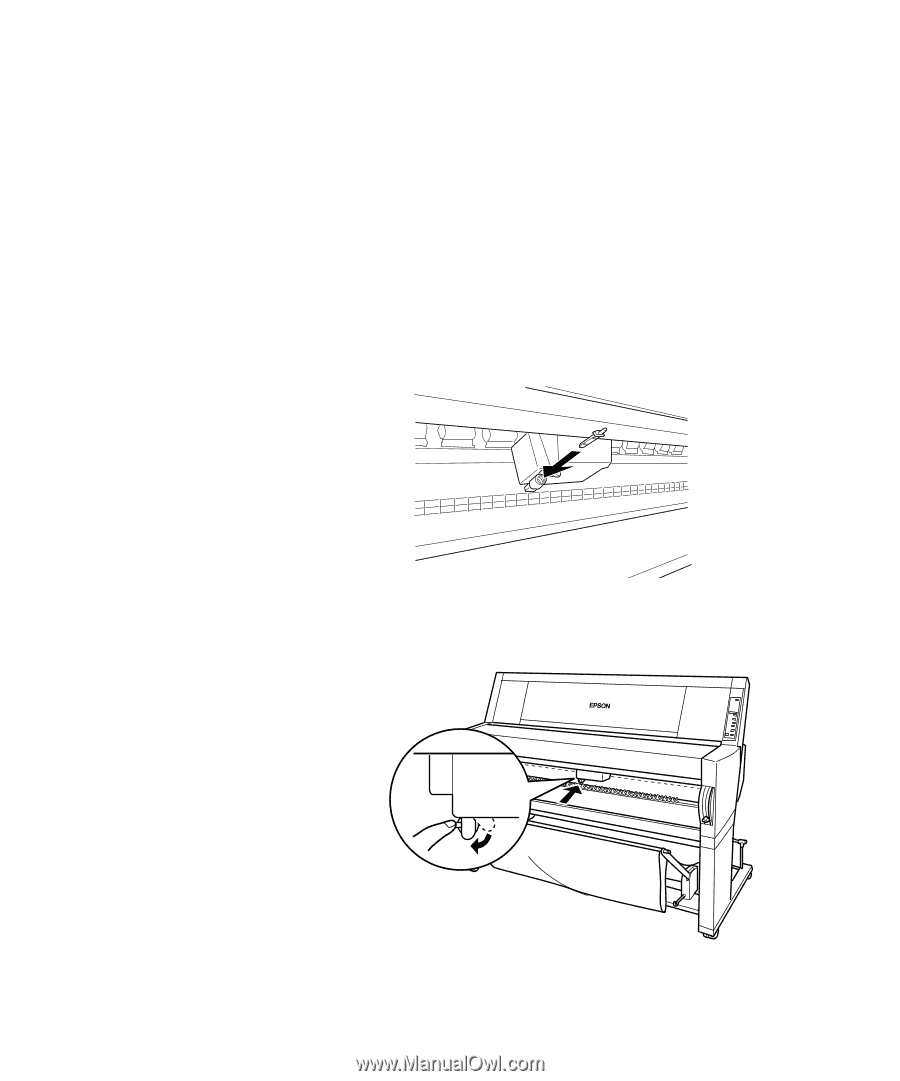
3-14 | Maintaining and Transporting the Printer Installing the New Cutter Blade After you have removed the used cutter blade, you're ready to install the new one. Follow these steps: 1. Remove the new blade from its package. 2. Make sure the spring coil is inside the cutter holder. If necessary, reinstall the coil. 3. Fully insert the new blade into the paper cutter holder in the direction shown below. 4. Push in the side pin while turning the paper cutter cover to the left to close the casing. CLOSE LOWER COVER appears on the display. 5. Close the lower cover. The cutter holder moves to the home (far right) position and READY appears on the display. 3-14
-
 1
1 -
2
-
3
-
4
-
5
-
6
-
7
-
8
-
9
-
10
-
11
-
12
-
13
-
14
-
15
-
16
-
17
-
18
-
19
-
20
-
21
-
22
-
23
-
24
-
25
-
26
-
27
-
28
-
29
-
30
-
31
-
32
-
33
-
34
-
35
-
36
-
37
-
38
-
39
-
40
-
41
-
42
-
43
-
44
-
45
-
46
-
47
-
48
-
49
-
50
-
51
-
52
-
53
-
54
-
55
-
56
-
57
-
58
-
59
-
60
-
61
-
62
-
63
-
 64
64 -
 65
65 -
 66
66 -
 67
67 -
 68
68 -
 69
69 -
 70
70 -
 71
71 -
 72
72 -
 73
73 -
 74
74 -
75
-
76
-
77
-
78
-
79
-
80
-
81
-
82
-
83
-
84
-
85
-
86
-
87
-
88
-
89
-
90
-
91
-
92
-
93
-
94
-
95
-
96
-
97
-
98
-
99
-
100
-
101
-
102
-
103
-
104
-
105
-
106
-
107
-
108
-
109
-
110
-
111
-
112
-
113
-
114
-
115
-
116
-
117
-
118
-
119
-
120
-
121
-
122
-
123
-
124
-
125
-
126
-
127
-
128
-
129
-
130
-
131
-
132
-
133
-
134
-
135
-
136
-
137
-
138
-
139
-
140
-
141
-
142
-
143
-
144
-
145
-
146
-
147
-
148
-
149
-
150
-
151
-
152
-
153
-
154
-
155
-
156
-
157
-
158
-
159
-
160
-
161
-
162
-
163
-
164
-
165
 |
 |
3-14
3-14
|
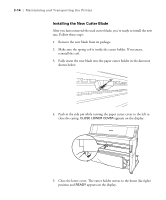
Maintaining and Transporting the Printer
Installing the New Cutter Blade
After you have removed the used cutter blade, you’re ready to install the new
one. Follow these steps:
1.
Remove the new blade from its package.
2.
Make sure the spring coil is inside the cutter holder. If necessary,
reinstall the coil.
3.
Fully insert the new blade into the paper cutter holder in the direction
shown below.
4.
Push in the side pin while turning the paper cutter cover to the left to
close the casing.
CLOSE LOWER COVER
appears on the display.
5.
Close the lower cover. The cutter holder moves to the home (far right)
position and
READY
appears on the display.