Epson Stylus Pro 9000 User Manual - Page 59
Completing the Alignment Procedure., Maintaining and Transporting the Printer
 |
View all Epson Stylus Pro 9000 manuals
Add to My Manuals
Save this manual to your list of manuals |
Page 59 highlights
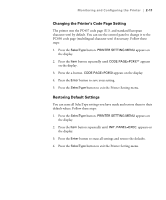
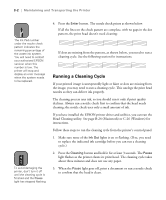
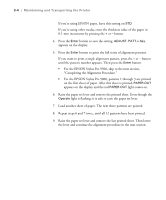
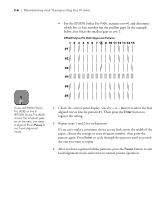
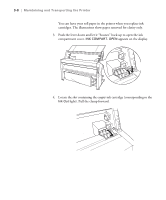
3-4 | Maintaining and Transporting the Printer If you're using EPSON paper, leave this setting on STD. If you're using other media, enter the thickness value of the paper in 0.1-mm increments by pressing the + or - button. 4. Press the Enter button to save the setting. ADJUST. PATT.= ALL appears on the display. 5. Press the Enter button to print the full series of alignment patterns. If you want to print a single alignment pattern, press the + or - button until the pattern number appears. Then press the Enter button. • For the EPSON Stylus Pro 9500, skip to the next section, "Completing the Alignment Procedure." • For the EPSON Stylus Pro 9000, patterns 1 through 3 are printed on the first sheet of paper. After this sheet is printed, PAPER OUT appears on the display and the red PAPER OUT light comes on. 6. Raise the paper set lever and remove the printed sheet. Even though the Operate light is flashing, it is safe to raise the paper set lever. 7. Load another sheet of paper. The next three patterns are printed. 8. Repeat steps 6 and 7 twice, until all 12 patterns have been printed. 9. Raise the paper set lever and remove the last printed sheet. Then lower the lever and continue the alignment procedure in the next section. 3-4
-
 1
1 -
2
-
3
-
4
-
5
-
6
-
7
-
8
-
9
-
10
-
11
-
12
-
13
-
14
-
15
-
16
-
17
-
18
-
19
-
20
-
21
-
22
-
23
-
24
-
25
-
26
-
27
-
28
-
29
-
30
-
31
-
32
-
33
-
34
-
35
-
36
-
37
-
38
-
39
-
40
-
41
-
42
-
43
-
44
-
45
-
46
-
47
-
48
-
49
-
50
-
51
-
52
-
53
-
 54
54 -
 55
55 -
 56
56 -
 57
57 -
 58
58 -
 59
59 -
 60
60 -
 61
61 -
 62
62 -
 63
63 -
 64
64 -
65
-
66
-
67
-
68
-
69
-
70
-
71
-
72
-
73
-
74
-
75
-
76
-
77
-
78
-
79
-
80
-
81
-
82
-
83
-
84
-
85
-
86
-
87
-
88
-
89
-
90
-
91
-
92
-
93
-
94
-
95
-
96
-
97
-
98
-
99
-
100
-
101
-
102
-
103
-
104
-
105
-
106
-
107
-
108
-
109
-
110
-
111
-
112
-
113
-
114
-
115
-
116
-
117
-
118
-
119
-
120
-
121
-
122
-
123
-
124
-
125
-
126
-
127
-
128
-
129
-
130
-
131
-
132
-
133
-
134
-
135
-
136
-
137
-
138
-
139
-
140
-
141
-
142
-
143
-
144
-
145
-
146
-
147
-
148
-
149
-
150
-
151
-
152
-
153
-
154
-
155
-
156
-
157
-
158
-
159
-
160
-
161
-
162
-
163
-
164
-
165
 |
 |