HP Photosmart D7400 User Guide - Page 39
Change the HP Photosmart from a USB connection to a network connection, Manage your network settings
 |
View all HP Photosmart D7400 manuals
Add to My Manuals
Save this manual to your list of manuals |
Page 39 highlights
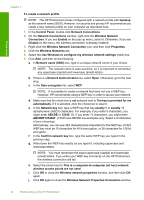
Finish setup Chapter 4 Change the HP Photosmart from a USB connection to a network connection If you first install the HP Photosmart with a USB connection, you can later change to either a wireless or Ethernet network connection. If you already understand how to connect to a network, you can use the general directions below. NOTE: For optimal performance and security in your wireless network, use an access point (such as a wireless router) to connect the HP Photosmart. To change a USB connection to an integrated wireless WLAN 802.11 connection 1. Unplug the USB connection from the back of the HP Photosmart. 2. Touch Setup on the display. 3. Touch Network. NOTE: If the menu option you want is not visible on the screen, touch or to scroll through all the menu options. 4. Touch Wireless Setup Wizard. This runs the Wireless Setup Wizard. 5. Install the software for a network connection, choose Add a Device, and then choose Through the network. 6. When the installation is complete, open Printers and Faxes (or Printers) in the Control Panel and delete the printers for the USB installation. To change a USB connection to a wired (Ethernet) connection 1. Unplug the USB connection from the back of the HP Photosmart. 2. Connect an Ethernet cable from the Ethernet port on the back of the HP Photosmart to an available Ethernet port on the router or switch. 3. Install the software for a network connection, choose Add a Device, and then choose Through the network. 4. When the installation is complete, open Printers and Faxes (or Printers) in the Control Panel and delete the printers from the previous USB installation. For more detailed instructions on connecting the HP Photosmart to a network, see: • "Wired network setup" on page 27 • "Integrated wireless WLAN 802.11 network setup" on page 29 • "Wireless ad hoc network setup" on page 33 Manage your network settings You can manage network settings for the HP Photosmart through the HP Photosmart control panel. Additional advanced settings are available in the Embedded Web Server, a configuration and status tool you access from your Web browser using an existing network connection to the HP Photosmart. This section contains the following topics: • Change basic network settings from the control panel • Change advanced network settings from the control panel settings 38 Finish setting up the HP Photosmart
-
 1
1 -
2
-
3
-
4
-
5
-
6
-
7
-
8
-
9
-
10
-
11
-
12
-
13
-
14
-
15
-
16
-
17
-
18
-
19
-
20
-
21
-
22
-
23
-
24
-
25
-
26
-
27
-
28
-
29
-
30
-
31
-
32
-
33
-
 34
34 -
 35
35 -
 36
36 -
 37
37 -
 38
38 -
 39
39 -
 40
40 -
 41
41 -
 42
42 -
 43
43 -
 44
44 -
45
-
46
-
47
-
48
-
49
-
50
-
51
-
52
-
53
-
54
-
55
-
56
-
57
-
58
-
59
-
60
-
61
-
62
-
63
-
64
-
65
-
66
-
67
-
68
-
69
-
70
-
71
-
72
-
73
-
74
-
75
-
76
-
77
-
78
-
79
-
80
-
81
-
82
-
83
-
84
-
85
-
86
-
87
-
88
-
89
-
90
-
91
-
92
-
93
-
94
-
95
-
96
-
97
-
98
-
99
-
100
-
101
-
102
-
103
-
104
-
105
-
106
-
107
-
108
-
109
-
110
-
111
-
112
-
113
-
114
-
115
-
116
-
117
-
118
-
119
-
120
-
121
-
122
-
123
-
124
-
125
-
126
-
127
-
128
-
129
-
130
-
131
-
132
-
133
-
134
-
135
-
136
-
137
-
138
-
139
-
140
-
141
-
142
-
143
-
144
-
145
-
146
-
147
-
148
-
149
-
150
-
151
-
152
-
153
-
154
-
155
-
156
-
157
-
158
-
159
-
160
-
161
-
162
-
163
-
164
-
165
-
166
-
167
-
168
-
169
-
170
-
171
-
172
-
173
-
174
-
175
-
176
-
177
-
178
-
179
-
180
-
181
-
182
-
183
-
184
-
185
-
186
-
187
-
188
-
189
-
190
-
191
 |
 |