HP Photosmart D7400 User Guide - Page 44
Use the Embedded Web Server setup wizard, To access the Embedded Web Server
 |
View all HP Photosmart D7400 manuals
Add to My Manuals
Save this manual to your list of manuals |
Page 44 highlights
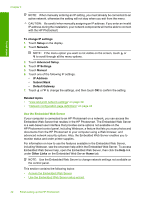
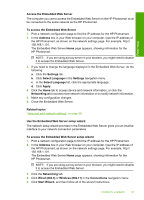
Finish setup Access the Embedded Web Server The computer you use to access the Embedded Web Server on the HP Photosmart must be connected to the same network as the HP Photosmart. To access the Embedded Web Server 1. Print a network configuration page to find the IP address for the HP Photosmart. 2. In the Address box in your Web browser on your computer, type the IP address of the HP Photosmart, as shown on the network settings page. For example, http:// 192.168.1.101. The Embedded Web Server Home page appears, showing information for the HP Photosmart. NOTE: If you are using a proxy server in your browser, you might need to disable it to access the Embedded Web Server. 3. If you need to change the language displayed in the Embedded Web Server, do the following: a. Click the Settings tab. b. Click Select Language in the Settings navigation menu. c. In the Select Language list, click the appropriate language. d. Click Apply. 4. Click the Home tab to access device and network information, or click the Networking tab to access more network information or to modify network information. 5. Make any configuration changes. 6. Close the Embedded Web Server. Related topics "View and print network settings" on page 39 Use the Embedded Web Server setup wizard The network setup wizard provided in the Embedded Web Server gives you an intuitive interface to your network connection parameters. To access the Embedded Web Server setup wizard 1. Print a network configuration page to find the IP address for the HP Photosmart. 2. In the Address box in your Web browser on your computer, type the IP address of the HP Photosmart, as shown on the network settings page. For example, http:// 192.168.1.101. The Embedded Web Server Home page appears, showing information for the HP Photosmart. NOTE: If you are using a proxy server in your browser, you might need to disable it to access the Embedded Web Server. 3. Click the Networking tab. 4. Click Wired (802.3) or Wireless (802.11) in the Connections navigation menu. 5. Click Start Wizard, and then follow all of the wizard instructions. Connect to a network 43
-
 1
1 -
2
-
3
-
4
-
5
-
6
-
7
-
8
-
9
-
10
-
11
-
12
-
13
-
14
-
15
-
16
-
17
-
18
-
19
-
20
-
21
-
22
-
23
-
24
-
25
-
26
-
27
-
28
-
29
-
30
-
31
-
32
-
33
-
34
-
35
-
36
-
37
-
38
-
 39
39 -
 40
40 -
 41
41 -
 42
42 -
 43
43 -
 44
44 -
 45
45 -
 46
46 -
 47
47 -
 48
48 -
 49
49 -
50
-
51
-
52
-
53
-
54
-
55
-
56
-
57
-
58
-
59
-
60
-
61
-
62
-
63
-
64
-
65
-
66
-
67
-
68
-
69
-
70
-
71
-
72
-
73
-
74
-
75
-
76
-
77
-
78
-
79
-
80
-
81
-
82
-
83
-
84
-
85
-
86
-
87
-
88
-
89
-
90
-
91
-
92
-
93
-
94
-
95
-
96
-
97
-
98
-
99
-
100
-
101
-
102
-
103
-
104
-
105
-
106
-
107
-
108
-
109
-
110
-
111
-
112
-
113
-
114
-
115
-
116
-
117
-
118
-
119
-
120
-
121
-
122
-
123
-
124
-
125
-
126
-
127
-
128
-
129
-
130
-
131
-
132
-
133
-
134
-
135
-
136
-
137
-
138
-
139
-
140
-
141
-
142
-
143
-
144
-
145
-
146
-
147
-
148
-
149
-
150
-
151
-
152
-
153
-
154
-
155
-
156
-
157
-
158
-
159
-
160
-
161
-
162
-
163
-
164
-
165
-
166
-
167
-
168
-
169
-
170
-
171
-
172
-
173
-
174
-
175
-
176
-
177
-
178
-
179
-
180
-
181
-
182
-
183
-
184
-
185
-
186
-
187
-
188
-
189
-
190
-
191
 |
 |