HP Photosmart D7400 User Guide - Page 99
Automatically enhance your photos, Red Eye, Removal, Red Eye Removal
 |
View all HP Photosmart D7400 manuals
Add to My Manuals
Save this manual to your list of manuals |
Page 99 highlights
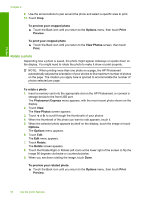
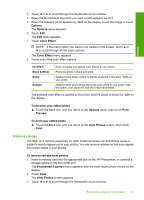
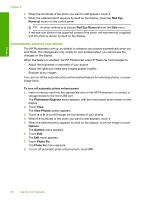
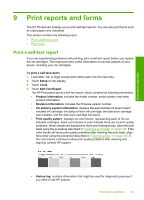
Photos Chapter 8 4. When the thumbnail of the photo you want to edit appears, touch it. 5. When the selected photo appears by itself on the display, press the Red Eye Removal button on the control panel. TIP: Another method is to choose Red Eye Removal from the Edit menu. A red-eye icon blinks in the upper left corner of the photo, red-eye removal is applied, and the photo is shown by itself on the display. Automatically enhance your photos The HP Photosmart is set up, by default, to enhance your photos automatically when you print them. The changes are only visible on your printed output; you cannot see the changes on the display. When this feature is enabled, the HP Photosmart uses HP Real Life Technologies to: • Adjust the brightness or darkness of your photos. • Adjust the lighting to make dark images appear brighter. • Sharpen blurry images. You can turn off the automatic photo enhancement feature for individual photos, on a perimage basis. To turn off automatic photo enhancement 1. Insert a memory card into the appropriate slot on the HP Photosmart, or connect a storage device to the front USB port. The Photosmart Express menu appears, with the most recent photo shown on the display. 2. Touch View. The View Photos screen appears. 3. Touch or to scroll through the thumbnails of your photos. 4. When the thumbnail of the photo you want to edit appears, touch it. 5. When the selected photo appears by itself on the display, touch the image or touch Options. The Options menu appears. 6. Touch Edit. The Edit menu appears. 7. Touch Photo Fix. The Photo Fix menu appears. 8. To turn off automatic photo enhancement, touch Off. 98 Use the photo features
-
 1
1 -
2
-
3
-
4
-
5
-
6
-
7
-
8
-
9
-
10
-
11
-
12
-
13
-
14
-
15
-
16
-
17
-
18
-
19
-
20
-
21
-
22
-
23
-
24
-
25
-
26
-
27
-
28
-
29
-
30
-
31
-
32
-
33
-
34
-
35
-
36
-
37
-
38
-
39
-
40
-
41
-
42
-
43
-
44
-
45
-
46
-
47
-
48
-
49
-
50
-
51
-
52
-
53
-
54
-
55
-
56
-
57
-
58
-
59
-
60
-
61
-
62
-
63
-
64
-
65
-
66
-
67
-
68
-
69
-
70
-
71
-
72
-
73
-
74
-
75
-
76
-
77
-
78
-
79
-
80
-
81
-
82
-
83
-
84
-
85
-
86
-
87
-
88
-
89
-
90
-
91
-
92
-
93
-
 94
94 -
 95
95 -
 96
96 -
 97
97 -
 98
98 -
 99
99 -
 100
100 -
 101
101 -
 102
102 -
 103
103 -
 104
104 -
105
-
106
-
107
-
108
-
109
-
110
-
111
-
112
-
113
-
114
-
115
-
116
-
117
-
118
-
119
-
120
-
121
-
122
-
123
-
124
-
125
-
126
-
127
-
128
-
129
-
130
-
131
-
132
-
133
-
134
-
135
-
136
-
137
-
138
-
139
-
140
-
141
-
142
-
143
-
144
-
145
-
146
-
147
-
148
-
149
-
150
-
151
-
152
-
153
-
154
-
155
-
156
-
157
-
158
-
159
-
160
-
161
-
162
-
163
-
164
-
165
-
166
-
167
-
168
-
169
-
170
-
171
-
172
-
173
-
174
-
175
-
176
-
177
-
178
-
179
-
180
-
181
-
182
-
183
-
184
-
185
-
186
-
187
-
188
-
189
-
190
-
191
 |
 |