HP Photosmart D7400 User Guide - Page 64
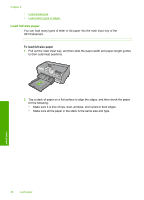
Load other types of paper, HP Greeting Cards, or HP Textured Greeting Cards
 |
View all HP Photosmart D7400 manuals
Add to My Manuals
Save this manual to your list of manuals |
Page 64 highlights
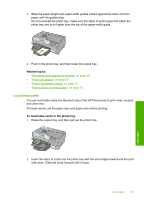
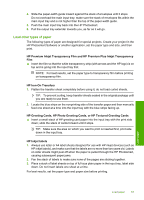
4. Slide the paper-width guide inward against the stack of envelopes until it stops. Do not overload the main input tray; make sure the stack of envelopes fits within the main input tray and is not higher than the top of the paper-width guide. 5. Push the main input tray back into the HP Photosmart. 6. Pull the output tray extender towards you, as far as it will go. Load other types of paper The following types of paper are designed for special projects. Create your project in the HP Photosmart Software or another application, set the paper type and size, and then print. HP Premium Inkjet Transparency Film and HP Premium Plus Inkjet Transparency Film ▲ Insert the film so that the white transparency strip (with arrows and the HP logo) is on top and is going into the input tray first. NOTE: For best results, set the paper type to transparency film before printing on transparency film. HP Iron-On Transfers 1. Flatten the transfer sheet completely before using it; do not load curled sheets. TIP: To prevent curling, keep transfer sheets sealed in the original package until you are ready to use them. 2. Locate the blue stripe on the nonprinting side of the transfer paper and then manually feed one sheet at a time into the input tray with the blue stripe facing up. HP Greeting Cards, HP Photo Greeting Cards, or HP Textured Greeting Cards ▲ Insert a small stack of HP greeting card paper into the input tray with the print side down; slide the stack of cards forward until it stops. TIP: Make sure the area on which you want to print is inserted first, print side down in the input tray. HP Inkjet labels 1. Always use letter or A4 label sheets designed for use with HP inkjet devices (such as HP inkjet labels), and make sure that the labels are no more than two years old. Labels on older sheets might peel off when the paper is pulled through the HP Photosmart, causing subsequent paper jams. 2. Fan the stack of labels to make sure none of the pages are sticking together. 3. Place a stack of label sheets on top of full-size plain paper in the input tray, label side down. Do not insert labels one sheet at a time. For best results, set the paper type and paper size before printing. Load paper Load paper 63
-
 1
1 -
2
-
3
-
4
-
5
-
6
-
7
-
8
-
9
-
10
-
11
-
12
-
13
-
14
-
15
-
16
-
17
-
18
-
19
-
20
-
21
-
22
-
23
-
24
-
25
-
26
-
27
-
28
-
29
-
30
-
31
-
32
-
33
-
34
-
35
-
36
-
37
-
38
-
39
-
40
-
41
-
42
-
43
-
44
-
45
-
46
-
47
-
48
-
49
-
50
-
51
-
52
-
53
-
54
-
55
-
56
-
57
-
58
-
 59
59 -
 60
60 -
 61
61 -
 62
62 -
 63
63 -
 64
64 -
 65
65 -
 66
66 -
 67
67 -
 68
68 -
 69
69 -
70
-
71
-
72
-
73
-
74
-
75
-
76
-
77
-
78
-
79
-
80
-
81
-
82
-
83
-
84
-
85
-
86
-
87
-
88
-
89
-
90
-
91
-
92
-
93
-
94
-
95
-
96
-
97
-
98
-
99
-
100
-
101
-
102
-
103
-
104
-
105
-
106
-
107
-
108
-
109
-
110
-
111
-
112
-
113
-
114
-
115
-
116
-
117
-
118
-
119
-
120
-
121
-
122
-
123
-
124
-
125
-
126
-
127
-
128
-
129
-
130
-
131
-
132
-
133
-
134
-
135
-
136
-
137
-
138
-
139
-
140
-
141
-
142
-
143
-
144
-
145
-
146
-
147
-
148
-
149
-
150
-
151
-
152
-
153
-
154
-
155
-
156
-
157
-
158
-
159
-
160
-
161
-
162
-
163
-
164
-
165
-
166
-
167
-
168
-
169
-
170
-
171
-
172
-
173
-
174
-
175
-
176
-
177
-
178
-
179
-
180
-
181
-
182
-
183
-
184
-
185
-
186
-
187
-
188
-
189
-
190
-
191
 |
 |
