Intel SE7525GP2 Product Specification - Page 99
Command-line Usage, 7.4.1, Changing the OEM Logo for DOS, 7.4.2, Changing the OEM Logo for Microsoft
 |
View all Intel SE7525GP2 manuals
Add to My Manuals
Save this manual to your list of manuals |
Page 99 highlights
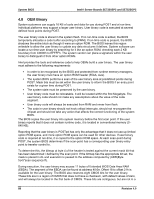
Intel® Server Boards SE7320SP2 and SE7525GP2 System BIOS Command-line Usage: OEMLogo [/F or /FN or /N] or OEMLogo [/D] Where ƒ [/F] forces replacement of the OEM logo even if the logo formats do not match. ƒ [/N] inserts the 16-color BMP without converting it to the default AMI format. ƒ [/FN] forces replacement of the OEM logo without converting a 16-color BMP to the default AMI format. ƒ [/D] deletes the logo module from the ROM file. Supported formats are dependent on the ROM and include the following: ƒ 16-color BMP, size up to 640x480, even width ƒ 256-color BMP, 640x480 ƒ JPEG, 640x480, 800x600, or 1024x768 ƒ 256-color PCX, 640x480 Note: The Rombuild.exe file is NOT the same for DOS and Microsoft Windows 2000 / 2003 / XP. The user must use the correct Rombuild.exe file for the operating system. 4.7.4.1 Changing the OEM Logo for DOS 1. Boot to DOS. 2. Download OEMLOGOD.exe, Rombuild.exe, RomFile, and NewOEMlogoImage to the hard drive. 3. Run the following command: OEMLogoD [/F or /FN or /N] 4.7.4.2 Changing the OEM Logo for Microsoft Windows* 2000 / 2003 / XP 1. Boot to Microsoft Windows 2000/2003/XP. 2. Download OEMLOGO.exe, Rombuild.exe, RomFile, and NewOEMlogoImage to the hard drive. 3. Run the following command: OEMLogo [/F or /FN or /N] Revision 4.0 87
-
 1
1 -
2
-
3
-
4
-
5
-
6
-
7
-
8
-
9
-
10
-
11
-
12
-
13
-
14
-
15
-
16
-
17
-
18
-
19
-
20
-
21
-
22
-
23
-
24
-
25
-
26
-
27
-
28
-
29
-
30
-
31
-
32
-
33
-
34
-
35
-
36
-
37
-
38
-
39
-
40
-
41
-
42
-
43
-
44
-
45
-
46
-
47
-
48
-
49
-
50
-
51
-
52
-
53
-
54
-
55
-
56
-
57
-
58
-
59
-
60
-
61
-
62
-
63
-
64
-
65
-
66
-
67
-
68
-
69
-
70
-
71
-
72
-
73
-
74
-
75
-
76
-
77
-
78
-
79
-
80
-
81
-
82
-
83
-
84
-
85
-
86
-
87
-
88
-
89
-
90
-
91
-
92
-
93
-
 94
94 -
 95
95 -
 96
96 -
 97
97 -
 98
98 -
 99
99 -
 100
100 -
 101
101 -
 102
102 -
 103
103 -
 104
104 -
105
-
106
-
107
-
108
-
109
-
110
-
111
-
112
-
113
-
114
-
115
-
116
-
117
-
118
-
119
-
120
-
121
-
122
-
123
-
124
-
125
-
126
-
127
-
128
-
129
-
130
-
131
-
132
-
133
-
134
-
135
-
136
-
137
-
138
-
139
-
140
-
141
-
142
-
143
-
144
-
145
-
146
-
147
-
148
-
149
-
150
-
151
-
152
-
153
-
154
-
155
-
156
-
157
-
158
-
159
-
160
-
161
-
162
-
163
-
164
-
165
-
166
-
167
-
168
-
169
-
170
-
171
-
172
-
173
-
174
-
175
-
176
-
177
-
178
-
179
-
180
-
181
-
182
-
183
-
184
 |
 |
