Konica Minolta AccurioPress C2070/2070P IC-314 User Guide - Page 194
Loading job parameters from a selected server, Submitting a file with job ticket for printing
 |
View all Konica Minolta AccurioPress C2070/2070P manuals
Add to My Manuals
Save this manual to your list of manuals |
Page 194 highlights
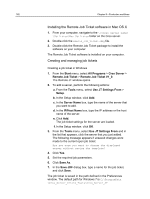
184 Chapter 8-Production workflows Loading job parameters from a selected server Requirements: The server from which you want to load job parameters must be in the Remote Job Ticket list of servers. 1. From the Tools menu, select Use JT Settings From. 2. In the list that appears, click the server from which you want to load job parameters. A check mark appears next to the selected server, and the Remote Job Ticket software loads the appropriate job parameters window. Submitting a file with job ticket for printing Requirements: You can only submit a file for printing with a job ticket that contains the required job parameters. 1. In the Remote Job Ticket software main window, click Submit. 2. In the Name box, type the name of the job ticket. 3. Click Browse. 4. In the Browse dialog box, locate the file that you want to print using the job ticket, and click Open. 5. Click Submit. The file is sent to the Creo server and is printed according to the settings defined in the job ticket. Adding a server 1. From the Tools menu, select Use JT Settings From > Setup . 2. Click the Add button. 3. In the Server Name box, type a name for the server that you want to use. 4. In the IP / Host Name box, type the IP address or host name of the server that you want to use. 5. Click Add. 6. Click OK. The new server appears in the list. Removing a server Requirements: The Remove button is available only if the list of servers contains more than one server.
-
 1
1 -
2
-
3
-
4
-
5
-
6
-
7
-
8
-
9
-
10
-
11
-
12
-
13
-
14
-
15
-
16
-
17
-
18
-
19
-
20
-
21
-
22
-
23
-
24
-
25
-
26
-
27
-
28
-
29
-
30
-
31
-
32
-
33
-
34
-
35
-
36
-
37
-
38
-
39
-
40
-
41
-
42
-
43
-
44
-
45
-
46
-
47
-
48
-
49
-
50
-
51
-
52
-
53
-
54
-
55
-
56
-
57
-
58
-
59
-
60
-
61
-
62
-
63
-
64
-
65
-
66
-
67
-
68
-
69
-
70
-
71
-
72
-
73
-
74
-
75
-
76
-
77
-
78
-
79
-
80
-
81
-
82
-
83
-
84
-
85
-
86
-
87
-
88
-
89
-
90
-
91
-
92
-
93
-
94
-
95
-
96
-
97
-
98
-
99
-
100
-
101
-
102
-
103
-
104
-
105
-
106
-
107
-
108
-
109
-
110
-
111
-
112
-
113
-
114
-
115
-
116
-
117
-
118
-
119
-
120
-
121
-
122
-
123
-
124
-
125
-
126
-
127
-
128
-
129
-
130
-
131
-
132
-
133
-
134
-
135
-
136
-
137
-
138
-
139
-
140
-
141
-
142
-
143
-
144
-
145
-
146
-
147
-
148
-
149
-
150
-
151
-
152
-
153
-
154
-
155
-
156
-
157
-
158
-
159
-
160
-
161
-
162
-
163
-
164
-
165
-
166
-
167
-
168
-
169
-
170
-
171
-
172
-
173
-
174
-
175
-
176
-
177
-
178
-
179
-
180
-
181
-
182
-
183
-
184
-
185
-
186
-
187
-
188
-
 189
189 -
 190
190 -
 191
191 -
 192
192 -
 193
193 -
 194
194 -
 195
195 -
 196
196 -
 197
197 -
 198
198 -
 199
199 -
200
-
201
-
202
-
203
-
204
-
205
-
206
-
207
-
208
-
209
-
210
-
211
-
212
-
213
-
214
-
215
-
216
-
217
-
218
-
219
-
220
-
221
-
222
-
223
-
224
-
225
-
226
-
227
-
228
-
229
-
230
-
231
-
232
-
233
-
234
-
235
-
236
-
237
-
238
-
239
-
240
-
241
-
242
-
243
-
244
-
245
-
246
-
247
-
248
-
249
-
250
-
251
-
252
-
253
-
254
-
255
-
256
-
257
-
258
-
259
-
260
-
261
-
262
-
263
-
264
-
265
-
266
-
267
-
268
-
269
-
270
-
271
-
272
-
273
-
274
-
275
-
276
-
277
-
278
-
279
-
280
-
281
 |
 |
