Konica Minolta AccurioPress C2070/2070P IC-314 User Guide - Page 97
Using the iSis automated chart reader to measure a color chart and create a profile, Profiling Tool
 |
View all Konica Minolta AccurioPress C2070/2070P manuals
Add to My Manuals
Save this manual to your list of manuals |
Page 97 highlights
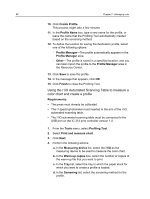
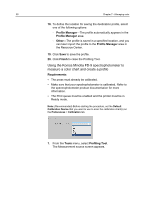
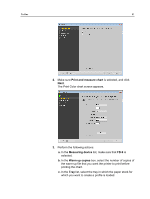
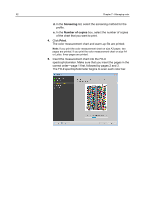
Using the iSis automated chart reader to measure a color chart and create a profile 87 14. Click Save to save the profile. 15. In the message that appears, click OK. 16. Click Finish to close the Profiling Tool. Using the iSis automated chart reader to measure a color chart and create a profile Requirements: The press must already be calibrated. 1. From the Tools menu, select Profiling Tool. 2. Select Print and measure chart. 3. Click Next. 4. Perform the following actions: a. In the Measuring device list, select the iSis as the measuring device that you will use to measure the color chart. b. In the Warm up copies box, select the number of copies of the warm-up file that you want to print. c. In the Tray list, select the tray in which the paper stock for which you want to create a profile is loaded. d. In the Screening list, select the screening method for the profile. e. In the Calibration list, select the relevant calibration table. Linked is the default setting (highly recommended). f. In the Number of copies box, select the number of copies of the chart that you want to print. 5. Click Print. The color measurement chart and the warm-up file are printed. 6. Perform the following actions: a. Insert the measurement chart into the iSis automated chart reader. Make sure that the arrows on the color measurement chart are facing the iSis automated chart reader. b. Click Start. The iSis automated chart reader begins to scan each color bar. 7. (Optional) To save the measurement file and load it at a later time, locate a folder and in the Save in box, type a name for the measurement file. 8. (Optional) Click Save. 9. Click Next.
-
 1
1 -
2
-
3
-
4
-
5
-
6
-
7
-
8
-
9
-
10
-
11
-
12
-
13
-
14
-
15
-
16
-
17
-
18
-
19
-
20
-
21
-
22
-
23
-
24
-
25
-
26
-
27
-
28
-
29
-
30
-
31
-
32
-
33
-
34
-
35
-
36
-
37
-
38
-
39
-
40
-
41
-
42
-
43
-
44
-
45
-
46
-
47
-
48
-
49
-
50
-
51
-
52
-
53
-
54
-
55
-
56
-
57
-
58
-
59
-
60
-
61
-
62
-
63
-
64
-
65
-
66
-
67
-
68
-
69
-
70
-
71
-
72
-
73
-
74
-
75
-
76
-
77
-
78
-
79
-
80
-
81
-
82
-
83
-
84
-
85
-
86
-
87
-
88
-
89
-
90
-
91
-
 92
92 -
 93
93 -
 94
94 -
 95
95 -
 96
96 -
 97
97 -
 98
98 -
 99
99 -
 100
100 -
 101
101 -
 102
102 -
103
-
104
-
105
-
106
-
107
-
108
-
109
-
110
-
111
-
112
-
113
-
114
-
115
-
116
-
117
-
118
-
119
-
120
-
121
-
122
-
123
-
124
-
125
-
126
-
127
-
128
-
129
-
130
-
131
-
132
-
133
-
134
-
135
-
136
-
137
-
138
-
139
-
140
-
141
-
142
-
143
-
144
-
145
-
146
-
147
-
148
-
149
-
150
-
151
-
152
-
153
-
154
-
155
-
156
-
157
-
158
-
159
-
160
-
161
-
162
-
163
-
164
-
165
-
166
-
167
-
168
-
169
-
170
-
171
-
172
-
173
-
174
-
175
-
176
-
177
-
178
-
179
-
180
-
181
-
182
-
183
-
184
-
185
-
186
-
187
-
188
-
189
-
190
-
191
-
192
-
193
-
194
-
195
-
196
-
197
-
198
-
199
-
200
-
201
-
202
-
203
-
204
-
205
-
206
-
207
-
208
-
209
-
210
-
211
-
212
-
213
-
214
-
215
-
216
-
217
-
218
-
219
-
220
-
221
-
222
-
223
-
224
-
225
-
226
-
227
-
228
-
229
-
230
-
231
-
232
-
233
-
234
-
235
-
236
-
237
-
238
-
239
-
240
-
241
-
242
-
243
-
244
-
245
-
246
-
247
-
248
-
249
-
250
-
251
-
252
-
253
-
254
-
255
-
256
-
257
-
258
-
259
-
260
-
261
-
262
-
263
-
264
-
265
-
266
-
267
-
268
-
269
-
270
-
271
-
272
-
273
-
274
-
275
-
276
-
277
-
278
-
279
-
280
-
281
 |
 |
