Konica Minolta AccurioPress C2070/2070P IC-314 User Guide - Page 31
Setting up a TCP/IP Printer in Windows 8.1
 |
View all Konica Minolta AccurioPress C2070/2070P manuals
Add to My Manuals
Save this manual to your list of manuals |
Page 31 highlights
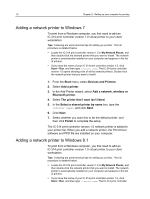
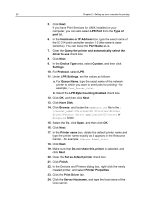
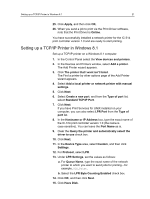
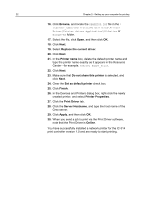
Setting up a TCP/IP Printer in Windows 8.1 21 25. Click Apply, and then click OK. 26. When you send a job to print via the Print Driver software, note that the Print Driver is Online. You have successfully installed a network printer for the IC‑314 print controller version 1.0 and are ready to start printing. Setting up a TCP/IP Printer in Windows 8.1 Set up a TCP/IP printer on a Windows 8.1 computer. 1. In the Control Panel select the View devices and printers. 2. In the Devices and Printers window, select Add a printer. The Add Printer wizard appears. 3. Click The printer that I want isn't listed. The Find a printer by other options page of the Add Printer wizard appears. 4. Select Add a local printer or network printer with manual settings. 5. Click Next. 6. Select Create a new port, and from the Type of port list, select Standard TCP/IP Port. 7. Click Next. If you have Print Services for UNIX installed on your computer, you can also select LPR Port from the Type of port list. 8. In the Hostname or IP Address box, type the exact name of the IC‑314 print controller version 1.0 (the name is case‑sensitive). You can leave the Port Name as is. 9. Clear the Query the printer and automatically select the driver to use check box. 10. Click Next. 11. In the Device Type area, select Custom, and then click Settings. 12. For Protocol, select LPR. 13. Under LPR Settings, set the values as follows: a. For Queue Name, type the exact name of the network printer to which you want to send jobs for printing-for example, CCS_Print. b. Select the LPR Byte Counting Enabled check box. 14. Click OK, and then click Next. 15. Click Have Disk.
-
 1
1 -
2
-
3
-
4
-
5
-
6
-
7
-
8
-
9
-
10
-
11
-
12
-
13
-
14
-
15
-
16
-
17
-
18
-
19
-
20
-
21
-
22
-
23
-
24
-
25
-
 26
26 -
 27
27 -
 28
28 -
 29
29 -
 30
30 -
 31
31 -
 32
32 -
 33
33 -
 34
34 -
 35
35 -
 36
36 -
37
-
38
-
39
-
40
-
41
-
42
-
43
-
44
-
45
-
46
-
47
-
48
-
49
-
50
-
51
-
52
-
53
-
54
-
55
-
56
-
57
-
58
-
59
-
60
-
61
-
62
-
63
-
64
-
65
-
66
-
67
-
68
-
69
-
70
-
71
-
72
-
73
-
74
-
75
-
76
-
77
-
78
-
79
-
80
-
81
-
82
-
83
-
84
-
85
-
86
-
87
-
88
-
89
-
90
-
91
-
92
-
93
-
94
-
95
-
96
-
97
-
98
-
99
-
100
-
101
-
102
-
103
-
104
-
105
-
106
-
107
-
108
-
109
-
110
-
111
-
112
-
113
-
114
-
115
-
116
-
117
-
118
-
119
-
120
-
121
-
122
-
123
-
124
-
125
-
126
-
127
-
128
-
129
-
130
-
131
-
132
-
133
-
134
-
135
-
136
-
137
-
138
-
139
-
140
-
141
-
142
-
143
-
144
-
145
-
146
-
147
-
148
-
149
-
150
-
151
-
152
-
153
-
154
-
155
-
156
-
157
-
158
-
159
-
160
-
161
-
162
-
163
-
164
-
165
-
166
-
167
-
168
-
169
-
170
-
171
-
172
-
173
-
174
-
175
-
176
-
177
-
178
-
179
-
180
-
181
-
182
-
183
-
184
-
185
-
186
-
187
-
188
-
189
-
190
-
191
-
192
-
193
-
194
-
195
-
196
-
197
-
198
-
199
-
200
-
201
-
202
-
203
-
204
-
205
-
206
-
207
-
208
-
209
-
210
-
211
-
212
-
213
-
214
-
215
-
216
-
217
-
218
-
219
-
220
-
221
-
222
-
223
-
224
-
225
-
226
-
227
-
228
-
229
-
230
-
231
-
232
-
233
-
234
-
235
-
236
-
237
-
238
-
239
-
240
-
241
-
242
-
243
-
244
-
245
-
246
-
247
-
248
-
249
-
250
-
251
-
252
-
253
-
254
-
255
-
256
-
257
-
258
-
259
-
260
-
261
-
262
-
263
-
264
-
265
-
266
-
267
-
268
-
269
-
270
-
271
-
272
-
273
-
274
-
275
-
276
-
277
-
278
-
279
-
280
-
281
 |
 |