Samsung SCH-R640 User Manual (user Manual) (ver.f3) (English)
Samsung SCH-R640 Manual
 |
View all Samsung SCH-R640 manuals
Add to My Manuals
Save this manual to your list of manuals |
Samsung SCH-R640 manual content summary:
- Samsung SCH-R640 | User Manual (user Manual) (ver.f3) (English) - Page 1
Samsung Character P O R TA B L E DUAL-BAND MOBILE PHONE User Manual Please read this manual before operating your phone, and keep it for future reference. - Samsung SCH-R640 | User Manual (user Manual) (ver.f3) (English) - Page 2
Samsung or its respective suppliers relating to the SAMSUNG Phone, including but not limited to, accessories, parts, or software relating there to (the "Phone System"), is proprietary to Samsung works of, reverse engineer, decompile, disassemble, or otherwise attempt to create source code from - Samsung SCH-R640 | User Manual (user Manual) (ver.f3) (English) - Page 3
, LLC is a registered trademark of Samsung Electronics America, Inc. and its related entities. Do you have questions about your Samsung Mobile Phone? For 24 hour information and assistance, we offer a new FAQ/ARS System (Automated Response System) at: http://www.samsung.com/us/support GH68-33882A - Samsung SCH-R640 | User Manual (user Manual) (ver.f3) (English) - Page 4
by the Bluetooth SIG. microSD™, microSDHC™, and the microSD logo are Trademarks of the SD Card Association. Open Source Software Some software components of this product incorporate source code covered under GNU General Public License (GPL), GNU Lesser General Public License (LGPL), OpenSSL License - Samsung SCH-R640 | User Manual (user Manual) (ver.f3) (English) - Page 5
ANY LAW, RULE, SPECIFICATION OR CONTRACT PERTAINING THERETO. NOTHING CONTAINED IN THE INSTRUCTION MANUAL SHALL BE CONSTRUED TO CREATE AN EXPRESS OR IMPLIED WARRANTY OF ANY KIND WHATSOEVER WITH RESPECT TO THE PRODUCT. IN ADDITION, SAMSUNG SHALL NOT BE LIABLE FOR ANY DAMAGES OF ANY KIND RESULTING FROM - Samsung SCH-R640 | User Manual (user Manual) (ver.f3) (English) - Page 6
Started 6 Understanding this User Manual 6 Charging the Battery 7 Activating Your Phone 10 Setting Up Your Voicemail 15 Storage Card (Optional 16 Section 2: Understanding Your Phone 18 Features of Your Phone 18 Side Views of Your Phone 19 Open View (Front) of Your Phone 21 Closed Rear View - Samsung SCH-R640 | User Manual (user Manual) (ver.f3) (English) - Page 7
Number After a Call 74 Speed Dial 77 Contacts Groups 80 Deleting a Contacts Entry 84 Memory Status 84 Section 5: Messaging Erase Messages 103 Message Settings 104 Section 6: Camera 106 Taking Pictures 106 Screen Layouts 110 Saving Pictures 112 Camera Options 112 The Pictures Gallery 122 - Samsung SCH-R640 | User Manual (user Manual) (ver.f3) (English) - Page 8
the Web 133 easyedgeSM 133 Browser 134 Tone Room 137 Section 9: Voice Service 138 Launching Voice Service 138 Voice Commands 139 Voice Command Settings 141 Section 10: Tools 146 Tools Menu 146 Voice Service 146 Bluetooth 146 Calendar 150 Memo Pad 151 Sketch Pad 152 Alarm Clock - Samsung SCH-R640 | User Manual (user Manual) (ver.f3) (English) - Page 9
Absorption Rate (SAR) Certification Information . 199 Smart Practices While Driving 202 Battery Use and Safety 204 Samsung Mobile Products and Recycling 207 UL Certified Travel Charger 209 Display / Touch-Screen 210 GPS & AGPS 211 Emergency Calls 213 Care and Maintenance 215 Responsible - Samsung SCH-R640 | User Manual (user Manual) (ver.f3) (English) - Page 10
Section 13: Warranty Information 229 Standard Limited Warranty 229 End User License Agreement for Software 234 Index 243 5 - Samsung SCH-R640 | User Manual (user Manual) (ver.f3) (English) - Page 11
Started This section explains how to start using your SCH-R640 phone by activating your service, setting up your Voicemail, or getting an understanding of how this manual is put together. Understanding this User Manual The chapters of this manual generally follow the same order as the menus and - Samsung SCH-R640 | User Manual (user Manual) (ver.f3) (English) - Page 12
Call Settings ➔ Answer Options..." Charging the Battery Your phone is powered by a rechargeable standard Li-Ion battery. Only use Samsung-approved charging devices and batteries. Samsung accessories are designed to maximize battery life. Use of other accessories may invalidate your warranty and may - Samsung SCH-R640 | User Manual (user Manual) (ver.f3) (English) - Page 13
located in North America, you must use an adaptor of the proper configuration for the power outlet. Use of the wrong adapter could damage your phone and void your warranty. 2. If needed, install the battery in the phone. (For more information, refer to "Install the - Samsung SCH-R640 | User Manual (user Manual) (ver.f3) (English) - Page 14
accessory connector on the upper left side of your phone. Correct Incorrect Warning!: Your touch screen screen may damage the tempered glass surface and void the warranty (see "Warranty Information" on page 229). Important!: You must unplug the adapter before removing the battery from the phone - Samsung SCH-R640 | User Manual (user Manual) (ver.f3) (English) - Page 15
your phone without charging its battery, the phone will shut down. Activating Your Phone Contact your Wireless Carrier and follow their instructions for obtaining service, if necessary. We suggest that you read this guide to fully understand the services your phone supports. Install the Battery Note - Samsung SCH-R640 | User Manual (user Manual) (ver.f3) (English) - Page 16
into the slot at the top of the battery cover (1) and gently pry it away from the phone. Then, lift the cover away from the phone (2). 2. First, insert the top end of the battery (1), matching the gold contacts on the battery to those on the inside of the phone. 3. Press lightly on the bottom end of - Samsung SCH-R640 | User Manual (user Manual) (ver.f3) (English) - Page 17
4. Place the bottom end of the battery cover over the battery (1) and press the battery cover down into place (2). Getting Started 12 - Samsung SCH-R640 | User Manual (user Manual) (ver.f3) (English) - Page 18
and hold to turn off the phone (if on). 2. Lay the phone face down and insert a small coin into the slot at the bottom of the battery cover and gently pry it away from the phone. then lift the cover away from the phone (2). 3. Lift the battery up (1) and away (2) from the phone, bottom end first - Samsung SCH-R640 | User Manual (user Manual) (ver.f3) (English) - Page 19
you are outside of your carrier's coverage or roaming area, the No Service icon ( ) appears at the top of the phone's display. If you cannot place or receive calls, try later when service is available, or at another location. Turn Your Phone Off ᮣ Press and hold the End key ( ), on the bottom right - Samsung SCH-R640 | User Manual (user Manual) (ver.f3) (English) - Page 20
Message menu) to view details of voice messages in your Voicemail box. To dial Voicemail: 1. In Standby mode, tap the Dialer soft key. The Dialer screen appears in the display. 2. Press and hold or dial your own mobile number and press . (For more information, refer to "Making a Call" on page - Samsung SCH-R640 | User Manual (user Manual) (ver.f3) (English) - Page 21
a storage capacity of over 16 GB will not work with this phone. Install a Memory Card 1. Remove the battery cover. (For more information, refer to "Remove the Battery" on page 13.) 2. Hold the card with the label facing up and the gold contacts of the card facing down, as shown, then carefully slide - Samsung SCH-R640 | User Manual (user Manual) (ver.f3) (English) - Page 22
your phone's response to commands and produce other unwanted results. To avoid such problems, format a used microSD Memory Card after inserting it in your handset. (For more information, refer to "Formatting a Memory Card" on page 188.) 3. Replace the battery cover. Remove a Memory Card 1. Remove - Samsung SCH-R640 | User Manual (user Manual) (ver.f3) (English) - Page 23
Memory Card slot (for optional microSD™ cards up to 16 GB) • Voice Recognition • Speakerphone Note: The SCH-R640 supports the wireless handsfree profile and the serial port profile for Bluetooth® wireless technology. The SCH-R640 does not support Bluetooth OBEX profiles. Understanding Your Phone 18 - Samsung SCH-R640 | User Manual (user Manual) (ver.f3) (English) - Page 24
Display: Indicates the status of your phone (including numbers dialed, feature and function screens, status icons, message indicators and connect charging accessories or any available USB cables to your phone. 6. Headset Connector: Used to connect a headset or TTY device to your phone. (For - Samsung SCH-R640 | User Manual (user Manual) (ver.f3) (English) - Page 25
mode from any feature, function, or menu. 7 9 10. Camera Key: Launches the Camera 8 feature of your phone and takes pictures. (For more information, refer to "Camera" on page 106.) 11. Lock Key: Locks and unlocks the keys and the touch screen and lights the backlight. Understanding Your - Samsung SCH-R640 | User Manual (user Manual) (ver.f3) (English) - Page 26
to the left. 1. Earpiece: Lets you hear other parties to calls. 2. Display: Indicates the status of your phone, including numbers dialed, feature and function screens, status icons, message indicators, signal strength, and so on. 3. Fn Key: Text Function Key - Toggles text entry mode between ABC - Samsung SCH-R640 | User Manual (user Manual) (ver.f3) (English) - Page 27
mode, moves the cursor to a fresh, blank line. 9. Back / Clear Key: Deletes characters from the display when you are in text entry mode. Press this key to return to the previous menu or screen when navigating features on your phone. 10. Send Key: Lets you place or receive a call. In Standby mode - Samsung SCH-R640 | User Manual (user Manual) (ver.f3) (English) - Page 28
Closed Rear View of Your Phone 1. Camera Lens: The lens of your built-in camera. 2. Battery Cover: Lets you 1 3 access your phone's battery. 2 3. Speaker Grill: Lets you hear ringing and alert tones, alarm tones, and music. 23 - Samsung SCH-R640 | User Manual (user Manual) (ver.f3) (English) - Page 29
Understanding the Display Screen 1. The top line of your phone's 1 display contains icons that indicate network status, 2 battery power, signal screen shows the following soft keys: • Dialer: Launches the Dialer screen that lets you place calls. • Contacts: Launches the Contacts list screen. - Samsung SCH-R640 | User Manual (user Manual) (ver.f3) (English) - Page 30
With the QWERTY keypad open, the display rotates automatically from portrait mode (as shown above) to landscape mode (as shown here). Display Screen Icons Your SCH-R640 phone can show you definitions of the icons that appear on the top line of the display. To access the Icon Glossary: ᮣ In Standby - Samsung SCH-R640 | User Manual (user Manual) (ver.f3) (English) - Page 31
by tapping the Widget button in the upper left corner of the Home screen. The Widget Tray appears at the bottom of the Home screen and lists icons for those Widgets selected in the Widget settings. Tip: You right within the Widget Tray until a desired Widget icon appears. Understanding Your Phone 26 - Samsung SCH-R640 | User Manual (user Manual) (ver.f3) (English) - Page 32
4. Tap the desired Widget icon to copy the corresponding Widget onto the Home screen panel. To re-position the Widget on the Home screen panel, press and drag the Widget to the desired position. 5. Once on the Home screen, you can tap a Widget to launch its function. Note: You can return a Widget to - Samsung SCH-R640 | User Manual (user Manual) (ver.f3) (English) - Page 33
Saved" • Information - Example: "New Message" • Error - Example: "System Error!" • Warning - Example: "Low Battery," "Memory Full!" Backlights Backlights illuminate the display and the keypad. When you press any key or slide the phone open, the backlights come on. They go off when no keys are - Samsung SCH-R640 | User Manual (user Manual) (ver.f3) (English) - Page 34
call, the display backlight dims and turns off after 10 seconds to conserve battery power, regardless of the Backlight setting. For more information, refer to "Backlight" on page 169. Menu Navigation Like the Home screen, the Main Menu has 3 panels. To access your phone's menus, tap the Menu soft - Samsung SCH-R640 | User Manual (user Manual) (ver.f3) (English) - Page 35
Learning More About Your Phone Your R640 phone contains tutorials about a number of its features. To access your phone's tutorials, do the following: 1. From a Home screen panel, tap the Widget button. The Widget Tray appears in the display. (For more information, refer to "Using the Widget Tray" - Samsung SCH-R640 | User Manual (user Manual) (ver.f3) (English) - Page 36
can use the following special function keys: Press to delete characters. Tip: You can also delete a character by pressing . Press to start a new line. In abc mode, press once to enter a single upper case letter. In Abc mode, press once to select CAPS LOCK (ABC mode). In ABC mode, press once more to - Samsung SCH-R640 | User Manual (user Manual) (ver.f3) (English) - Page 37
Abc, ABC, Fn (symbols), and Fn (symbols locked). While at any text entry screen: • To toggle between abc and Abc and ABC unlock the phone. Lock Mode also restricts access to menus and the volume key. Unlock your phone by entering the lock code when prompted. (For more information, refer to "Edit Code - Samsung SCH-R640 | User Manual (user Manual) (ver.f3) (English) - Page 38
Standby mode is the state of the phone once it has found service and is idle. The phone goes into Standby mode: • After you power the phone on. • When you press after a call or from within a menu. In Standby mode, you will see a home screen panel showing phone status icons and any widgets you have - Samsung SCH-R640 | User Manual (user Manual) (ver.f3) (English) - Page 39
or share the call with other people nearby by placing your phone in Speakerphone Mode. • To enable Speakerphone Mode: 1. Follow the prompt and unlock the screen. 2. Tap and slide the screen button to the On position. Caution!: Keep the phone away from you ear while in Speakerphone Mode. (For more - Samsung SCH-R640 | User Manual (user Manual) (ver.f3) (English) - Page 40
Vibrate mode: ᮣ In Standby mode, do one of the following: • Press the Volume key (on the left side of the phone) Down until "Vibrate Only" briefly appears in the display and your phone returns to Standby mode. - or - • Tap the Dialer soft key and press and hold the mode activated" briefly appears - Samsung SCH-R640 | User Manual (user Manual) (ver.f3) (English) - Page 41
" briefly appears in the display. Adjust the Ringer key until "Normal 1. In Standby mode, press the Volume key (on the left side of the phone) Up or Down. Options are: • All Sounds Off • Alarm Only • Vibrate Only • Low • Medium Low • Medium • Medium High • High 2. When you are satisfied with - Samsung SCH-R640 | User Manual (user Manual) (ver.f3) (English) - Page 42
Camera Mode Camera mode lets you activate your phone's camera to take pictures. In Camera mode, you can also adjust the resolution and appearance of .) • Entering Camera Mode: In Standby mode, press the Camera key ( ) - on the right side of the phone. • Exiting Camera Mode: Press the key. 37 - Samsung SCH-R640 | User Manual (user Manual) (ver.f3) (English) - Page 43
, you can also perform all of these procedures, except Plus (+) Code (International Shortcut) Calls, using the QWERTY keypad. Making a Call 1. In Standby mode, tap Dialer. The Dialer screen appears in the display. The format of the Dialer screen depends on whether the QWERTY keypad is closed or open - Samsung SCH-R640 | User Manual (user Manual) (ver.f3) (English) - Page 44
your R640 phone locks itself in emergency mode, only allowing you to make calls to the emergency call center you originally contacted. This your call using threeway calling. 1. In Standby mode, tap Dialer. The Dialer screen appears in the display. 2. Enter the number for the first party in your - Samsung SCH-R640 | User Manual (user Manual) (ver.f3) (English) - Page 45
5. Enter the second party's phone number and press . 6. When the second party answers, resume the conversation. Manual Pause Calling To manually call a number with pause(s) without storing it in your Contacts list: 1. In Standby mode, tap Dialer. The Dialer screen appears in the display. 2. Enter - Samsung SCH-R640 | User Manual (user Manual) (ver.f3) (English) - Page 46
Dialing lets you place a call to any Contact stored in your Contacts list by dialing the Contact's Location number. 1-Touch Dialing Use 1-touch dialing to speed dial Contacts from 1 (Voicemail) through 9. 1. In Standby mode, tap Dialer. The Dialer screen appears in the display. 2. Press and hold - Samsung SCH-R640 | User Manual (user Manual) (ver.f3) (English) - Page 47
999. 1. In Standby mode, tap Dialer. The Dialer screen appears in the display. 2. Tap the number key representing the first digit of the desired Contact's speed dial number. 3. Tap the number key representing the second digit of the desired Contact's speed dial number. 4. Press and hold the number - Samsung SCH-R640 | User Manual (user Manual) (ver.f3) (English) - Page 48
code for your location. Example: 011 is the code for international calls placed from the United States. To make a call using Plus Code Dialing: 1. In Standby mode, tap Dialer. The Dialer screen country code. (When you press , the second "+" symbol is automatically replaced with the country code - Samsung SCH-R640 | User Manual (user Manual) (ver.f3) (English) - Page 49
R640 are exceptional due to advanced, speaker-independent technology. This means you do not need to "train" your phone to understand your voice. You can use your voice in a natural manner to dial numbers. Note: End Calls Before relaunching the Voice Service stored in your contact list, by speaking - Samsung SCH-R640 | User Manual (user Manual) (ver.f3) (English) - Page 50
". 3. Speak clearly and say the name of a person in your Contacts list, first name followed by last name. If the name is recognized the list. (For more information, refer to "Voice Service" on page 138.) • Press to exit Voice Service without dialing. If the recognized name has multiple numbers stored - Samsung SCH-R640 | User Manual (user Manual) (ver.f3) (English) - Page 51
or "No" to hear the next one, or use the keypad to select the correct number from the list. (For more information, refer to "Voice Service" on page 138.) Call Functions 46 - Samsung SCH-R640 | User Manual (user Manual) (ver.f3) (English) - Page 52
are calling (credit card number, bank account number, and so on) and enter the appropriate response(s). Answering a Call Incoming When you receive a call, the phone displays one of the following: • If the caller can be identified, the caller's number (or name if it's in your Contacts) appears in the - Samsung SCH-R640 | User Manual (user Manual) (ver.f3) (English) - Page 53
with caller ID. (If the caller's name is programmed into your Contacts). • Information about the last 90 each of incoming, missed, and outgoing keypad. The following options appear in the display: • Slide Open: Slide the phone open to answer an incoming call. • Any Key: Pressing any key on either - Samsung SCH-R640 | User Manual (user Manual) (ver.f3) (English) - Page 54
wish.) 3. To de-select an option, tap it again. The check mark disappears. Call Waiting If you're on a call, your phone beeps when another call is incoming. Contact your Wireless Carrier for availability. 1. Press to connect and ask the calling party to remain on the line. 2. Press and the second - Samsung SCH-R640 | User Manual (user Manual) (ver.f3) (English) - Page 55
Call Block You can prevent your number from displaying on another phone's caller ID screen by enabling Call Block. 1. In Standby mode, tap Dialer, then tap , , . 2. Enter the number whose calls you want to block, then press . Silence an Incoming - Samsung SCH-R640 | User Manual (user Manual) (ver.f3) (English) - Page 56
you switch this call's sounds from the phone's earpiece and microphone to a Bluetooth device. (For more information, refer to "Device List" on page 148.) 3. Options: The following options pop-up: • Contacts: Launches the Contact List screen, letting you make a threeway call with one / another - Samsung SCH-R640 | User Manual (user Manual) (ver.f3) (English) - Page 57
Launches the Bluetooth screen, letting you switch this call's sounds from the phone's earpiece and phone has Call Logs that retain information about Outgoing, Incoming, and Missed Calls. The Calls menu lets you access this information for future reference, to return calls, and to add new Contacts - Samsung SCH-R640 | User Manual (user Manual) (ver.f3) (English) - Page 58
90 missed/received/dialed calls are stored in the Dialed calls log. Review the Dialed calls log for the time and date of a call, your Contacts. 3. For additional options, tap . The following options appear in the display: • Erase: Erase the selected call from your Dialed call log. • Lock/Unlock: - Samsung SCH-R640 | User Manual (user Manual) (ver.f3) (English) - Page 59
in the All calls log. Review the All calls log for also access the All calls log from a Home screen by pressing . The following icons indicate the type selected calls from your Call log. • Lock/Unlock: Blocks/permits erasure of one or more reset all but the Lifetime counters. Call Functions 54 - Samsung SCH-R640 | User Manual (user Manual) (ver.f3) (English) - Page 60
Text / Picture) to this number. • Save: Save this number to your Contacts. 4. For additional options, tap in the display: . The following options appear • Erase: Erase the selected call from your Call log. • Lock/Unlock: Blocks/permits erasure of the selected call from your Dialed call log. 55 - Samsung SCH-R640 | User Manual (user Manual) (ver.f3) (English) - Page 61
Erase Logs You can erase individual calls from the Missed, Received, Dialed, or All call logs by doing the following: 1. From the Calls menu, tap Missed / Received / Dialed / All. A selected list of your calls appears in the display. 2. Tap and drag the list to scroll up or down for a particular - Samsung SCH-R640 | User Manual (user Manual) (ver.f3) (English) - Page 62
of all calls originated by and made to your phone while roaming and since the last reset. • Transmit Data: Shows the amount of data sent by the data services on your phone. • Received Data: Shows the amount of data received by the data services on your phone. • Total Data: Shows the total amount of - Samsung SCH-R640 | User Manual (user Manual) (ver.f3) (English) - Page 63
amount of data sent and received by the data services on your phone since activation (Lifetime data counters cannot be reset). Reset Timers / Counters 1. From the View Timers screen, press Reset. The Reset screen appears in the display. 2. To reset a particular timer or counter, tap and drag the - Samsung SCH-R640 | User Manual (user Manual) (ver.f3) (English) - Page 64
Note: Although Total call timers and data counters can be reset, Lifetime call timers and data counters can never be reset. Store Numbers from Call Logs Store numbers from your Dialed, Received, Missed, and All call logs to Contacts. Tip: In Standby mode, briefly press to display the Recent Calls - Samsung SCH-R640 | User Manual (user Manual) (ver.f3) (English) - Page 65
Up to 1000 entries can be stored in Contacts. Each entry can have up to five associated phone numbers and one e-mail address. Each phone number can be up to 32 digits in length, including 2-Sec or Wait pauses (for more information, refer to "Manual Pause Calling" on page 40), and associated names - Samsung SCH-R640 | User Manual (user Manual) (ver.f3) (English) - Page 66
. Voice Service prompts, "Say a command." Say "Go to Contacts" into the microphone. • New Contact: Add a number or e-mail address to your Contacts. • Contacts List: Find a phone number by name. Tip: You can also access the Contacts List option from Standby mode, by tapping Contacts. • Groups: Review - Samsung SCH-R640 | User Manual (user Manual) (ver.f3) (English) - Page 67
entry. • Update Existing: Lets you add the number you entered to an existing Contacts entry. • Memo: Enter this number into a text memo. 4. Tap Add New Contact. The Add New Contact screen appears in the display showing the following icons: Mobile 1 Business Mobile 2 Fax Home 5. Tap the - Samsung SCH-R640 | User Manual (user Manual) (ver.f3) (English) - Page 68
New Contact screen appears in the display. 2. Open the QWERTY keypad. 3. Tap the Name field. 4. Enter the name of the new Contact. (For more information, refer to "Entering Text" on page 31.) 5. Locate and tap one of the following fields: Mobile 1 Business Mobile 2 Fax Home 6. Enter a phone - Samsung SCH-R640 | User Manual (user Manual) (ver.f3) (English) - Page 69
New Contact screen appears in the display. 3. Open the QWERTY keypad. 4. Tap the Name field. 5. Enter the name of the new Contact. (For more information, refer to "Entering Text" on page 31.) 6. Locate and tap one of the following fields: Mobile 1 Business Mobile 2 Fax Home 7. Enter a phone - Samsung SCH-R640 | User Manual (user Manual) (ver.f3) (English) - Page 70
it quickly. 1. In Standby mode, tap Menu ➔ Contacts ➔ Contact List. The Cantact List screen appears in the display showing the first few names in your Contacts list. Tip: You can also access the Contact List screen from Standby mode by tapping Contacts. 2. Open the QWERTY keypad and enter a name as - Samsung SCH-R640 | User Manual (user Manual) (ver.f3) (English) - Page 71
display: - Set Speed Dial: Assign a Speed Dial number to this Contact. - Set Default Number: Contact with multiple numbers - Assign a number as Default number for this Contact. - Send Name Card Via Bluetooth: Send a copy of this Contacts entry to another Bluetooth device. • Tap Edit to add or change - Samsung SCH-R640 | User Manual (user Manual) (ver.f3) (English) - Page 72
Voice Method Use the Voice Service Contacts command to view contact information for any named contact stored in your Contacts list by saying the name. Note: The Contacts command does not dial phone numbers for a Contact. To look up information for a specific Contact: 1. In Standby mode, tap Menu ➔ - Samsung SCH-R640 | User Manual (user Manual) (ver.f3) (English) - Page 73
display: - Set Speed Dial: Assign a Speed Dial number to this Contact. - Set Default Number: Contact with multiple numbers - Assign a number as Default number for this Contact. - Send Name Card Via Bluetooth: Send a copy of this Contacts entry to another Bluetooth device. • Tap Edit to add or change - Samsung SCH-R640 | User Manual (user Manual) (ver.f3) (English) - Page 74
Contact. The selected Contact's information appears in the display. 3. Scroll up or down to review the information for the Contact that you wish to change, then tap Edit. The Edit Contact screen "Add Pauses to Contacts Numbers" on page 70 for more information). - Wait: A hard pause (waits for input - Samsung SCH-R640 | User Manual (user Manual) (ver.f3) (English) - Page 75
Numbers Calls to automated systems such as banking services often require a password or account number. Instead of manually entering these numbers, you can store them in a Contacts entry with the phone number and with special characters called pauses, up to a maximum of 32 digits. • 2-Sec Pause - Samsung SCH-R640 | User Manual (user Manual) (ver.f3) (English) - Page 76
entered. Edit an Existing Email Address to send the 1. Find the Contacts entry you want to edit. See "Finding a Contacts Entry" on page 65 for more information. 2. Tap the desired Contacts entry, then tap Edit. The Edit Contact screen appears in the display. 3. Open the QWERTY keypad, then tap - Samsung SCH-R640 | User Manual (user Manual) (ver.f3) (English) - Page 77
. (For more information, refer to "The Pictures Gallery" on page 122.) • Tap the picture that you wish to assign to the Contacts entry, then tap Set. The Edit Contact screen appears in the display with a thumbnail view of the selected image in the Picture ID field. - or - If there are no pictures - Samsung SCH-R640 | User Manual (user Manual) (ver.f3) (English) - Page 78
The Edit Contact screen appears in the display with a thumbnail view of the selected image in the Picture ID field. 5. Tap Save to save the picture assignment to the selected Contacts entry. Assigning a Ringtone to a Contacts Entry When you assign a ringtone to a Contacts entry, the phone plays the - Samsung SCH-R640 | User Manual (user Manual) (ver.f3) (English) - Page 79
2. Tap Save. The following options appear in the display: • Add New Contact: Lets you create a new Contacts entry. • Update Existing: Lets you add the number you entered to an existing Contacts entry. 3. Follow the instructions in the upcoming sections depending on whether the number is a new entry - Samsung SCH-R640 | User Manual (user Manual) (ver.f3) (English) - Page 80
Create a New Entry 1. Select Add New Contact. The Add New Contact screen appears in the display showing the following number type options: Mobile 1 Business Mobile 2 Fax Home 2. Select , refer to "Entering Text" on page 31.) 4. Tap Save. The new entry is saved to your Contacts list. 75 - Samsung SCH-R640 | User Manual (user Manual) (ver.f3) (English) - Page 81
Update Existing. The Update Existing screen appears in the display showing your Contacts list. 2. Find the Contacts entry to which you want to add the new number. See "Finding a Contacts Entry" on page 65 for more information. 3. Tap the desired Contact. The following number type options appear - Samsung SCH-R640 | User Manual (user Manual) (ver.f3) (English) - Page 82
entry procedures (see "Adding a New Contacts Entry" on page 62) until you enter a name for the entry. 2. After entering the Contacts entry name, do not press Save. Open the QWERTY keypad and tap the number field. 3. Tap Options ➔ Set Speed Dial. The Set Speed Dial screen appears in the display. 77 - Samsung SCH-R640 | User Manual (user Manual) (ver.f3) (English) - Page 83
(911). You are prompted to confirm your Speed Dial number assignment. 5. Tap Yes to save your Speed Dial assignment and return to the Add New Contact screen. Note: Tap No to discard the assignment and return to the Speed Dial - Samsung SCH-R640 | User Manual (user Manual) (ver.f3) (English) - Page 84
the entry. 6. Tap Yes to remove the Speed Dial assignment. "Speed dial removed" pops up in the display, and you are returned to the Edit Contact screen. 7. Do steps 2 through 4 of the "Assignment During Entry Creation" procedure on page 77. 79 - Samsung SCH-R640 | User Manual (user Manual) (ver.f3) (English) - Page 85
Entry" on page 62 for more information) or find and edit a Contacts entry (see "Editing a Contacts Entry" on page 69 for more information) that you want to add to a Group. 2. Tap the Group field. The Select Group screen appears in the display showing Groups similar to the following: • Business - Samsung SCH-R640 | User Manual (user Manual) (ver.f3) (English) - Page 86
. Using Group Add Members Option The Add Members option lets you add one or more existing Contacts to a Group. 1. In Standby mode, tap Menu ➔ Menu 1 ➔ Contacts ➔ Groups. The Groups screen appears in the display showing Groups similar to the following: • Business • Colleague • Family • Friends 2. Tap - Samsung SCH-R640 | User Manual (user Manual) (ver.f3) (English) - Page 87
The Rename option lets you change the name any of the Groups. 1. In Standby mode, tap Menu ➔ Menu 1 ➔ Contacts ➔ Groups. The Group List screen appears in the display. 2. Tap ➔ Rename Group. The Select Group screen appears in the display. 3. Tap the Group name you wish to change. The Rename Group - Samsung SCH-R640 | User Manual (user Manual) (ver.f3) (English) - Page 88
The Erase option lets you delete a Group, thus freeing you to reassign the Contacts formerly in the Group. 1. In Standby mode, tap Menu ➔ Menu 1 ➔ Contacts ➔ Groups. The Groups screen appears in the display. 2. Tap ➔ Erase Group. The Erase Group screen appears in the display. 3. Tap the Group you - Samsung SCH-R640 | User Manual (user Manual) (ver.f3) (English) - Page 89
Entry 1. In Standby Mode, tap Contacts ➔ appears in the display. . The Erase screen 2. Scroll to and tap the Contact you want to erase. A check mark appears in the box to the right of the Contact. 3. Tap Done. The phone prompts you to confirm the erasure. 4. To confirm erasure of the selected - Samsung SCH-R640 | User Manual (user Manual) (ver.f3) (English) - Page 90
in the display. Tip: To launch the New Text Msg screen using a voice command - In Standby mode, tap Menu ➔ Menu 3 ➔ Voice Commands. The phone prompts, "Say a command." Say "Send Text" into the microphone. You are then prompted to say a Contact name or a number for the first recipient of the message - Samsung SCH-R640 | User Manual (user Manual) (ver.f3) (English) - Page 91
3. Tap Add ➔ From Contacts / Recent Calls / Groups and find and select a recipient for this message. - or - Tap New# and enter a recipient number or e-mail address. 4. Tap the Text field. 5. - Samsung SCH-R640 | User Manual (user Manual) (ver.f3) (English) - Page 92
unless turned off) , Save Quick Text, Lock/Unlock, Add To Contacts or View Contact, Extract Addresses, or Message Info. • View Later: Saves the message to your Messages folder, where you can view it later, then returns your phone - Samsung SCH-R640 | User Manual (user Manual) (ver.f3) (English) - Page 93
appears in the display, press the Camera key ( ) to take a picture.Your new picture appears in the picture review screen. Note: For more information about using the camera feature in your phone, see "Camera" on page 106. 3. Tap Send via. The Send Via menu appears in the display. 4. Tap Picture - Samsung SCH-R640 | User Manual (user Manual) (ver.f3) (English) - Page 94
; otherwise, proceed to step 9. • Tap the Sound field. The Ringtones screen appears in the display showing the following options: - Record New: Record a the list of previously recorded voice memos and preloaded audio files on your phone. • Tap Record New or tap the desired sound file to be inserted - Samsung SCH-R640 | User Manual (user Manual) (ver.f3) (English) - Page 95
• Add Slide: Add a slide and another picture to your message. • Remove Slide: Remove a slide from your message. • Insert Quick Text: Insert pre-composed text in your message. • Priority Level: Choose Urgent, Normal, or Low. • Validity Period: Enter the Date when this message will cease to be valid, - Samsung SCH-R640 | User Manual (user Manual) (ver.f3) (English) - Page 96
in the display. Tip: To launch the New PIC Msg screen using a voice command - In Standby mode, tap Menu ➔ Menu 3 ➔ Voice Commands until the phone prompts, "Say a command." Say "Send Picture" into the microphone. You are then prompted to say a Contact name or a number for the first recipient of the - Samsung SCH-R640 | User Manual (user Manual) (ver.f3) (English) - Page 97
, tap ➔ Take Picture. Note: For more information about using the camera feature in your phone, see "Camera" on page 106. • Press to add the highlighted picture to your message. You are returned to the New PIC Msg screen with the selected picture in the Slide field. 6. Tap and slide to scroll down - Samsung SCH-R640 | User Manual (user Manual) (ver.f3) (English) - Page 98
• Tap Record New or tap the desired sound file to be inserted into your message. 8. Tap and slide to scroll down to, and then tap, the Subject field. Enter a subject for the Picture message using the keypad. (For more information, refer to "Entering Text" on page 31.) 9. Tap to complete the message - Samsung SCH-R640 | User Manual (user Manual) (ver.f3) (English) - Page 99
in Standby mode, the ringer sounds (unless turned off) and the New Multimedia Msg screen appears in the display along with the closed option to Reply, Forward, Erase, Save Picture, Save Quick Text, Lock, Add To Contacts, View Contact, Extract Addresses, or Message Info. • View Later: Saves the - Samsung SCH-R640 | User Manual (user Manual) (ver.f3) (English) - Page 100
message is downloading to your phone. 2. After the Picture message has downloaded, an alert Lock / Unlock: Block/permit erasure of this message. • Save Quick Text: Save the text in this message as a new Quick Text. • View Contact: View the Contact information for the message sender. • Add To Contacts - Samsung SCH-R640 | User Manual (user Manual) (ver.f3) (English) - Page 101
Later 1. In Standby mode, tap Messaging ➔ Messages. The Messages screen appears in the display, listing recipients and originators of messages. 2. indicating that the message is downloading to your phone. 4. Once a Picture message has been downloaded to your phone, the new Picture message appears - Samsung SCH-R640 | User Manual (user Manual) (ver.f3) (English) - Page 102
To manage the messages without reviewing them, tap . The following options appear in the display: • Sort Alaphabetically: Sort the Messages list with Contacts in alphabetical order followed by non-Contact numbers in numerical order. • Erase: Remove selected or all unlocked messages from the Messages - Samsung SCH-R640 | User Manual (user Manual) (ver.f3) (English) - Page 103
. • Erase: Delete this message from the Inbox. • Lock / Unlock: Block/permit erasure of the highlighted message. • Save Quick Contacts: Save the sender's number to your Contacts. • View Contact: View Contact information. • Extract Addresses: Extract addresses from message text and add to Contacts - Samsung SCH-R640 | User Manual (user Manual) (ver.f3) (English) - Page 104
that you've saved appears in the display. 2. Highlight a text message that you wish to view or edit, then tap Edit. The New Text Msg screen appears in the display. 3. Enter or change the recipient's number and/or e-mail address and edit the message text. (For more information, refer to "Entering - Samsung SCH-R640 | User Manual (user Manual) (ver.f3) (English) - Page 105
draft messages that you've saved appears in the display. 2. Tap the picture message that you wish to view, then tap Edit. The message edit screen appears in the display. 3. Make any needed changes and tap . The following options appear in the display: • Preview: Shows the message contents. • Save As - Samsung SCH-R640 | User Manual (user Manual) (ver.f3) (English) - Page 106
• Add Slide: Add a slide and another picture to your message. • Remove Slide: Remove a slide from your message. • Priority Level: Choose Urgent, Normal, or Low. • Validity Period: Enter the Date when this message will cease to be valid, then use the Left and Right navigation keys to choose the Time. - Samsung SCH-R640 | User Manual (user Manual) (ver.f3) (English) - Page 107
review your messages. ᮣ Select the desired option. Listen to Voicemail Now When you choose to review your new voicemail message(s) right away, your phone have chosen to review your voicemail messages at a later time: 1. In Standby mode, tap Messaging ➔ Voicemail. The Voicemail screen appears in the - Samsung SCH-R640 | User Manual (user Manual) (ver.f3) (English) - Page 108
. The following options appear in the display: • Messages: Deletes all unlocked messages stored in the Messages folder. • Drafts: Deletes all unlocked messages stored in the Drafts folder. • All Messages: Deletes all unlocked messages stored in all of the message folders, except Voicemail. 3. Select - Samsung SCH-R640 | User Manual (user Manual) (ver.f3) (English) - Page 109
View Mode: Chat / Normal - View messages to/from the same number/Contact as a "chat session", or view messages individually. • Entry Mode: Choose messages is received. • Picture Msg Download: With Msg Download set to On, your phone automatically downloads Picture messages for viewing when they - Samsung SCH-R640 | User Manual (user Manual) (ver.f3) (English) - Page 110
• Callback Number: Choose whether to include a callback phone number with your outgoing messages, and enter the number to be included. • Signature: Choose whether to include a text signature in outgoing message text, and enter - Samsung SCH-R640 | User Manual (user Manual) (ver.f3) (English) - Page 111
Section 6: Camera Use your Samsung phone to take full color digital pictures, display them on your phone's vivid color display, and instantly share them with family and friends. It's fun, and as easy to use as a traditional point-and-click camera. This - Samsung SCH-R640 | User Manual (user Manual) (ver.f3) (English) - Page 112
settings, do the following: 1. In Standby mode, press the Camera key ( ) on the right side of the phone. The camera viewfinder screen appears in the display. (For more information, refer to "Screen Layouts" on page 110.) Note: You can also activate the Camera by tapping Menu ➔ Menu 1 ➔ Camera or - Samsung SCH-R640 | User Manual (user Manual) (ver.f3) (English) - Page 113
or over a Bluetooth connection. • Press Set as to assign the photo as a Home screen wallpaper or as a Contact ID image. • Press Erase to erase the photo. • Press Save to save the ( ) on the right side of the phone. The camera view finder screen appears in the display. (For more information, refer to - Samsung SCH-R640 | User Manual (user Manual) (ver.f3) (English) - Page 114
(for this session only) apply one of the preloaded picture frames in your phone to characterize or enhance one or more pictures. • Mosaic: Lets you take a progress bar (similar to this 0/8 ) or the selected Mosaic screen (which fills with pictures as they are taken) appears in the - Samsung SCH-R640 | User Manual (user Manual) (ver.f3) (English) - Page 115
Bluetooth connection, press Send via. • To set a picture as a Home screen wallpaper or as a Contact ID image, press Set as. • To discard the pictures, press Erase. refer to "Camera Options" on page 112. Screen Layouts Camera Screen When you activate your phone's camera, the first line of the display - Samsung SCH-R640 | User Manual (user Manual) (ver.f3) (English) - Page 116
Camera Screen Buttons Set the Camera's Shooting Mode to Single, Continuous, Frame, or Mosaic. Set the Camera's Resolution to 1280x960 / 800x600 / 640x480 / 320x240. Set the Camera's White - Samsung SCH-R640 | User Manual (user Manual) (ver.f3) (English) - Page 117
in the Pictures folder. These folders are part of the phone's memory and/or part of an optional Memory Card devoted to storing, browsing, and viewing saved Mode" on page 88. • Set the picture As a home screen Wallpaper or as a Contact's Picture ID. • Discard the picture by tapping Erase. Camera - Samsung SCH-R640 | User Manual (user Manual) (ver.f3) (English) - Page 118
with a single press of the Camera key ( ). • Frame: Lets you temporarily (for this session only) apply one of the preloaded picture frames in your phone to characterize or enhance one or more pictures. • Mosaic: Lets you take a mosaic of up to 9 photos, one per press of the Camera key ( ). 2. Tap - Samsung SCH-R640 | User Manual (user Manual) (ver.f3) (English) - Page 119
temporarily apply one of the preloaded picture frames in your phone to characterize or enhance one or more pictures. 1. In Frames appears in the display. 2. Select the Frame you wish to use. The camera screen appears in the display with your selected Frame in place. When you take your next picture - Samsung SCH-R640 | User Manual (user Manual) (ver.f3) (English) - Page 120
options pop-up: • 1280x960 (pixels) • 800x600 (pixels) • 640x480 (pixels) • 320x240 (pixels) 2. Tap the desired option. You're returned to the camera viewfinder screen. Note: The Size setting affects zoom capabilities. When Size is set to 1280 x 960, zoom is not available. When Size is set to any - Samsung SCH-R640 | User Manual (user Manual) (ver.f3) (English) - Page 121
Sec, or 10 Sec, the Self Timer countdown timer icon appears in the camera screen in the display. When you press the Camera key ( ), the countdown timer indicates stop the countdown timer without resetting it, press . Night Shot Night Shot indicates/changes whether your phone is ready to take photos - Samsung SCH-R640 | User Manual (user Manual) (ver.f3) (English) - Page 122
pictures you take. Increasing the Zoom (2 - 10) enlarges your pictures (1 is normal). 1. In Camera mode, press the Volume key (on the left side of the phone) up or down. The horizontal Zoom scale appears in the display. 2. To Zoom in on a subject, press the Volume key down. 3. To Zoom out from - Samsung SCH-R640 | User Manual (user Manual) (ver.f3) (English) - Page 123
an aqua hue. • Negative: Subjects and pictures appear in inverted colors. 2. Select the color effect of your choice. You're returned to the camera viewfinder screen. When you take your next picture, the phone's display previews your subject image with the selected color effect. Camera 118 - Samsung SCH-R640 | User Manual (user Manual) (ver.f3) (English) - Page 124
Light present at the exact center of the subject. 2. Select the desired metering option. The metering indicator canges in the center of the viewfinder screen to indicate the subject area being sampled. Quality You can affect how much your photo is compressed, thereby reducing it's overall size (not - Samsung SCH-R640 | User Manual (user Manual) (ver.f3) (English) - Page 125
setting of your choice. You're returned to the camera viewfinder screen. Review 1. In Camera mode, tap Options ➔ Settings tab ➔ Review. The following options pop-up: • On: Photos are displayed for review immediately after you take them. • Off: Photos are not displayed after you take them. Instead - Samsung SCH-R640 | User Manual (user Manual) (ver.f3) (English) - Page 126
sound. You're returned to the camera viewfinder screen. Memory 1. In Camera mode, tap Options ➔ Settings tab ➔ Memory. The following options pop-up: • Phone: Stores pictures in phone memory. • Card: Stores pictures on an optional microSD Memory Card. 2. Select the memory location setting of your - Samsung SCH-R640 | User Manual (user Manual) (ver.f3) (English) - Page 127
The following options are available: • To browse pictures in the gallery manually, swipe across the current image. • To browse pictures in the gallery tap Send via. • To assign the current picture as a Home screen Wallpaper or as a Contact Picture ID, tap Set As. • To delete the current picture from - Samsung SCH-R640 | User Manual (user Manual) (ver.f3) (English) - Page 128
by Menu or from Edit Contact or New PIC Msg Screen 1. In a Home screen, tap Menu ➔ Menu 2 ➔ Multimedia ➔ Pictures. - or - In the Add New Contact / Edit Contact screen, tap the Picture ID field another device over a Bluetooth connection. • Erase: Delete one or more selected, unlocked pictures. 123 - Samsung SCH-R640 | User Manual (user Manual) (ver.f3) (English) - Page 129
take a new picture. • Edit: Use graphic tools to change the picture. • Set As: Assign this picture as a Home screen Wallpaper or as a Contact Picture ID. • Erase: Delete this picture. • Move To Card / Phone: Move one or more selected pictures from the Card or Phone to the Phone or Card. Camera 124 - Samsung SCH-R640 | User Manual (user Manual) (ver.f3) (English) - Page 130
Copy one or more selected pictures from the Card or Phone to the Phone or Card. • Rename: Change the file name for phone. The camera view finder screen appears in the display. 2. Using the display as a viewfinder, take the desired picture by pressing the Camera key ( ). The photo review screen - Samsung SCH-R640 | User Manual (user Manual) (ver.f3) (English) - Page 131
In Standby mode, tap Menu ➔ Menu 2 ➔ Multimedia. The following Multimedia options appear in the display: • Camera: Lets you launch and set up your phone's camera. (For more information, refer to "Camera" on page 106.) • Pictures: Lets you choose the images or pictures that appear in Picture messages - Samsung SCH-R640 | User Manual (user Manual) (ver.f3) (English) - Page 132
using a personal computer. (For information on loading music files on a Memory Card, see "Loading Music Files" on page 130.) Launching the Music Library Menu 1. From the Multimedia menu, select Music Player. The Music Player screen appears in the display. 2. To access the music files, tap ➔ Go to - Samsung SCH-R640 | User Manual (user Manual) (ver.f3) (English) - Page 133
files lists that show the songs Now Playing, All Songs on your Memory Card, or all songs in Playlists or arranged according to Artists or Albums. • , Downloaded and Copyright information, and Expired Songs of the highlighted music file. • Memory Info: Lists the Available card memory, the card memory - Samsung SCH-R640 | User Manual (user Manual) (ver.f3) (English) - Page 134
Volume key Up. - To play a music file softer, press the Volume key Down. • Music Navigation buttons: - To adjust music playback volume using the touch screen, tap . - To skip play to an earlier music file in the selected list, tap . - To pause playing a music file, tap . - To resume playing a music - Samsung SCH-R640 | User Manual (user Manual) (ver.f3) (English) - Page 135
Power your phone on. 2. Connect your phone to a personal computer with an optional USB data cable. 3. Open the Memory Card reader drive and the "My_Music" folder. 4. Drag or download music (MP3) files into the "My_Music" folder. 5. Remove the Memory Card by following the removal instructions for the - Samsung SCH-R640 | User Manual (user Manual) (ver.f3) (English) - Page 136
(preloaded and downloaded) for calls, alerts, and as distinctive ringers for Contacts. 1. From the Multimedia menu, select Ringtones. A list of recorded sound files, music files, and ringtones appears in the display. Tip: You can also access My Ringtones from: -A Set Alarm screen by selecting the - Samsung SCH-R640 | User Manual (user Manual) (ver.f3) (English) - Page 137
pause the recording, tap Pause. • To stop and save the recording, tap Stop. Erasing Ringtone Files 1. In the Ringtones screen, tap . The list of files is reduced to recorded sound files and downloaded music files. 2. Tap the file(s) you want to erase, or tap Mark All to erase all sound files and - Samsung SCH-R640 | User Manual (user Manual) (ver.f3) (English) - Page 138
easyedgeSM and Browser features. easyedgeSM With easyedgeSM, you can download full featured games, applications, pictures, and more over the air. Finding Standby mode, select Menu ➔ Menu 1 ➔ easyedge. The easyedgeSM Main Menu screen appears in the display. 2. Scroll the Main Menu up or down to find - Samsung SCH-R640 | User Manual (user Manual) (ver.f3) (English) - Page 139
Browser With Browser, you can conveniently surf the web and download ringtones and wallpapers using your phone. Each time you launch Browser, your phone connects to the Internet and the service indicator icon with a red arrow ( ) appears in the display. Stored Web Content Browser ends an Internet - Samsung SCH-R640 | User Manual (user Manual) (ver.f3) (English) - Page 140
slide open the keyboard. 2. Select the desired category, to enter the category list. Exit Browser ᮣ To exit Browser, press . Using Browser Browser presents on-screen items in any of the following ways: • Text or numeric input. Note: When entering text in a web page field, Browser limits you to using - Samsung SCH-R640 | User Manual (user Manual) (ver.f3) (English) - Page 141
as jumping to a different page, to a different site, or even initiating a phone call. Links are shown inside of brackets ([ ]). You can normally select a link. How Browser Buttons Work The top and right side of the Browser screen contain control bars. The following table lists Browser buttons that - Samsung SCH-R640 | User Manual (user Manual) (ver.f3) (English) - Page 142
: Search the text of the current web page. Press to exit the Browser and return the phone to Standby mode. Tone Room With the Tone Room application, you can browse for, search for, download, and manage Ringtones and Ringback tones. Launching Tone Room ᮣ In Standby mode, select Menu ➔ Menu 2 ➔ Tone - Samsung SCH-R640 | User Manual (user Manual) (ver.f3) (English) - Page 143
voice recognition software for your mobile phone that lets you dial numbers, lookup contact information, and open applications using your voice. To launch Voice Service, do the following: 1. From a Home screen, tap Menu ➔ Menu 3 ➔ Tools ➔ Voice Service. The Voice Service menu appears in the display - Samsung SCH-R640 | User Manual (user Manual) (ver.f3) (English) - Page 144
your phone to start Voice Service when you open the phone. ( Contacts list features of your phone. (See "Ringtones" on page 131, "Calendar" on page 150, and "Contacts" on page 60 for more information.) • Check: Lets you check your phone's status (that is, network coverage, signal strength, battery - Samsung SCH-R640 | User Manual (user Manual) (ver.f3) (English) - Page 145
• Make sure you wait for the beep before speaking. • Speak clearly at a normal volume, as if you were talking on the phone. Voice-Activating Your Contacts List When you first start Voice Service, it reads your Contacts list and voice-activates all the names stored there. When you have add or change - Samsung SCH-R640 | User Manual (user Manual) (ver.f3) (English) - Page 146
or number. In this case, it can display a list of up to three possible choices, and prompt you to confirm the correct one. You can change the way that Voice Service responds to your choices with name dialing, digit dialing, and contacts. To change the way Voice Service responds to your choices, do - Samsung SCH-R640 | User Manual (user Manual) (ver.f3) (English) - Page 147
screen appears in the display, showing the following options: • More Sensitive • Automatic • Less Sensitive 2. Tap the desired option. Adapt Voice If you regularly have trouble with Voice Service able to use it unless they reset the phone to factory defaults. Adaptation involves recording several - Samsung SCH-R640 | User Manual (user Manual) (ver.f3) (English) - Page 148
, re-record that sequence. • Only use Adapt Voice if you are regularly having problems with digit dialing. Once you adapt, digit dialing will not work as well for other people using your phone. (You can always reset Adapt Voice to its original state, as described below.) Using Adapt Voice To adapt - Samsung SCH-R640 | User Manual (user Manual) (ver.f3) (English) - Page 149
Adapt Voice To reset Adapt Voice to factory default settings, do the following: 1. From the Voice Service menu, tap Voice Command Settings ➔ Adapt Voice ➔ Reset Voice. The phone prompts you to confirm digit adaptation rest. 2. To reset your voice adaptation, tap OK. To cancel and retain your digit - Samsung SCH-R640 | User Manual (user Manual) (ver.f3) (English) - Page 150
the display, showing version and build information about the Voice Service software included on your phone. ᮣ From the Voice Service menu, tap Voice Command Settings ➔ About. The About screen appears in the display showing the version level of the Voice Service software currently installed on your - Samsung SCH-R640 | User Manual (user Manual) (ver.f3) (English) - Page 151
Tools. The Tools menu appears in the display. The following sections provide detailed descriptions of your phone's Tools. Voice Service For information about Voice Service, see "Voice Service" on page 138. Bluetooth Bluetooth is a short-range wireless communications technology capable of exchanging - Samsung SCH-R640 | User Manual (user Manual) (ver.f3) (English) - Page 152
or receive information via Bluetooth. To save battery life or in situations where Bluetooth use is prohibited, such as airline traveling, you can turn off the Bluetooth wireless technology headset. Turning Bluetooth On ᮣ From the Tools menu, tap Bluetooth ➔ Turn On. The Bluetooth enabled (red) icon - Samsung SCH-R640 | User Manual (user Manual) (ver.f3) (English) - Page 153
with the selected device. • If Autopair fails, you are prompted to enter the passkey or PIN for the selected device. Note: When pairing you phone with another Bluetooth device other than a headset or headphones, the same passkey or PIN must be entered on both devices (when prompted) for the pairing - Samsung SCH-R640 | User Manual (user Manual) (ver.f3) (English) - Page 154
visible to other devices. • Auto Pairing: When set to On, your phone attempts to automatically pair with a selected, discovered device. When set to Off, you are prompted to manually enter a device's PIN to pair with that device. • Supported Profiles: Lists and explains the Bluetooth profiles your - Samsung SCH-R640 | User Manual (user Manual) (ver.f3) (English) - Page 155
date highlighted. The month and year also appear. The following controls are also available: • To move to another monthly or weekly calandar, swipe the screen left or right. • To view a list of events for a particular date, tap that date. - To view a particular event in an event list, tap the - Samsung SCH-R640 | User Manual (user Manual) (ver.f3) (English) - Page 156
set an alert for stored notes. Return to Memo Pad anytime you wish to review and edit your notes. Add a Memo 1. From the Tools menu, tap To add a new memo, tap appears in the display. . The Add New Memo screen 3. Open the QWERTY keypad and enter memo text. (For more information, refer to " - Samsung SCH-R640 | User Manual (user Manual) (ver.f3) (English) - Page 157
protect the memo you are viewing from erasure, tap Lock. - To permit a locked memo to be erased, tap Unlock. Sketch Pad Sketch Pad lets you use your phone to freehand draw images and text. ᮣ From the Tools menu, tap Sketch Pad. The Sketch Pad screen appears in the display. The following options are - Samsung SCH-R640 | User Manual (user Manual) (ver.f3) (English) - Page 158
• To include a copy of a drawing as part of a Picture message, tap Send. • To store a phone is turned off. If the time for an alarm that was set for Once has elapsed and the phone is off, the alarm occurs at the same time on the following day. ᮣ From the Tools menu, tap Alarm Clock. The Alarm screen - Samsung SCH-R640 | User Manual (user Manual) (ver.f3) (English) - Page 159
- Repeat: Tap to select the number of times the alarm repeats (Once, Twice, or 3 / 5 / 10 Times. • To save a new or changed alarm, tap Save. • To deactivate an alarm, tap the On button to the right of the alarm. It changes to Off. • To change the settings for an alarm, tap the alarm, fields in the - Samsung SCH-R640 | User Manual (user Manual) (ver.f3) (English) - Page 160
of different cities and/or time zones around the world. 1. From the Tools menu, tap World Time. The World Time screen appears in the display. 2. To add a clock to the World Time screen, tap +. The Add Clock menu pops-up in the display listing the following options: • United States: Lists cities in - Samsung SCH-R640 | User Manual (user Manual) (ver.f3) (English) - Page 161
available: • DST: Turns Daylight Saving Time display on or off for this clock. • Erase: Remove this clock from the World Time screen. • 2nd clock set • To erase the stop watch all and lap times recorded, tap Reset. Timer Timer lets you use your phone as a countdown timer. At the end of the count, an - Samsung SCH-R640 | User Manual (user Manual) (ver.f3) (English) - Page 162
, tap Restart. • To erase the current count, tap Reset. Calculator You can perform calculations, including addition, subtraction, multiplication, and division using your phone. 1. From the Tools menu, tap Calculator. The Calculator keypad screen appears in the display. 2. Enter the first number in - Samsung SCH-R640 | User Manual (user Manual) (ver.f3) (English) - Page 163
) 1. From the Tools menu, tap Tip Calculator. The Bill entry keypad screen appears in the display. 2. Enter the total amount of the bill by tapping the keypad keys. 3. Tap Done. The Tip Calculator screen appears in the display, with the Bill, Tip, and Split fields populated - Samsung SCH-R640 | User Manual (user Manual) (ver.f3) (English) - Page 164
, do the following: 1. From the Tools menu, tap Converter ➔ Temperature / Length / Weight / Area / Volume / Currency. The quantity to be converted entry screen appears in the display. 2. Enter the quantity you want converted. 3. Specify the units by tapping the down arrow button to the right of the - Samsung SCH-R640 | User Manual (user Manual) (ver.f3) (English) - Page 165
Search Device Search lets you search for information saved on your phone. 1. From the Tools menu, tap Device Search. The Device Search All screen appears in the display. To narrow your search, tap , then select All, Contacts, Recent Calls, Calendar, Message, Picture, or Menu. 2. Enter the first word - Samsung SCH-R640 | User Manual (user Manual) (ver.f3) (English) - Page 166
explains how to customize your phone to suit your needs and preferences. Accessing Your Settings ᮣ To access your phone's settings from Standby mode that you dial 911. Note: Contact your Wireless Provider to determine whether, when, or where location-based services are available. 1. From the Settings - Samsung SCH-R640 | User Manual (user Manual) (ver.f3) (English) - Page 167
26. 1. From the Settings menu, tap Widgets. The following Widgets are included in your R640 phone: Tone Room: Launches the Tone Room application. easyedge: Launches the easyedgeSM menu. Send Message: Launches the Send Message submenu. Top 5 Contacts: Lets you quickly call any of five preidentified - Samsung SCH-R640 | User Manual (user Manual) (ver.f3) (English) - Page 168
Clock: Shows the current time of day. Calendar: Launches the Calendar tool. Date: Shows the current day and date. Alarm Clock: Launches the Alarm Clock tool. Sketch Pad: Launches the Sketch Pad tool. Bluetooth: Launches the Bluetooth menu. Memo Pad: Launches the Memo Pad tool. Tutorial: Launches the - Samsung SCH-R640 | User Manual (user Manual) (ver.f3) (English) - Page 169
Sounds Settings menu, tap Master Volume. 2. Slide your finger around the Master Volume menu or press the Volume key (on the left side of the phone) Up or Down to select one the following volume settings: • All Sounds Off • Alarm Only • Vibrate Only • Low 3. Tap Set to save the setting. • Medium - Samsung SCH-R640 | User Manual (user Manual) (ver.f3) (English) - Page 170
showing the Caller ID and Ringing, or (for Contacts) to Repeatedly playback the calling Contact's Name. 2. Tap the desired setting(s). 3. Tap the desired ringer. Alert Sounds You can set your phone to sound an alert whenever you enter or leave your service area, connect or disconnect a call, as well - Samsung SCH-R640 | User Manual (user Manual) (ver.f3) (English) - Page 171
Sounds Settings menu, tap Keypad Volume. 2. Slide your finger around the Keypad Volume menu or press the Volume key (on the left side of the phone) Up or Down to select one the following volume settings: • Sound Off • Low • Medium Low • Medium • Medium High • High 3. Tap Set to save the setting - Samsung SCH-R640 | User Manual (user Manual) (ver.f3) (English) - Page 172
. • Call Connect: When you make a call, an alert sounds when the call is answered. 2. Tap the desired Service Alert setting(s). Power On/Off You can set a melody to play when you power your phone on or off. 1. From the Sounds Settings menu, tap Power On/Off. The following options appear in the - Samsung SCH-R640 | User Manual (user Manual) (ver.f3) (English) - Page 173
menu style, set the Home screens and Lock screen wallpapers, customize the backlight settings screen appears in the display. Note: If necessary, press and hold the key to erase an existing banner. 2. Open the QWERTY keypad and enter a word or short phrase (up to 18 characters) to appear in your phone - Samsung SCH-R640 | User Manual (user Manual) (ver.f3) (English) - Page 174
on for a specified period of time. Note: Prolonged backlight use drains your battery faster. 1. From the Display Settings menu, tap Backlight. The following sub- appear in your phone's display while in Standby mode. 1. From the Display Settings menu, tap Wallpaper. The Pictures screen appears in the - Samsung SCH-R640 | User Manual (user Manual) (ver.f3) (English) - Page 175
numbers to appear in Normal or Large font size. • Lock Screen Font Color: Select one of 16 colors. 2. Tap the desired font size and/or color. Unlock Screen Unlock Screen lets you select which key(s) can awaken your phone's display when locked and the backlight is off. 1. From the Display Settings - Samsung SCH-R640 | User Manual (user Manual) (ver.f3) (English) - Page 176
the display, and more. ᮣ From the Settings menu, tap Touch Settings. The Touch Settings screen appears in the display and lists the following options: • Auto Lock: When set to On, causes the phone to lock automatically when the backlight goes out. • Sound: Tap the desired the feedback tone (Beep - Samsung SCH-R640 | User Manual (user Manual) (ver.f3) (English) - Page 177
radio functions, set the language used in screens and menus, invoke your phone's security options, and select whether your phone operates outside your home area (roaming). ᮣ From the Settings menu, tap Phone Settings. The following sections describe the phone sub-menus in detail. Airplane Mode When - Samsung SCH-R640 | User Manual (user Manual) (ver.f3) (English) - Page 178
for the QWERTY keypad. 1. From the Phone Settings menu, tap QWERTY Action. The following options appear in the display: • Off: No shortcut. • Text Message: Typing on QWERTY keypad opens the New Text Msg screen. • Contacts: Typing on QWERTY keypad opens the Contact List screen. • Memo Pad: Typing on - Samsung SCH-R640 | User Manual (user Manual) (ver.f3) (English) - Page 179
the characters you have already entered. To complete the word you are entering, just select it in the pop-up list. 1. From the Phone Settings Phone Settings menu, tap Security. The Enter Code keypad screen appears in the display. You're prompted to enter the lock code. Note: The default lock code - Samsung SCH-R640 | User Manual (user Manual) (ver.f3) (English) - Page 180
lets you set lock codes for your phone and/or for calls and services on your phone. Tip: The default lock code for your phone is generally the last four digits of your phone number. 1. From the Security menu, tap Edit Code. 2. Follow the prompts to change the lock code. Note: Your phone does not - Samsung SCH-R640 | User Manual (user Manual) (ver.f3) (English) - Page 181
2. Tap the desired Restriction and setting(s). Phone Lock Setting Locking the phone limits all outgoing calls, except Emergency (911) calls. Also, you cannot access phone menus, functions, and services. To unlock the phone, you must enter the phone's lock code. (For more information, refer to "Edit - Samsung SCH-R640 | User Manual (user Manual) (ver.f3) (English) - Page 182
Settings returns all Settings options to their factory default. 1. From the Security menu, tap Reset Settings. You are prompted to confirm that you wish to reset your phone's Settings to default values (except for your Contacts list and Voice Dial). 2. To reset your Settings to default values, tap - Samsung SCH-R640 | User Manual (user Manual) (ver.f3) (English) - Page 183
menu, tap NAM Select. The following options appear in the display: • NAM1: Your service contract has one phone line. • NAM2: Your service contract has two phone lines. 2. Tap the desired NAM setting. The phone powers itself off and back on. Set Time Use the Set Time option to set the current - Samsung SCH-R640 | User Manual (user Manual) (ver.f3) (English) - Page 184
between a PC and your R640. Tip: For more information on using PC Connection, contact your service provider. 1. At the Phone Settings sub-menu, tap PC you connect your phone to a PC with an optional USB Data Cable. Lets you access your phone's memory and any optional microSD Memory Card, if installed - Samsung SCH-R640 | User Manual (user Manual) (ver.f3) (English) - Page 185
a specific answer mode when you receive an incoming call. (For more information, refer to "Call Answer" on page 48.) Tip: You can set your phone to answer calls automatically, without any input from you. (For more information, refer to "Call Answer" on page 48.) Auto Retry Auto Retry automatically - Samsung SCH-R640 | User Manual (user Manual) (ver.f3) (English) - Page 186
2. Tap the desired setting. TTY Mode Your phone is fully TTY compatible. TTY equipment is connected to your phone through the headset connector on the left side of the phone. TTY must be enabled before you can use your phone with a TTY device. 1. From the Call Settings menu, tap TTY Mode. You are - Samsung SCH-R640 | User Manual (user Manual) (ver.f3) (English) - Page 187
enabled. • Off: One Touch Dial is disabled. 2. Tap the desired setting. Voice Privacy Voice Privacy when enabled (that is, set to Enhanced), turns on advanced voice encryption. 1. From the Call Settings menu, tap Voice Privacy. The following options appear in the display: • Enhanced: Voice privacy - Samsung SCH-R640 | User Manual (user Manual) (ver.f3) (English) - Page 188
Code you want as the new default code for Plus Code Dialing. (For more information, refer to "Plus (+) Code Dialing" on page 43.) Memory Manager Memory Manager lets you quickly and easily review and manage your phone : • Phone: Saves the selected type of files in your phone's memory. • Card: Saves - Samsung SCH-R640 | User Manual (user Manual) (ver.f3) (English) - Page 189
you review your usage of your phone's memory. ᮣ From the Memory Manager menu, tap Phone Memory ➔ Memory Usage. The Memory Usage screen appears you erase or move files as needed to free up memory on your phone for reuse. 1. From the Memory Manager menu, tap Phone Memory ➔ Pictures / Ringtones. A list - Samsung SCH-R640 | User Manual (user Manual) (ver.f3) (English) - Page 190
You are prompted to confirm moving the selected file(s) to the Memory Card. • Tap Yes to move all marked files, or tap No to return to the Move screen. Card Memory Card Memory lets you review a removable, microSD Memory Card's available memory, manage your files stored there, and format new microSD - Samsung SCH-R640 | User Manual (user Manual) (ver.f3) (English) - Page 191
Memory Usage. The Memory Usage screen appears in the display showing the following information: • Available unused memory • Used memory • Total memory • Pictures memory usage • Music memory usage 2. Press to return to the Card Memory menu. Changing Your Settings 186 - Samsung SCH-R640 | User Manual (user Manual) (ver.f3) (English) - Page 192
erase or move files as needed to free up space on your Memory Card for reuse. 1. From the Memory Manager menu, tap Card Memory ➔ Pictures / Music. A list erase all marked files, or tap No to return to the Erase screen. 3. To move files to the phone, do the following: • Tap Move. • Tap an image file - Samsung SCH-R640 | User Manual (user Manual) (ver.f3) (English) - Page 193
and creates multimedia directories compatible with your phone. Caution!: Repeated formatting of a microSD card reduces its service life. So, don't reformat a Memory Card just to free up storage space. To regain space on a microSD card already formatted by your phone, just delete unwanted files. (For - Samsung SCH-R640 | User Manual (user Manual) (ver.f3) (English) - Page 194
hardware and software versions of your phone, the meanings of your phones status icons, and the phone number assigned to your phone. Tip: This information can be very important to you when contacting Customer Care personnel. 1. From the Settings menu, tap Phone Info. The following options appear in - Samsung SCH-R640 | User Manual (user Manual) (ver.f3) (English) - Page 195
will cause cancer or other serious health hazards. The weight of scientific evidence has not linked cell phones with any health problems. Cell phones emit low levels of Radio Frequency (RF) energy. Over the past 15 years, scientists have conducted hundreds of studies looking at the biological - Samsung SCH-R640 | User Manual (user Manual) (ver.f3) (English) - Page 196
The low levels of RF cell phones emit while in use are in the microwave frequency range. They also emit RF at substantially reduced time intervals when in the stand-by mode. - Samsung SCH-R640 | User Manual (user Manual) (ver.f3) (English) - Page 197
to Date: Is there a connection between RF and certain health problems? The results of most studies conducted to date say no. exposure to Radio Frequency (RF) from cell phones and adverse health outcomes. Still the scientific community has supported additional research to address gaps in knowledge. - Samsung SCH-R640 | User Manual (user Manual) (ver.f3) (English) - Page 198
of people to determine if there are any health issues linked to long-term exposure to radio frequency energy from cell phone use. The COSMOS study will follow approximately 300,000 adult cell phone users in Europe for 20 to 30 years. Additional information about the COSMOS study can be found at http - Samsung SCH-R640 | User Manual (user Manual) (ver.f3) (English) - Page 199
(NCI) actively follows cancer statistics in the United States to detect any change in rates of new cases for brain cancer. If cell phones play a role in risk for brain cancer, rates should go up, because heavy cell phone use has been common for quite some time in the U.S. Between 1987 and 2005, the - Samsung SCH-R640 | User Manual (user Manual) (ver.f3) (English) - Page 200
; • Use speaker mode or a headset to place more distance between your head and the cell phone. Hands-Free Kits Hands-free kits may include audio or Bluetooth® headsets and various types of body-worn accessories such as belt-clips and holsters. Combinations of these can be used to reduce RF energy - Samsung SCH-R640 | User Manual (user Manual) (ver.f3) (English) - Page 201
to RF emissions from cell phones, there is no reason to believe that accessories which claim to shield the phone cases, while others involve nothing more than a metallic accessory attached to the phone. Studies have shown that these products generally do not work as advertised. Unlike "hands-free - Samsung SCH-R640 | User Manual (user Manual) (ver.f3) (English) - Page 202
December 2000. In this report, a group of independent experts noted that no evidence exists that using a cell phone causes brain tumors or other ill effects. Their recommendation to limit cell phone use by children was strictly precautionary; it was not based on scientific evidence that any health - Samsung SCH-R640 | User Manual (user Manual) (ver.f3) (English) - Page 203
• Occupational Safety and Health Administration (OSHA): http://www.osha.gov/SLTC/radiofrequencyradiation/. (Note: This web address is case sensitive.) • National Institute for Occupational Safety and Health (NIOSH): http://www.cdc.gov/niosh/. • World Health Organization (WHO): http://www.who.int/peh - Samsung SCH-R640 | User Manual (user Manual) (ver.f3) (English) - Page 204
cases, the recommendations were developed by scientific and engineering experts drawn from industry, government, and academia after extensive reviews expressed in units of watts per kilogram (W/kg). The FCC requires wireless phones to comply with a safety limit of 1.6 watts per kilogram (1.6 W/kg - Samsung SCH-R640 | User Manual (user Manual) (ver.f3) (English) - Page 205
wireless base station antenna, the lower the power output. Before a new model phone is available for sale to the public, it must be tested and FCC. For body-worn operation, this phone has been tested and meets FCC RF exposure guidelines when used with an accessory that contains no metal and that - Samsung SCH-R640 | User Manual (user Manual) (ver.f3) (English) - Page 206
to a particular model phone, this site uses the phone FCC ID number which is usually printed somewhere on the case of the phone. Sometimes it may be necessary to remove the battery pack to find the number. Once you have the FCC ID number for a particular phone, follow the instructions on the website - Samsung SCH-R640 | User Manual (user Manual) (ver.f3) (English) - Page 207
Samsung is committed to promoting responsible driving and giving drivers the tools they need to understand and address distractions. Check the laws and regulations on the use of mobile devices and their accessories hands-free device; • Secure your phone within easy reach; Health and Safety Information - Samsung SCH-R640 | User Manual (user Manual) (ver.f3) (English) - Page 208
the call if necessary; • Do not take notes or look up phone numbers while driving; Notice regarding legal restrictions on mounting this device in in a manner that will obstruct the driver's clear view of the street and traffic. Never use wireless data services such as text messaging, Web browsing, - Samsung SCH-R640 | User Manual (user Manual) (ver.f3) (English) - Page 209
get wet, have them checked by your service provider or contact Samsung, even if they appear to be working properly. • Do not place your battery in or near a heat source. Excessive heating can damage the phone or the battery and could cause the phone or the battery to explode. Do not dry a wet or - Samsung SCH-R640 | User Manual (user Manual) (ver.f3) (English) - Page 210
may present a risk of fire, explosion, leakage, or other hazard. Samsung's warranty does not cover damage to the phone caused by non-Samsung-approved batteries and/or chargers. • Do not use incompatible cell phone batteries and chargers. Some websites and second-hand dealers not associated with - Samsung SCH-R640 | User Manual (user Manual) (ver.f3) (English) - Page 211
about whether a replacement battery or charger is compatible, contact the manufacturer of the battery or charger. • Misuse or use of incompatible phones, batteries, and charging devices could result in damage to the equipment and a possible risk of fire, explosion, or leakage, leading to serious - Samsung SCH-R640 | User Manual (user Manual) (ver.f3) (English) - Page 212
must be recycled or disposed of properly. Recycling programs for your mobile device, batteries, and accessories may not be available in your area. We've made it easy for you to recycle your old Samsung mobile device by working with respected take-back companies in every state in the country. Drop It - Samsung SCH-R640 | User Manual (user Manual) (ver.f3) (English) - Page 213
label. Just go to http://www.samsung.com/us/aboutsamsung/citizenship/ usactivities_environment_samsungrecyclingdirect.html?INT=STA_recyle_y our_phone_page and follow the instructions to print out a free prepaid postage label and then send your old mobile device or battery to the address listed, via - Samsung SCH-R640 | User Manual (user Manual) (ver.f3) (English) - Page 214
UL Certified Travel Charger The Travel Charger for this phone has met applicable UL safety requirements. Please adhere to the following safety instructions per UL guidelines: FAILURE TO FOLLOW THE INSTRUCTIONS OUTLINED MAY LEAD TO SERIOUS PERSONAL INJURY AND POSSIBLE PROPERTY DAMAGE. IMPORTANT - Samsung SCH-R640 | User Manual (user Manual) (ver.f3) (English) - Page 215
to a light touch from the pad of your finger or a non-metallic stylus. Using excessive force or a metallic object when pressing on the touch-screen may damage the tempered glass surface and void the warranty. For more information, refer to "Standard Limited Warranty" on page 229. Health and Safety - Samsung SCH-R640 | User Manual (user Manual) (ver.f3) (English) - Page 216
the performance of location-based technology on your mobile device. Certain Samsung mobile devices can also use an Assisted Global Positioning System (AGPS charges may apply in accordance with your service plan. Contact your wireless service provider for details. Your Location Location-based - Samsung SCH-R640 | User Manual (user Manual) (ver.f3) (English) - Page 217
emergency responders your approximate location. AGPS has limitations and might not work in your area. Therefore: • Always tell the emergency responder Remain on the mobile device for as long as the emergency responder instructs you. Navigation Maps, directions, and other navigation data may contain - Samsung SCH-R640 | User Manual (user Manual) (ver.f3) (English) - Page 218
example). Before traveling in remote or underdeveloped areas, plan an alternate method of contacting emergency services personnel. Remember, to make or receive any calls, the mobile device must be before you can make an emergency call. Consult your User Manual and your local cellular service 213 - Samsung SCH-R640 | User Manual (user Manual) (ver.f3) (English) - Page 219
provider. When making an emergency call, remember to give all the necessary information as accurately as possible. Remember that your mobile device may be the only means of communication at the scene of an accident; do not cut off the call until given permission to do so. Health and Safety - Samsung SCH-R640 | User Manual (user Manual) (ver.f3) (English) - Page 220
care. The suggestions below will help you fulfill any warranty obligations and allow you to enjoy this product for many years: Keep your Samsung Mobile Device away from: Liquids of any kind Keep the mobile device dry. Precipitation, humidity, and liquids contain minerals that will corrode electronic - Samsung SCH-R640 | User Manual (user Manual) (ver.f3) (English) - Page 221
, or shake the mobile device. Rough handling can break internal circuit boards. Paint Do not paint the mobile device. Paint can clog the device's moving parts or ventilation openings and prevent proper operation. Health and Safety Information 216 - Samsung SCH-R640 | User Manual (user Manual) (ver.f3) (English) - Page 222
using portable audio devices, such as portable music players and cell phones, at high volume settings for long durations may lead to hearing. Individual susceptibility to noise-induced hearing loss and potential hearing problem varies. Additionally, the amount of sound produced by a portable audio - Samsung SCH-R640 | User Manual (user Manual) (ver.f3) (English) - Page 223
the higher volume may be harmful to your hearing. • When using headphones, turn the volume down if you cannot hear the people speaking near you or if sitting next to you can hear what you are listening to. • Do not turn the volume up to block out noisy surroundings. If you choose to listen to your - Samsung SCH-R640 | User Manual (user Manual) (ver.f3) (English) - Page 224
• Do not listen at any volume that causes you discomfort. If you experience ringing in your ears, hear muffled speech, or experience any temporary hearing difficulty after listening to your portable audio device, discontinue use and consult your doctor. You can obtain additional information on this - Samsung SCH-R640 | User Manual (user Manual) (ver.f3) (English) - Page 225
National Institute for Occupational Safety and Health (NIOSH) 395 E Street, S.W. Suite 9200 Patriots Plaza Building Washington, DC 20201 Voice: 1-800-35-NIOSH (1-800-356-4674) 1-800-CDC-INFO (1-800-232-4636) Outside the U.S. 513-533-8328 Email: [email protected] Internet: http://www.cdc.gov/niosh/ - Samsung SCH-R640 | User Manual (user Manual) (ver.f3) (English) - Page 226
it, or when it may cause interference or danger. When connecting the mobile device or any accessory to another device, read its user's guide for detailed safety instructions. Do not connect incompatible products. Using Your Mobile Device Near Other Electronic Devices Most modern electronic equipment - Samsung SCH-R640 | User Manual (user Manual) (ver.f3) (English) - Page 227
• Should turn the mobile device OFF immediately if there is any reason to suspect information. Switch your mobile device off in health care facilities when any regulations posted in these areas instruct you to do so. Hospitals or health care facilities may be using equipment that could be sensitive - Samsung SCH-R640 | User Manual (user Manual) (ver.f3) (English) - Page 228
with a potentially explosive atmosphere and obey all signs and instructions. Sparks in such areas could cause an explosion or fire to switch the mobile device off while at a refueling point (service station). Users are reminded of the need to observe restrictions on turn off your vehicle engine. 223 - Samsung SCH-R640 | User Manual (user Manual) (ver.f3) (English) - Page 229
digital wireless mobile devices be compatible with hearing aids. The intent of the HAC Act is to ensure reasonable access to telecommunications services for persons with hearing disabilities. While some wireless mobile devices are used near some hearing devices (hearing aids and cochlear implants - Samsung SCH-R640 | User Manual (user Manual) (ver.f3) (English) - Page 230
The ratings are not guarantees. Results will vary depending on the user's hearing device and hearing loss. If your hearing device happens to be vulnerable to interference, you may not be able to use a rated mobile device successfully. Trying out the mobile device with your hearing device is the best - Samsung SCH-R640 | User Manual (user Manual) (ver.f3) (English) - Page 231
A sum of 5 is considered acceptable for normal use. A sum of 6 is considered for best use. M3 + M2 = 5 T3 + T2 = 5 In the above example, if a hearing aid meets the M2 level rating and the wireless mobile device meets the M3 level rating, the sum of the two values equal M5. This is synonymous - Samsung SCH-R640 | User Manual (user Manual) (ver.f3) (English) - Page 232
the mobile device and all its parts and accessories out of the reach of small copy of this standard, contact the National Fire Protection Association batteries, antennas, and chargers. The use of any unauthorized accessories may be dangerous and void the mobile device warranty if said accessories - Samsung SCH-R640 | User Manual (user Manual) (ver.f3) (English) - Page 233
or explosive materials in the same compartment as the mobile device, its parts, or accessories. • For vehicles equipped with an air bag, remember that an an aircraft. • Failure to observe these instructions may lead to the suspension or denial of cell phone services to the offender, or legal action, - Samsung SCH-R640 | User Manual (user Manual) (ver.f3) (English) - Page 234
") that SAMSUNG's phones and accessories ("Products") are free from defects in material and workmanship under normal use and service for the period commencing upon the date of purchase and continuing for the following specified period of time after that date: Phone Batteries Leather Case Holster - Samsung SCH-R640 | User Manual (user Manual) (ver.f3) (English) - Page 235
not cover any battery if (i) the battery has been charged by a battery charger not specified or approved by SAMSUNG for charging the battery, (ii) any of the seals on the battery are broken or show evidence of tampering, or (iii) the battery has been used in equipment other than the SAMSUNG phone - Samsung SCH-R640 | User Manual (user Manual) (ver.f3) (English) - Page 236
must return Product to an authorized phone service facility in an adequate container for shipping, replaced parts, components, boards and equipment shall become the property of SAMSUNG. If SAMSUNG determines that any Product is not covered by this Limited Warranty, Purchaser must pay all parts, - Samsung SCH-R640 | User Manual (user Manual) (ver.f3) (English) - Page 237
, SPECIFICATION OR CONTRACT PERTAINING THERETO. NOTHING CONTAINED IN THE INSTRUCTION MANUAL SHALL BE CONSTRUED TO CREATE AN EXPRESS WARRANTY OF ANY LASTS, SO THE ABOVE LIMITATION MAY NOT APPLY TO YOU. IN ADDITION, SAMSUNG SHALL NOT BE LIABLE FOR ANY DAMAGES OF ANY KIND RESULTING FROM THE PURCHASE - Samsung SCH-R640 | User Manual (user Manual) (ver.f3) (English) - Page 238
UNDERSTAND THAT THE PURCHASER MAY USE THIRD-PARTY SOFTWARE OR EQUIPMENT IN CONJUNCTION WITH THE PRODUCT. SAMSUNG MAKES NO WARRANTIES OR REPRESENTATIONS AND THERE ARE NO CONDITIONS, EXPRESS OR IMPLIED, STATUTORY OR OR SUPPLIER OF SUCH THIRD-PARTY SOFTWARE OR EQUIPMENT, AS THE CASE MAY BE. 233 - Samsung SCH-R640 | User Manual (user Manual) (ver.f3) (English) - Page 239
America, LLC 1301 E. Lookout Drive Richardson, Texas 75082 Phone: 1-800-SAMSUNG Phone: 1-888-987-HELP (4357) ©2011 Samsung Telecommunications America, LLC. All rights reserved. No reproduction in whole or in part allowed without prior written approval. Specifications and availability subject to - Samsung SCH-R640 | User Manual (user Manual) (ver.f3) (English) - Page 240
THE "I ACCEPT", AND STILL INSTALL, COPY, DOWNLOAD, ACCESS OR OTHERWISE USE THE SOFTWARE), YOU AGREE USE OF THE SOFTWARE. 1. GRANT OF LICENSE. Samsung grants you the following rights provided that you comply run one copy of the Software on the local hard disk(s) or other permanent storage media of one - Samsung SCH-R640 | User Manual (user Manual) (ver.f3) (English) - Page 241
code or works based on the Software. You may not rent, lease, lend, sublicense or provide commercial hosting services with the Software. 4. CONSENT TO USE OF DATA. You agree that Samsung and its affiliates may collect and use technical information gathered as part of the product support services - Samsung SCH-R640 | User Manual (user Manual) (ver.f3) (English) - Page 242
must include all of the Software (including all component parts, the media and printed materials, any upgrades, this to the Software, including the U.S. Export Administration Regulations, as well as end License will terminate automatically without notice from Samsung if you fail to comply with any of - Samsung SCH-R640 | User Manual (user Manual) (ver.f3) (English) - Page 243
-FREE, OR THAT DEFECTS IN THE SOFTWARE WILL BE CORRECTED. NO ORAL OR WRITTEN INFORMATION OR ADVICE GIVEN BY SAMSUNG OR A SAMSUNG AUTHORIZED REPRESENTATIVE SHALL CREATE A WARRANTY. SHOULD THE SOFTWARE PROVE DEFECTIVE, YOU ASSUME THE ENTIRE COST OF ALL NECESSARY SERVICING - Samsung SCH-R640 | User Manual (user Manual) (ver.f3) (English) - Page 244
TO USE THE SOFTWARE, THE PROVISION OF OR FAILURE TO PROVIDE SUPPORT OR OTHER SERVICES, INFORMATION, SOFTWARE, AND RELATED CONTENT THROUGH THE SOFTWARE OR OTHERWISE damages in contract or anything else), the entire liability of Samsung under any provision of this EULA and your exclusive remedy - Samsung SCH-R640 | User Manual (user Manual) (ver.f3) (English) - Page 245
This EULA is the entire agreement between you and Samsung relating to the Software and supersedes all prior or with respect to the Software or any other subject matter covered by this EULA. If any provision of this EULA is problems of this sort, it is recommended that the device be returned to - Samsung SCH-R640 | User Manual (user Manual) (ver.f3) (English) - Page 246
user memory and return all settings to default settings. Please contact the Samsung Customer Care Center for details. Important!: Please provide warranty information (proof of purchase) to Samsung's Customer Care Center in order to provide this service at no charge. If the warranty has expired on - Samsung SCH-R640 | User Manual (user Manual) (ver.f3) (English) - Page 247
TX 75074 Toll Free Tel: 1.888.987.HELP (4357) Samsung Telecommunications America, LLC: 1301 East Lookout Drive Richardson, Texas 75082 Phone: 1-800-SAMSUNG (726-7864) Phone: 1-888-987-HELP (4357) ©2011 Samsung Telecommunications America. All rights reserved. No reproduction in whole or in part - Samsung SCH-R640 | User Manual (user Manual) (ver.f3) (English) - Page 248
70 A Adding a New Contacts Entry Dial Method 62 Adjust Key Tone 166 Ringer Setting 36 All calls log 54 B Battery Charging 7 Low Battery Indicator 10 Removal 13 Travel Adapter 8 Battery Use & Safety 204 Bluetooth 146 Add New Device 147 Connecting 148 Device List 148 Settings 149 Turn On/Off 147 243 - Samsung SCH-R640 | User Manual (user Manual) (ver.f3) (English) - Page 249
C Call Answer 48 Call Answer Mode 32 Call Block 50 Call Functions Answering a Call 47 Making a Call 38 Call Notification Types 48 Call Settings 180 Auto Retry 180 Call Answer 180 TTY Mode 181 Voice Privacy 182 Call Timer 57 Call Waiting 49 Caller ID 49 Calls All 54 Call Timer 57 Dialed 53 Erase Logs - Samsung SCH-R640 | User Manual (user Manual) (ver.f3) (English) - Page 250
Gallery 122 Save Pictures 112 Screen Icons 111 Taking Pictures 106 Zoom 117 Camera Mode 37 Card Memory Formatting 188 Management 185 Care and Maintenance 215 Changing Your Settings 161 Children and Cell Phones 197 Contacts 60 Add Pauses 70 Adding a New Contacts Entry 62 Edit Name and Numbers - Samsung SCH-R640 | User Manual (user Manual) (ver.f3) (English) - Page 251
88, 91, 125 Text 85 D Dialed calls log 53 Display / Touch-Screen 210 Display Screen Icons 25 Display Settings 168 Backlight 169 Banner 168 Dialing Font Size 170 Wallpaper 169 Do cell phones pose a health hazard? 190 E Edit Contacts Name and Numbers 69 Emergency Calls 213 Entering Text 31 Erase Logs - Samsung SCH-R640 | User Manual (user Manual) (ver.f3) (English) - Page 252
Started Activating Your Phone 10 Understanding this User Manual 6 Voicemail 15 GPS & AGPS 211 H Health and Safety Information 190 I Icons Number Type 62, 63, 64, 75, 76 Ignore Calls 50 In-Call Menu 50 Incoming Calls 47 Input Mode 32 K Keypad Volume 166 L Launching Voice Service 138 Lock Mode 32 247 - Samsung SCH-R640 | User Manual (user Manual) (ver.f3) (English) - Page 253
M Memo Pad Add a Memo 151 Review, Edit, and Erase Memos 152 Memory Card Formatting 188 Installing 16 Removing 17 Menu Navigation In-Call Options 50 Return to Previous Menu 29 Message Folder Erase Messages 103 Message Folders Drafts - Samsung SCH-R640 | User Manual (user Manual) (ver.f3) (English) - Page 254
Mode Call Answer 32 Camera 37 Input 32 Lock 32 Silent 35 Standby 33 Talk 33 Vibrate 35 Msg Setting Sub Menu 104 Multimedia 126 N Notes and tips 6 Notes, description 6 Number Type Icons 62, - Samsung SCH-R640 | User Manual (user Manual) (ver.f3) (English) - Page 255
World Time 155 Phone View, Side 19 Phone Memory Freeing 184, 187 , Usage Info 184 185 Phone Settings 172 Airplane Mode 172 Language 173 Security Settings 174 System Picture Messages 94 Receive Text Messages 87 Received calls log 53 Reducing Exposure Hands-Free Kits and Other Accessories 195 250 - Samsung SCH-R640 | User Manual (user Manual) (ver.f3) (English) - Page 256
to Your Mobile device 227 Return to Previous Menu 29 Review Calls 57 S Samsung Mobile Products and Recycling 207 Save a Number After a Call 74 Save pictures 112 Screen Layouts 110 Security Settings 174 Lock Phone 176 Resetting Your Phone 177 Restriction 175 Set Time 178 Settings Airplane Mode 172 - Samsung SCH-R640 | User Manual (user Manual) (ver.f3) (English) - Page 257
Language 173 Location 161 Lock Phone 176 Memory Manager 183 Phone Info 189 Phone Settings 172 Resetting Your Phone 177 Restriction 175 Ringer Type 165 Security 174 Security Settings 174 Sounds 164 System Select 177 TTY Mode 181 Voice Privacy 182 Volume/Vibrate 164 - Samsung SCH-R640 | User Manual (user Manual) (ver.f3) (English) - Page 258
Calling 39 Time, Set 178 Timer, Calls 57 Tip, description 6 Tools 146 Tools Menu 146 TTY Mode 181 U UL Certified Travel Charger 209 Understanding Your Contacts Deleting a Contacts entry 84 Editing an existing Contacts entry 69 Finding a Contacts entry 65 253 - Samsung SCH-R640 | User Manual (user Manual) (ver.f3) (English) - Page 259
Understanding Your Phone Display Screen 24 Features of Your Phone 18 Open View of Your Phone 21 V Vibrate Mode 35 Voice Service Key Setting 144 Launching 138 Voice SVC 138 Voicemail Listening To 15 VoiceSignal About VoiceSignal 145 W Wait 70 Warranty Information 229 254
-
 1
1 -
 2
2 -
 3
3 -
 4
4 -
 5
5 -
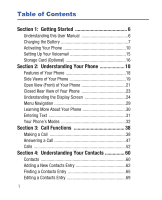 6
6 -
 7
7 -
8
-
9
-
10
-
11
-
12
-
13
-
14
-
15
-
16
-
17
-
18
-
19
-
20
-
21
-
22
-
23
-
24
-
25
-
26
-
27
-
28
-
29
-
30
-
31
-
32
-
33
-
34
-
35
-
36
-
37
-
38
-
39
-
40
-
41
-
42
-
43
-
44
-
45
-
46
-
47
-
48
-
49
-
50
-
51
-
52
-
53
-
54
-
55
-
56
-
57
-
58
-
59
-
60
-
61
-
62
-
63
-
64
-
65
-
66
-
67
-
68
-
69
-
70
-
71
-
72
-
73
-
74
-
75
-
76
-
77
-
78
-
79
-
80
-
81
-
82
-
83
-
84
-
85
-
86
-
87
-
88
-
89
-
90
-
91
-
92
-
93
-
94
-
95
-
96
-
97
-
98
-
99
-
100
-
101
-
102
-
103
-
104
-
105
-
106
-
107
-
108
-
109
-
110
-
111
-
112
-
113
-
114
-
115
-
116
-
117
-
118
-
119
-
120
-
121
-
122
-
123
-
124
-
125
-
126
-
127
-
128
-
129
-
130
-
131
-
132
-
133
-
134
-
135
-
136
-
137
-
138
-
139
-
140
-
141
-
142
-
143
-
144
-
145
-
146
-
147
-
148
-
149
-
150
-
151
-
152
-
153
-
154
-
155
-
156
-
157
-
158
-
159
-
160
-
161
-
162
-
163
-
164
-
165
-
166
-
167
-
168
-
169
-
170
-
171
-
172
-
173
-
174
-
175
-
176
-
177
-
178
-
179
-
180
-
181
-
182
-
183
-
184
-
185
-
186
-
187
-
188
-
189
-
190
-
191
-
192
-
193
-
194
-
195
-
196
-
197
-
198
-
199
-
200
-
201
-
202
-
203
-
204
-
205
-
206
-
207
-
208
-
209
-
210
-
211
-
212
-
213
-
214
-
215
-
216
-
217
-
218
-
219
-
220
-
221
-
222
-
223
-
224
-
225
-
226
-
227
-
228
-
229
-
230
-
231
-
232
-
233
-
234
-
235
-
236
-
237
-
238
-
239
-
240
-
241
-
242
-
243
-
244
-
245
-
246
-
247
-
248
-
249
-
250
-
251
-
252
-
253
-
254
-
255
-
256
-
257
-
258
-
259
 |
 |

Samsung Character
P
ORTA
B
L
E
D
UA
L-
BA
N
D
M
O
B
I
L
E
P
H
O
N
E
User Manual
Please read this manual before operating your
phone, and keep it for future reference.