Dell PowerEdge T610 Hardware Owner's Manual - Page 153
Installing an Expansion Card., iDRAC6 Enterprise Card.
 |
View all Dell PowerEdge T610 manuals
Add to My Manuals
Save this manual to your list of manuals |
Page 153 highlights
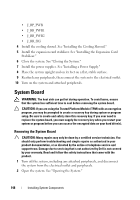
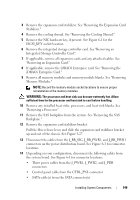
9 If applicable, install the iDRAC6 Enterprise card. See "Installing the iDRAC6 Enterprise Card." 10 Install the expansion-card stabilizer bracket: Fit the slots on the bracket over the metal guides in the chassis, and slide the bracket downwards until the release latch locks into place. See Figure 3-27. 11 Install the integrated storage controller card. See "Installing an Integrated Storage Controller Card." 12 If applicable, install the expansion cards and any attached cables. See "Installing an Expansion Card." 13 Install the NIC hardware key, if previously present. See Figure 6-1 for the ISCSI_KEY socket location. 14 Install the cooling shroud. See "Installing the Cooling Shroud." 15 Install the expansion card stabilizer. See "Installing the Expansion Card Stabilizer." 16 Close the system. See "Closing the System." 17 Place the system upright and on its feet on a flat, stable surface. 18 Reattach any peripherals, then connect the system to the electrical outlet. 19 Turn on the system and attached peripherals. Installing System Components 153
-
 1
1 -
2
-
3
-
4
-
5
-
6
-
7
-
8
-
9
-
10
-
11
-
12
-
13
-
14
-
15
-
16
-
17
-
18
-
19
-
20
-
21
-
22
-
23
-
24
-
25
-
26
-
27
-
28
-
29
-
30
-
31
-
32
-
33
-
34
-
35
-
36
-
37
-
38
-
39
-
40
-
41
-
42
-
43
-
44
-
45
-
46
-
47
-
48
-
49
-
50
-
51
-
52
-
53
-
54
-
55
-
56
-
57
-
58
-
59
-
60
-
61
-
62
-
63
-
64
-
65
-
66
-
67
-
68
-
69
-
70
-
71
-
72
-
73
-
74
-
75
-
76
-
77
-
78
-
79
-
80
-
81
-
82
-
83
-
84
-
85
-
86
-
87
-
88
-
89
-
90
-
91
-
92
-
93
-
94
-
95
-
96
-
97
-
98
-
99
-
100
-
101
-
102
-
103
-
104
-
105
-
106
-
107
-
108
-
109
-
110
-
111
-
112
-
113
-
114
-
115
-
116
-
117
-
118
-
119
-
120
-
121
-
122
-
123
-
124
-
125
-
126
-
127
-
128
-
129
-
130
-
131
-
132
-
133
-
134
-
135
-
136
-
137
-
138
-
139
-
140
-
141
-
142
-
143
-
144
-
145
-
146
-
147
-
 148
148 -
 149
149 -
 150
150 -
 151
151 -
 152
152 -
 153
153 -
 154
154 -
 155
155 -
 156
156 -
 157
157 -
 158
158 -
159
-
160
-
161
-
162
-
163
-
164
-
165
-
166
-
167
-
168
-
169
-
170
-
171
-
172
-
173
-
174
-
175
-
176
-
177
-
178
-
179
-
180
-
181
-
182
-
183
-
184
-
185
-
186
-
187
-
188
-
189
-
190
-
191
-
192
-
193
-
194
-
195
-
196
-
197
-
198
-
199
-
200
-
201
-
202
-
203
-
204
-
205
-
206
 |
 |