Dell PowerEdge T610 Hardware Owner's Manual - Page 88
Power Supplies, Removing a Power Supply - rack chassis
 |
View all Dell PowerEdge T610 manuals
Add to My Manuals
Save this manual to your list of manuals |
Page 88 highlights
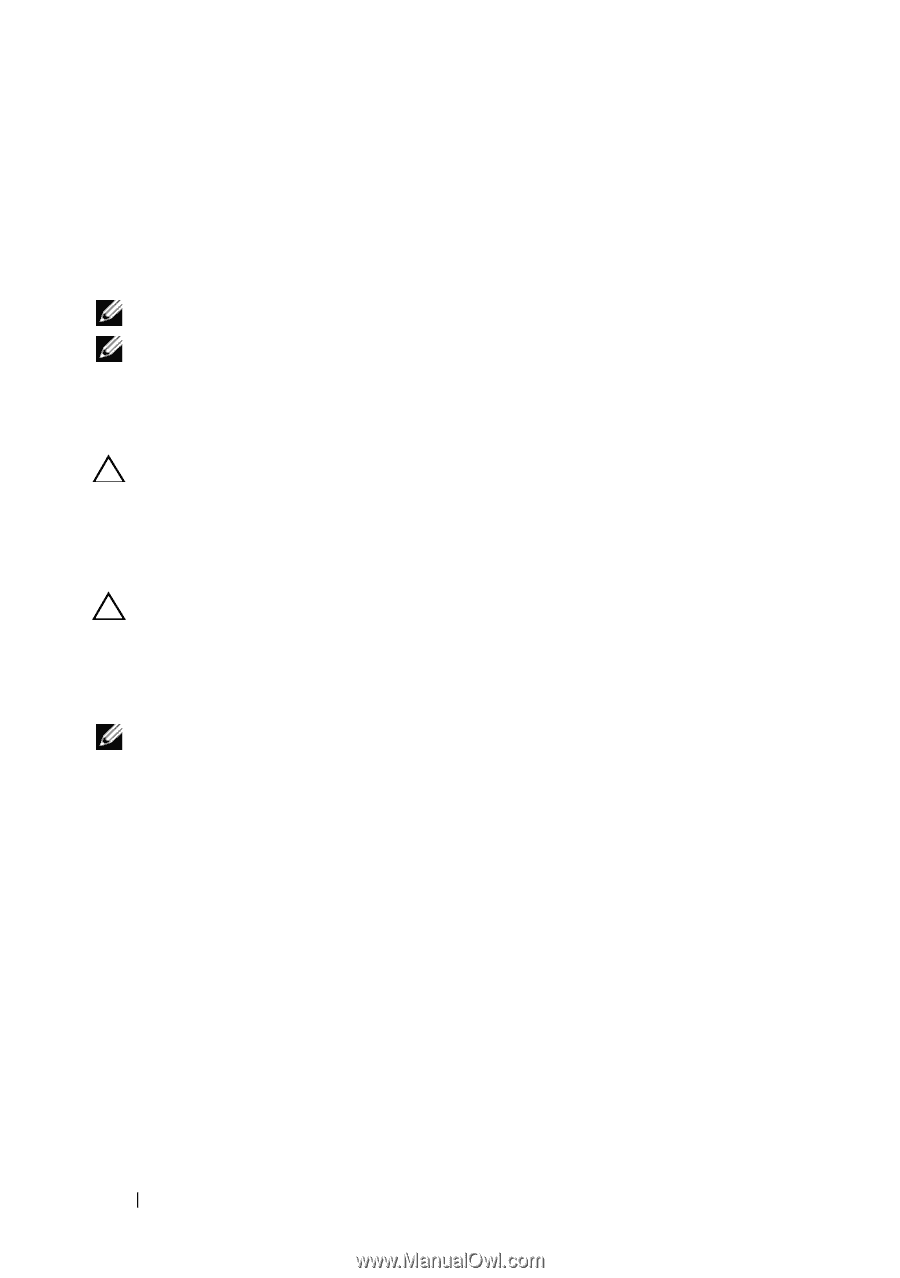
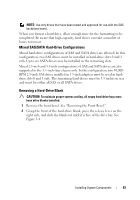
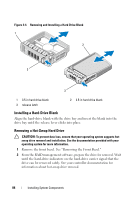
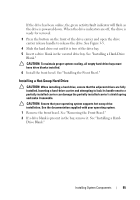
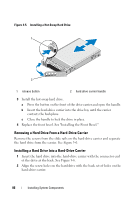
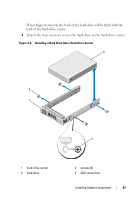
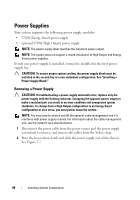
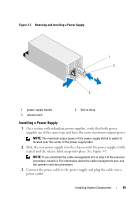
Power Supplies Your system supports the following power supply modules: • 570-W Energy Smart power supply • optional 870-W High Output power supply NOTE: The power supply label specifies the maximum power output. NOTE: The system does not support a mixed installation of High Output and Energy Smart power supplies. If only one power supply is installed, it must be installed in the first power supply bay. CAUTION: To ensure proper system cooling, the power supply blank must be installed in the second bay in a non-redundant configuration. See "Installing a Power Supply Blank." Removing a Power Supply CAUTION: If troubleshooting a power supply mismatch error, replace only the power supply with the flashing indicator. Swapping the opposite power supply to make a matched pair can result in an error condition and unexpected system shutdown. To change from a High Output configuration to an Energy Smart configuration or vice versa, you must power down the system. NOTE: You may have to unlatch and lift the optional cable management arm if it interferes with power supply removal. For information about the cable management arm, see the system's rack documentation. 1 Disconnect the power cable from the power source and the power supply you intend to remove, and remove the cables from the Velcro strap. 2 Press the lever release latch and slide the power supply out of the chassis. See Figure 3-7. 88 Installing System Components
-
 1
1 -
2
-
3
-
4
-
5
-
6
-
7
-
8
-
9
-
10
-
11
-
12
-
13
-
14
-
15
-
16
-
17
-
18
-
19
-
20
-
21
-
22
-
23
-
24
-
25
-
26
-
27
-
28
-
29
-
30
-
31
-
32
-
33
-
34
-
35
-
36
-
37
-
38
-
39
-
40
-
41
-
42
-
43
-
44
-
45
-
46
-
47
-
48
-
49
-
50
-
51
-
52
-
53
-
54
-
55
-
56
-
57
-
58
-
59
-
60
-
61
-
62
-
63
-
64
-
65
-
66
-
67
-
68
-
69
-
70
-
71
-
72
-
73
-
74
-
75
-
76
-
77
-
78
-
79
-
80
-
81
-
82
-
 83
83 -
 84
84 -
 85
85 -
 86
86 -
 87
87 -
 88
88 -
 89
89 -
 90
90 -
 91
91 -
 92
92 -
 93
93 -
94
-
95
-
96
-
97
-
98
-
99
-
100
-
101
-
102
-
103
-
104
-
105
-
106
-
107
-
108
-
109
-
110
-
111
-
112
-
113
-
114
-
115
-
116
-
117
-
118
-
119
-
120
-
121
-
122
-
123
-
124
-
125
-
126
-
127
-
128
-
129
-
130
-
131
-
132
-
133
-
134
-
135
-
136
-
137
-
138
-
139
-
140
-
141
-
142
-
143
-
144
-
145
-
146
-
147
-
148
-
149
-
150
-
151
-
152
-
153
-
154
-
155
-
156
-
157
-
158
-
159
-
160
-
161
-
162
-
163
-
164
-
165
-
166
-
167
-
168
-
169
-
170
-
171
-
172
-
173
-
174
-
175
-
176
-
177
-
178
-
179
-
180
-
181
-
182
-
183
-
184
-
185
-
186
-
187
-
188
-
189
-
190
-
191
-
192
-
193
-
194
-
195
-
196
-
197
-
198
-
199
-
200
-
201
-
202
-
203
-
204
-
205
-
206
 |
 |