HP C8180 Windows Help - Page 105
Preserve your photos on a CD or DVD, Save to Computer, Save to USB drive, Save to CD/DVD - photosmart will not copy
 |
UPC - 883585123384
View all HP C8180 manuals
Add to My Manuals
Save this manual to your list of manuals |
Page 105 highlights
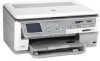
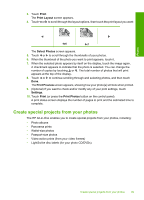
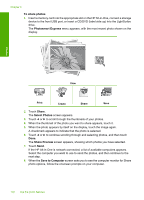
Photos Chapter 8 3. Touch Save to Computer. TIP: You can also transfer images from a memory card to a connected USB storage device by choosing the Save to USB drive option, or you can burn your photos onto a CD/DVD loaded label side up in the CD/DVD drive by choosing Save to CD/DVD. If the HP All-in-One is network-connected, a list of available computers appears. Select the computer to which you want to transfer the photos, and then continue to the next step. 4. When the Save to Computer screen asks you to see the computer monitor for Import photo options, follow the onscreen prompts on your computer to save the photos to your computer. Only images that were not previously saved are copied to your computer. Preserve your photos on a CD or DVD The HP All-in-One lets you save your photos from a memory card or storage device to a CD or DVD. This feature allows you to archive your photos (freeing up space on your memory card, storage device, or computer hard drive) and share them on your friends' and family's computers or DVD players. You can also create and print a text label on a LightScribe disc to identify the contents of your CD or DVD. LightScribe media is not required for saving photos to a CD/DVD, but is required for creating and printing text labels. Therefore, if you plan to create text labels for your CD/DVD, you should always use LightScribe media for both saving and labeling. TIP: You can also install the Roxio Creator Basic software that came with your HP All-in-One. This software lets you create and print text, photos, and pre-set designs on a LightScribe disc to identify the contents of your CD or DVD. In addition, you can use your HP Photosmart software to print labels on CD/DVD tattoo paper for non-LightScribe discs to identify the contents of your CD or DVD. 104 Use the photo features
-
 1
1 -
2
-
3
-
4
-
5
-
6
-
7
-
8
-
9
-
10
-
11
-
12
-
13
-
14
-
15
-
16
-
17
-
18
-
19
-
20
-
21
-
22
-
23
-
24
-
25
-
26
-
27
-
28
-
29
-
30
-
31
-
32
-
33
-
34
-
35
-
36
-
37
-
38
-
39
-
40
-
41
-
42
-
43
-
44
-
45
-
46
-
47
-
48
-
49
-
50
-
51
-
52
-
53
-
54
-
55
-
56
-
57
-
58
-
59
-
60
-
61
-
62
-
63
-
64
-
65
-
66
-
67
-
68
-
69
-
70
-
71
-
72
-
73
-
74
-
75
-
76
-
77
-
78
-
79
-
80
-
81
-
82
-
83
-
84
-
85
-
86
-
87
-
88
-
89
-
90
-
91
-
92
-
93
-
94
-
95
-
96
-
97
-
98
-
99
-
 100
100 -
 101
101 -
 102
102 -
 103
103 -
 104
104 -
 105
105 -
 106
106 -
 107
107 -
 108
108 -
 109
109 -
 110
110 -
111
-
112
-
113
-
114
-
115
-
116
-
117
-
118
-
119
-
120
-
121
-
122
-
123
-
124
-
125
-
126
-
127
-
128
-
129
-
130
-
131
-
132
-
133
-
134
-
135
-
136
-
137
-
138
-
139
-
140
-
141
-
142
-
143
-
144
-
145
-
146
-
147
-
148
-
149
-
150
-
151
-
152
-
153
-
154
-
155
-
156
-
157
-
158
-
159
-
160
-
161
-
162
-
163
-
164
-
165
-
166
-
167
-
168
-
169
-
170
-
171
-
172
-
173
-
174
-
175
-
176
-
177
-
178
-
179
-
180
-
181
-
182
-
183
-
184
-
185
-
186
-
187
-
188
-
189
-
190
-
191
-
192
-
193
-
194
-
195
-
196
-
197
-
198
-
199
-
200
-
201
-
202
-
203
-
204
-
205
-
206
-
207
-
208
-
209
-
210
-
211
-
212
-
213
-
214
-
215
-
216
-
217
-
218
-
219
-
220
-
221
-
222
-
223
-
224
-
225
-
226
-
227
-
228
-
229
-
230
-
231
-
232
-
233
-
234
-
235
 |
 |