HP C8180 Windows Help - Page 106
Save to CD/DVD, LightScribe CD/DVD
 |
UPC - 883585123384
View all HP C8180 manuals
Add to My Manuals
Save this manual to your list of manuals |
Page 106 highlights
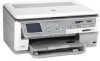
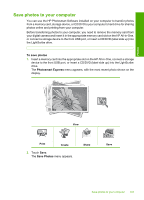
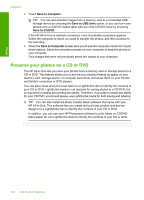
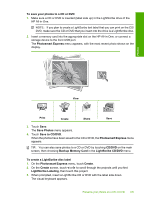
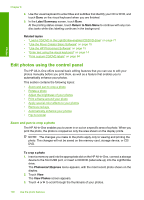
To save your photos to a CD or DVD 1. Make sure a CD or DVD is inserted (label side up) in the LightScribe drive of the HP All-in-One. NOTE: If you plan to create a LightScribe text label that you can print on the CD/ DVD, make sure the CD or DVD that you insert into the drive is a LightScribe disc. 2. Insert a memory card into the appropriate slot on the HP All-in-One, or connect a storage device to the front USB port. The Photosmart Express menu appears, with the most recent photo shown on the display. Photos View Print Create Share Save 3. Touch Save. The Save Photos menu appears. 4. Touch Save to CD/DVD. When the photos have been saved to the CD or DVD, the Photosmart Express menu appears. TIP: You can also save photos to a CD or DVD by touching CD/DVD on the main screen, then choosing Backup Memory Card in the LightScribe CD/DVD menu. To create a LightScribe disc label 1. On the Photosmart Express menu, touch Create. 2. On the Create screen, touch or to scroll through the projects until you find LightScribe Labeling, then touch this project. 3. When prompted, insert a LightScribe CD or DVD with the label side down. The visual keyboard appears. Preserve your photos on a CD or DVD 105
-
 1
1 -
2
-
3
-
4
-
5
-
6
-
7
-
8
-
9
-
10
-
11
-
12
-
13
-
14
-
15
-
16
-
17
-
18
-
19
-
20
-
21
-
22
-
23
-
24
-
25
-
26
-
27
-
28
-
29
-
30
-
31
-
32
-
33
-
34
-
35
-
36
-
37
-
38
-
39
-
40
-
41
-
42
-
43
-
44
-
45
-
46
-
47
-
48
-
49
-
50
-
51
-
52
-
53
-
54
-
55
-
56
-
57
-
58
-
59
-
60
-
61
-
62
-
63
-
64
-
65
-
66
-
67
-
68
-
69
-
70
-
71
-
72
-
73
-
74
-
75
-
76
-
77
-
78
-
79
-
80
-
81
-
82
-
83
-
84
-
85
-
86
-
87
-
88
-
89
-
90
-
91
-
92
-
93
-
94
-
95
-
96
-
97
-
98
-
99
-
100
-
 101
101 -
 102
102 -
 103
103 -
 104
104 -
 105
105 -
 106
106 -
 107
107 -
 108
108 -
 109
109 -
 110
110 -
 111
111 -
112
-
113
-
114
-
115
-
116
-
117
-
118
-
119
-
120
-
121
-
122
-
123
-
124
-
125
-
126
-
127
-
128
-
129
-
130
-
131
-
132
-
133
-
134
-
135
-
136
-
137
-
138
-
139
-
140
-
141
-
142
-
143
-
144
-
145
-
146
-
147
-
148
-
149
-
150
-
151
-
152
-
153
-
154
-
155
-
156
-
157
-
158
-
159
-
160
-
161
-
162
-
163
-
164
-
165
-
166
-
167
-
168
-
169
-
170
-
171
-
172
-
173
-
174
-
175
-
176
-
177
-
178
-
179
-
180
-
181
-
182
-
183
-
184
-
185
-
186
-
187
-
188
-
189
-
190
-
191
-
192
-
193
-
194
-
195
-
196
-
197
-
198
-
199
-
200
-
201
-
202
-
203
-
204
-
205
-
206
-
207
-
208
-
209
-
210
-
211
-
212
-
213
-
214
-
215
-
216
-
217
-
218
-
219
-
220
-
221
-
222
-
223
-
224
-
225
-
226
-
227
-
228
-
229
-
230
-
231
-
232
-
233
-
234
-
235
 |
 |