HP C8180 Windows Help - Page 113
Flip horizontal - photosmart how to scan to computer
 |
UPC - 883585123384
View all HP C8180 manuals
Add to My Manuals
Save this manual to your list of manuals |
Page 113 highlights
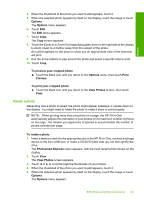
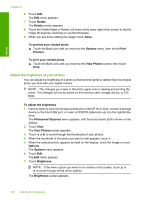
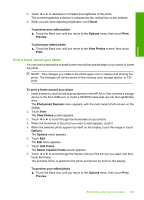
Photos Chapter 8 You can turn off the automatic photo enhancement feature for individual photos, on a perimage basis. To turn off automatic photo enhancement 1. Insert a memory card into the appropriate slot on the HP All-in-One, connect a storage device to the front USB port, or insert a CD/DVD (label side up) into the LightScribe drive. The Photosmart Express menu appears, with the most recent photo shown on the display. 2. Touch View. The View Photos screen appears. 3. Touch or to scroll through the thumbnails of your photos. 4. When the thumbnail of the photo you want to edit appears, touch it. 5. When the selected photo appears by itself on the display, touch the image or touch Options. The Options menu appears. 6. Touch Edit. The Edit menu appears. 7. Touch Photo Fix. The Photo Fix menu appears. 8. To turn off automatic photo enhancement, touch Off. Flip horizontal When you are scanning film, an additional option, Flip Horizontal, appears in the Edit menu. This option enables you to correct instances where the emulsion side of the film is placed in the incorrect orientation. Touching this option flips the image, which is then shown by itself on the display. To flip the scanned film image horizontally 1. While previewing your scanned film image, touch the image or touch Options. The Options menu appears. 2. Touch Edit. The Edit menu appears. 3. Touch Flip Horizontal. The image is flipped horizontally and appears by itself on the display. Related topics • "Scan slides or negative film" on page 116 • "Edit a scanned preview image" on page 118 112 Use the photo features
-
 1
1 -
2
-
3
-
4
-
5
-
6
-
7
-
8
-
9
-
10
-
11
-
12
-
13
-
14
-
15
-
16
-
17
-
18
-
19
-
20
-
21
-
22
-
23
-
24
-
25
-
26
-
27
-
28
-
29
-
30
-
31
-
32
-
33
-
34
-
35
-
36
-
37
-
38
-
39
-
40
-
41
-
42
-
43
-
44
-
45
-
46
-
47
-
48
-
49
-
50
-
51
-
52
-
53
-
54
-
55
-
56
-
57
-
58
-
59
-
60
-
61
-
62
-
63
-
64
-
65
-
66
-
67
-
68
-
69
-
70
-
71
-
72
-
73
-
74
-
75
-
76
-
77
-
78
-
79
-
80
-
81
-
82
-
83
-
84
-
85
-
86
-
87
-
88
-
89
-
90
-
91
-
92
-
93
-
94
-
95
-
96
-
97
-
98
-
99
-
100
-
101
-
102
-
103
-
104
-
105
-
106
-
107
-
 108
108 -
 109
109 -
 110
110 -
 111
111 -
 112
112 -
 113
113 -
 114
114 -
 115
115 -
 116
116 -
 117
117 -
 118
118 -
119
-
120
-
121
-
122
-
123
-
124
-
125
-
126
-
127
-
128
-
129
-
130
-
131
-
132
-
133
-
134
-
135
-
136
-
137
-
138
-
139
-
140
-
141
-
142
-
143
-
144
-
145
-
146
-
147
-
148
-
149
-
150
-
151
-
152
-
153
-
154
-
155
-
156
-
157
-
158
-
159
-
160
-
161
-
162
-
163
-
164
-
165
-
166
-
167
-
168
-
169
-
170
-
171
-
172
-
173
-
174
-
175
-
176
-
177
-
178
-
179
-
180
-
181
-
182
-
183
-
184
-
185
-
186
-
187
-
188
-
189
-
190
-
191
-
192
-
193
-
194
-
195
-
196
-
197
-
198
-
199
-
200
-
201
-
202
-
203
-
204
-
205
-
206
-
207
-
208
-
209
-
210
-
211
-
212
-
213
-
214
-
215
-
216
-
217
-
218
-
219
-
220
-
221
-
222
-
223
-
224
-
225
-
226
-
227
-
228
-
229
-
230
-
231
-
232
-
233
-
234
-
235
 |
 |